Few culinary experiences are as satisfying as creating a perfectly thin, golden crepe. Yet, for many home cooks and even seasoned chefs, the moment of truth – the flip – can quickly turn a promising disc of batter into a frustrating, torn mess. As a technician with over a decade of experience deep-diving into the world of crepe makers, from simple home models to high-capacity commercial units, I’ve seen every possible pitfall. I understand the nuances, from material choices to advanced heating technologies, that contribute to a flawless crepe. This article will draw on that knowledge to guide you through the common mistakes that lead to torn crepes and equip you with the insights and techniques to achieve perfectly flipped, intact crepes every single time.
The Delicate Art of Crepe Making: Understanding Why They Tear
Crepes are inherently delicate. Unlike their fluffy pancake cousins, crepes forgo leavening agents like baking powder or soda, resulting in their signature wafer-thin structure. This very thinness, while desirable for its melt-in-your-mouth texture, makes them incredibly fragile and susceptible to tearing. Their structural integrity relies heavily on a perfect balance of ingredients, proper cooking conditions, and a confident, well-timed technique. When one of these elements is off, the crepe’s tender network of gluten and cooked batter can easily break under pressure, particularly during the crucial flipping stage. Mastering crepes isn’t about brute force; it’s about understanding and respecting their delicate nature.
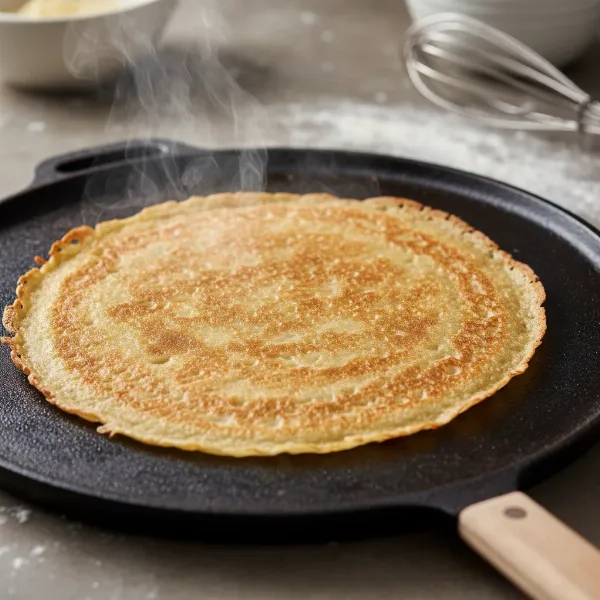 a thin, golden crepe cooking on a hot pan, showing its delicate, translucent texture
Common Mistakes That Tear Your Crepes While Flipping (And How to Fix Them)
Let’s break down the primary culprits behind torn crepes and, more importantly, how you can sidestep these common errors.
Mistake 1: Improper Batter Consistency and Preparation
|
Our Picks for the Best Crepe maker in 2026
As an Amazon Associate I earn from qualifying purchases.
|
||
| Num | Product | Action |
|---|---|---|
| 1 | Electric Crepe Maker 12'' & Griddle - Non-Stick Pan With Spreader for Roti, Tortilla, Blintzes, Pancakes - Adjustable Temperature, 1000W |

|
| 2 | Moss & Stone Electric Crepe Maker 8 Inch, Portable Crepe Maker & Hot Plate Cooktop On/Off Switch, Nonstick Coating, Automatic Temperature Control, Easy To Use For Pancakes, Blintz, Chapati |
|
| 3 | Nutrichef Electric Crepe Maker - 8-inch Nonstick Cooktop with On/Off Switch - Cooks Roti, Tortillas & Pancakes - Automatic Temperature Control & Cool Touch Handle - Includes Food Bowl, Whisk & Spatula |
|
| 4 | Nutrichef Electric Crepe Maker & Griddle Cooktop - Nonstick 12 Inch Aluminum Hot Plate with LED Indicator Lights & Adjustable Temperature Control - Wooden Spatula & Batter Spreader Included |
|
| 5 | Gourmia 8” Electric Crepe Maker – Nonstick Ceramic Surface, One-Touch Operation, Includes Batter Tray, Compact & Easy to Clean, Crepe, Pancake & Tortilla Maker |
|
| 6 | 16 Inch Commercial Crepe Maker, Dual-Head, Dual Zone Temp Setting, Nonstick Pancake Griddle Machine, 50-300°C(120-570℉), 3400W, S.S. Shell, for Catering, Restaurant, Snack Stand, CE Certified |
|
| 7 | Moss & Stone 12” Electric Griddle Pan & Crepe Machine, Non-Stick Electric Crepe Maker with Adjustable Temperature, Includes Spreader & Spatula – Ideal for Pancakes, Blintzes & Tortillas |
|
| 8 | Gourmia 12” Crepe Maker – Nonstick Electric Griddle for Pancakes, Omelets & More, Precise Temp Control with Indicator Lights, Includes Spatula & Batter Spreader, Quick Cleanup, Stainless Steel Trim |
|
| 9 | Baker's Friend Instant Crepe Maker with Handle, Electric Crepe Maker Machine, Crepera Electrica, 8 Inch Non-stick Cooking Surface, Aqua |
|
| 10 | Moss & Stone Electric Crepe Maker – 8” Portable Crepe Pan Nonstick with Dipping Plate, Auto Shut-Off, On/Off Switch, Even Heating & One Automatic Temperature Control – Compact Crepe Maker |
|
The foundation of any great crepe is its batter. Issues with consistency and preparation are often the silent saboteurs of a successful flip.
Batter is Too Thin or Too Thick
If your batter is too thin, it lacks the structural integrity to hold together when cooked and flipped. It becomes excessively fragile, akin to wet tissue paper. Conversely, if it’s too thick, it won’t spread evenly, resulting in a crepe that’s more like a pancake, or one with uneven thickness that cooks poorly and can tear in its thinner spots.
The Fix:
- Adjusting Consistency: The ideal crepe batter should have the consistency of heavy cream – thin enough to spread easily, but thick enough to coat the back of a spoon. If it’s too thin, whisk in a tablespoon or two of flour at a time until the desired consistency is reached. If it’s too thick after resting, gradually add a splash of milk or water.
- Gradual Liquid Addition: When mixing, don’t dump all your wet ingredients into the dry at once. Start by mixing the dry ingredients, then gradually add the wet components, creating a thick paste first before slowly thinning it out. This helps prevent lumps and ensures a smooth, uniform batter.
Not Resting Your Batter Enough
Many aspiring crepe makers mix their batter and immediately head to the pan. This is a significant oversight. When you mix batter, the flour develops gluten, which can make the mixture tough and elastic. It also traps air bubbles. These factors combined can make your crepes rigid and prone to tearing.
The Fix:
- The Power of Resting: Allow your crepe batter to rest in the refrigerator for at least 30 minutes to an hour, or ideally, overnight. This resting period is critical for several reasons:
- Gluten Relaxation: It allows the gluten strands to relax, resulting in a more pliable, less elastic, and ultimately more flexible crepe that’s less likely to tear.
- Hydration: The flour fully hydrates, absorbing all the liquid and reducing lumpiness.
- Bubble Dissipation: Trapped air bubbles, which can make crepes fragile, have time to dissipate, leading to a smoother, stronger crepe.
- Re-whisk Gently: After resting, give the batter a gentle whisk to re-incorporate any settled flour, but avoid over-whisking.
Lumps or Over-whisking
Lumpy batter leads to uneven crepes with weak points that are destined to tear. Over-whisking can introduce too much air, making the batter excessively fragile.
The Fix:
- Smooth it Out: For a truly lump-free batter, consider using a blender. It’s quick, efficient, and ensures a silky-smooth consistency. If you’re mixing by hand, whisk thoroughly, then pass the batter through a fine-mesh sieve to catch any stubborn lumps before resting.
- Gentle Mixing: Once the ingredients are just combined, stop whisking. Excessive agitation only works against the goal of relaxed gluten and minimal air.
Mistake 2: The Wrong Pan and Inconsistent Heat
Even the best batter can be ruined by an unsuitable cooking surface or fluctuating temperatures.
Sticking Pan or Poor Seasoning
A crepe sticking to the pan is almost guaranteed to tear during flipping. This often happens due to a pan that isn’t truly non-stick, is poorly seasoned, or doesn’t have enough fat.
The Fix:
- Choose the Right Pan: Invest in a dedicated crepe pan or a good quality non-stick skillet with shallow, sloped sides. These are designed for easy release and effortless flipping. Avoid pans with straight, high sides, which hinder spatula access and pan-flipping techniques. Ensure the pan surface is perfectly flat.
- Proper Greasing: Even with a non-stick pan, a tiny amount of fat is often necessary. Use a light coating of butter or oil, applied with a paper towel, wiping off any excess. Too much oil can lead to uneven cooking and brittle crepes. For cast iron, ensure it’s well-seasoned.
- Preheat Adequately: A cold or insufficiently hot pan will cause the batter to stick instantly.
Incorrect Temperature Settings
Both too low and too high heat can lead to torn crepes. If the heat is too low, the crepe won’t set quickly enough, becoming gummy and difficult to lift. If it’s too high, the crepe cooks too rapidly, becoming brittle, potentially burning, and preventing the proper development of flexibility needed for a clean flip. Inconsistent heat can also lead to uneven cooking, creating weak spots.
The Fix:
- Master the Heat: Medium heat is often the sweet spot. A good test for readiness is to drop a tiny amount of water onto the hot pan – it should sizzle gently and evaporate quickly, not violently spit or sit there without reaction.
- Consistent Heat Management: stovetops can accumulate heat. Monitor your pan’s temperature, especially after the first few crepes. You may need to slightly lower the heat between crepes or keep an eye on your crepe maker’s thermostat to ensure it maintains an optimal, consistent temperature, typically around 200-220°C (390-430°F).
Mistake 3: Poor Timing and Flipping Technique
This is where the magic (or the mayhem) happens. The actual act of flipping is often where crepes meet their demise.
Flipping Too Early
This is perhaps the most common mistake. If the crepe hasn’t cooked long enough, it hasn’t developed sufficient structure to support itself, and attempting to flip it will inevitably lead to tearing.
The Fix:
- Watch for Visual Cues: Patience is key. Wait for clear indicators that your crepe is ready to flip:
- Dry Surface: The top surface of the crepe should appear mostly dry.
- Golden Edges: The edges should turn a light golden-brown and start to pull away or lift slightly from the pan.
- No New Bubbles: The formation of new bubbles on the surface should have ceased.
- Minimum Cook Time: Generally, allow the first side to cook for at least 1 to 2 minutes before even considering a flip. The precise time will vary based on your pan, heat, and batter thickness.
Using the Wrong Spatula
A thick, stiff, or narrow metal spatula is a crepe’s worst enemy. It can easily dig into the delicate crepe, scratch your non-stick pan, and make smooth lifting impossible.
The Fix:
- Opt for Flexibility and Width: A wide, thin, flexible rubber or silicone spatula is ideal. Its broad surface provides better support for the crepe, and its flexibility allows it to glide easily underneath without tearing. Avoid sharp edges.
- Dedicated Tools: Many professional crepe makers use specific, long, thin, flexible spatulas designed for this task. These tools are often made of stainless steel but are ground very thin and have a slight curve.
Aggressive or Hesitant Flipping
A tentative, slow, or forceful flipping motion can cause the crepe to fold, crumple, or tear. Hesitation can allow the crepe to cool and become less pliable, while aggression can rip it.
The Fix:
- Confidence is Key: Once you’ve loosened the edges and determined the crepe is ready, commit to the flip.
- Gentle Lift and Smooth Turn:
- Gently slide your thin spatula completely under the crepe, ensuring you have enough support.
- Lift the crepe slightly off the pan.
- With a smooth, confident motion, turn your wrist to flip the crepe over. Aim for a single, fluid movement.
- The Pan-Flip Technique: For the more adventurous, mastering the “wrist flick” pan-flip can result in the most graceful, tear-free flips. This involves a quick, upward, and outward flick of the pan to send the crepe airborne and rotate it before it lands back in the pan. This requires practice, often with a “sacrificial” crepe.
 a skilled chef performing a perfect pan-flip of a thin golden crepe
Not Loosening Edges Before Flipping
Trying to force a stuck crepe from the pan will invariably lead to tears.
The Fix:
- Pre-Flip Release: Before attempting to slide your spatula fully underneath, gently run the edge of your spatula around the circumference of the crepe, ensuring it’s completely detached from the pan’s edges. You should be able to gently shake the pan and see the crepe move freely. If it doesn’t move, it’s still sticking or not fully cooked.
Pro Tips for Flawless Crepe Flipping
Beyond avoiding common mistakes, a few seasoned tricks can elevate your crepe-making game.
The “Sacrificial Crepe”
Every true crepe maker knows about the “first crepe.” It’s a rite of passage. The first crepe is rarely perfect because the pan hasn’t reached its optimal, consistent temperature, or you’re still calibrating your batter and technique. Don’t stress over it. Use this crepe as a test. Adjust your heat, add a bit more oil if needed, or tweak your batter. The first one is for practice, and the rest will thank it.
Dedicated Crepe Tools
While a good non-stick skillet and silicone spatula work wonders, investing in dedicated crepe tools can make a significant difference. A T-shaped crepe spreader helps achieve consistent thinness, and a specialized crepe spatula (often longer and thinner than a regular spatula) is designed for easy, damage-free flipping.
Practice and Patience
Ultimately, making perfect crepes, especially flipping them flawlessly, comes down to practice. Each pan, stovetop, and even batch of batter can behave slightly differently. Pay attention, learn from each crepe, and don’t get discouraged by a few tears. With every crepe you make, your technique will improve, and you’ll develop the intuition needed for flawless results. It’s a journey, not a race.
Conclusion
Torn crepes can be incredibly frustrating, but they are almost always preventable. By understanding the delicate nature of crepe batter and addressing common pitfalls related to consistency, pan conditions, and flipping technique, you can transform your crepe-making experience. Remember to give your batter ample time to rest, ensure your pan is perfectly seasoned and at the right temperature, and approach each flip with a wide, flexible spatula and a confident, gentle hand. The journey to perfect crepes is one of learning and refinement, but with these insights, you’re well on your way to mastering this delightful culinary art. What’s your favorite sweet or savory filling for a perfectly flipped crepe?
Frequently Asked Questions
Why does my crepe stick to the pan even if it’s non-stick?
Even non-stick pans can cause sticking if not properly preheated or if insufficient fat is used. Ensure your pan is at the correct medium temperature, and apply a very thin layer of oil or butter between each crepe. Overheating can also degrade the non-stick coating over time.
How can I make my crepes more flexible and less prone to tearing?
The key to flexible crepes is allowing your batter to rest for at least 30 minutes to an hour (or overnight) in the refrigerator. This relaxes the gluten, making the crepes more pliable. Ensure your batter isn’t too thin and that you’re not overcooking them, which can make them brittle.
What’s the best way to know when a crepe is ready to flip?
Look for visual cues: the edges should be lightly golden brown and starting to lift from the pan, and the entire top surface of the crepe should appear dry, with no wet spots or active bubbles. Waiting for these signs ensures the crepe has set enough to handle flipping without tearing.
Can using a crepe maker instead of a pan prevent tearing?
Yes, a dedicated crepe maker often provides more consistent, even heat distribution and a perfectly flat, non-stick surface, which can significantly reduce sticking and make flipping easier compared to a standard frying pan. Their shallow edges also facilitate easier spatula access.