Troubleshooting Your Crepe Maker: When It Won’t Heat Up
Few things are as disappointing as gearing up to make a batch of delicious crepes, only to find your trusty crepe maker staying stubbornly cold. A non-heating crepe maker can bring your breakfast plans to a halt, but often, the problem isn’t as daunting as it seems. With a little troubleshooting and the right approach, you can diagnose and even repair many common issues, getting your appliance back to perfectly golden crepes. As a technician with over a decade of experience, I’ve seen countless crepe makers, from simple home models to robust professional units, and I’m here to guide you through the process.
Initial Checks: The Simple Solutions
Before you delve into complex repairs, always start with the basics. Many heating issues stem from simple oversights or minor power interruptions.
Power Supply and Connection
|
Our Picks for the Best Crepe maker in 2026
As an Amazon Associate I earn from qualifying purchases.
|
||
| Num | Product | Action |
|---|---|---|
| 1 | Gourmia 8” Electric Crepe Maker – Nonstick Ceramic Surface, One-Touch Operation, Includes Batter Tray, Compact & Easy to Clean, Crepe, Pancake & Tortilla Maker |

|
| 2 | Moss & Stone 12” Electric Griddle Pan & Crepe Machine, Non-Stick Electric Crepe Maker with Adjustable Temperature, Includes Spreader & Spatula – Ideal for Pancakes, Blintzes & Tortillas |
|
| 3 | Electric Crepe Maker 12'' & Griddle - Non-Stick Pan With Spreader for Roti, Tortilla, Blintzes, Pancakes - Adjustable Temperature, 1000W |
|
| 4 | Moss & Stone Electric Crepe Maker 8 Inch, Portable Crepe Maker & Hot Plate Cooktop On/Off Switch, Nonstick Coating, Automatic Temperature Control, Easy To Use For Pancakes, Blintz, Chapati |
|
| 5 | Gourmia 12” Crepe Maker – Nonstick Electric Griddle for Pancakes, Omelets & More, Precise Temp Control with Indicator Lights, Includes Spatula & Batter Spreader, Quick Cleanup, Stainless Steel Trim |
|
| 6 | Baker's Friend Instant Crepe Maker with Handle, Electric Crepe Maker Machine, Crepera Electrica, 8 Inch Non-stick Cooking Surface, Aqua |
|
| 7 | Moss & Stone Electric Crepe Maker – 8” Portable Crepe Pan Nonstick with Dipping Plate, Auto Shut-Off, On/Off Switch, Even Heating & One Automatic Temperature Control – Compact Crepe Maker |
|
| 8 | 16 Inch Commercial Crepe Maker, Dual-Head, Dual Zone Temp Setting, Nonstick Pancake Griddle Machine, 50-300°C(120-570℉), 3400W, S.S. Shell, for Catering, Restaurant, Snack Stand, CE Certified |
|
| 9 | Nutrichef Electric Crepe Maker & Griddle Cooktop - Nonstick 12 Inch Aluminum Hot Plate with LED Indicator Lights & Adjustable Temperature Control - Wooden Spatula & Batter Spreader Included |
|
| 10 | Nutrichef Electric Crepe Maker - 8-inch Nonstick Cooktop with On/Off Switch - Cooks Roti, Tortillas & Pancakes - Automatic Temperature Control & Cool Touch Handle - Includes Food Bowl, Whisk & Spatula |
|
First, ensure your crepe maker is securely plugged into a working electrical outlet. Sometimes, a loose connection is all it takes to prevent heating. Try plugging another appliance into the same outlet to confirm it’s receiving power. If that appliance also fails, you might have a tripped circuit breaker or a faulty outlet, which would require attention from an electrician. Additionally, inspect the power cord itself for any visible damage, fraying, or cuts. A compromised cord can prevent electricity from reaching the heating elements safely.
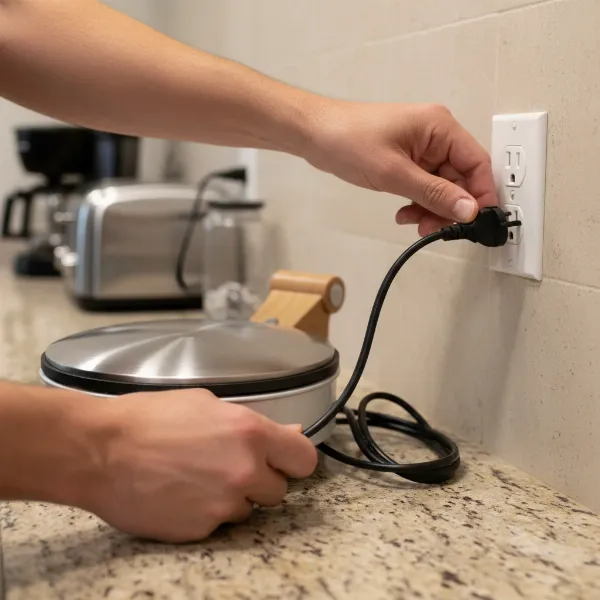 Person checking power cord and outlet for a non-heating crepe maker
Temperature Dial and Power Switch
It might sound obvious, but verify that your crepe maker’s temperature dial is set above “0” and that the power switch is in the “on” position. Many people overlook this simple step in their haste to start cooking. Some models have indicator lights that illuminate when the power is on and when the desired temperature is reached. Observe these lights to see if they behave as expected. If the power light doesn’t come on at all, it points to an electrical issue or a faulty switch.
Reset Button or Thermal Cut-Out
Many modern crepe makers, especially commercial models, are equipped with a safety thermal cut-out or a reset button. This feature automatically shuts off power if the appliance overheats, preventing damage. If your crepe maker suddenly stopped heating, particularly after prolonged use, it’s possible this safety mechanism has been triggered. Locate the reset button, usually a small button on the underside or rear of the appliance, and press it firmly. Always allow the machine to cool down completely before attempting a reset.
Safety First: Before You Start Any Repair
Working with electrical appliances requires extreme caution. Before performing any internal inspection or repair, prioritize your safety:
- Unplug the Appliance: This is the most critical step. Always disconnect your crepe maker from its power source to prevent electric shock.
- Allow it to Cool: The cooking surface and internal components can retain heat for a long time. Give your crepe maker ample time to cool down before handling any parts.
- Gather Tools: Have the necessary tools ready, such as screwdrivers (Phillips and flathead), pliers, and a multimeter for testing electrical components. Safety glasses and gloves are also recommended.
- Work in a Well-Lit Area: Ensure you have adequate lighting to clearly see all components and connections.
Never attempt a repair if you are uncomfortable or unsure about any step. When in doubt, it’s always best to consult a qualified technician.
Diving Deeper: Internal Components to Inspect
If the initial checks don’t resolve the issue, you’ll need to open up your crepe maker to inspect its internal components. Be gentle when disassembling and keep track of all screws and parts.
The Thermal Fuse
A thermal fuse is a safety device designed to blow (break the circuit) if the temperature inside the appliance exceeds a safe limit, usually due to a malfunction or overheating. Once a thermal fuse blows, it needs to be replaced; it cannot be reset. You’ll typically find it located close to the heating element. To test a thermal fuse, you’ll need a multimeter set to measure continuity. A good fuse will show continuity, while a blown fuse will show an open circuit. Replacing a thermal fuse involves carefully disconnecting the old one and crimping in a new one of the exact same specifications.
The Heating Element
The heating element is the core component responsible for generating heat. If it’s defective, your crepe maker simply won’t get hot. Visually inspect the heating element for any obvious signs of damage, such as breaks, cracks, or burnt spots. Sometimes, a heating element can appear intact but still be faulty. You can test its resistance using a multimeter set to ohms. Consult your crepe maker’s manual or look up the expected resistance for your model. A reading significantly different from the expected value, or an open circuit reading, indicates a defective heating element. Replacing a heating element can be more involved, often requiring disconnecting wires and unbolting the element from the base. Ensure the replacement element matches the voltage and wattage of the original.
The Thermostat
The thermostat regulates the temperature of your crepe maker, turning the heating element on and off to maintain a consistent heat. If the thermostat fails, it might continuously prevent the heating element from activating, or it could cause overheating. There are different types of thermostats, but most can be tested for continuity with a multimeter. With the temperature dial turned to a low setting, the thermostat should show an open circuit (no continuity) until it reaches that temperature. When turned to a high setting, it should show continuity, indicating it’s calling for heat. If the thermostat doesn’t behave this way, it might be faulty. Replacement involves disconnecting wires and mounting screws.
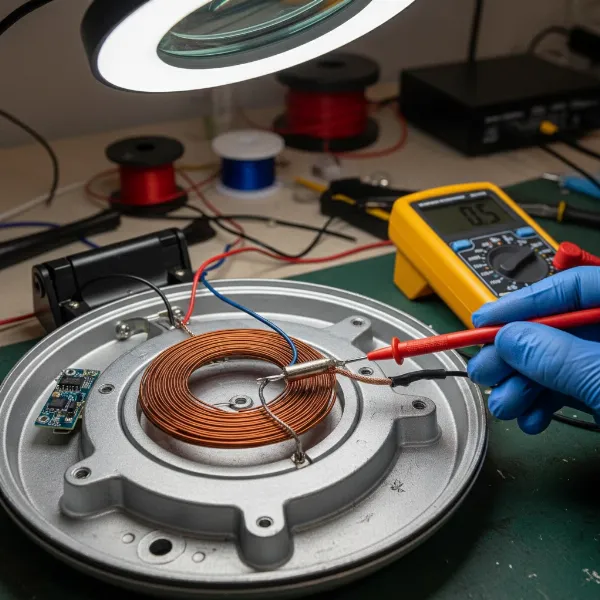 Technician testing internal components of a crepe maker with a multimeter
Step-by-Step Troubleshooting and Repair
Here’s a generalized sequence for internal inspection and repair:
1. Disassemble the Crepe Maker
Carefully remove the screws holding the bottom or top panel in place, depending on your model. Lift the panel to expose the internal wiring and components. Take photos as you go to remember how everything connects.
2. Locate Components
Identify the thermal fuse, heating element, and thermostat. These are usually connected directly to the power wiring and the heating plate.
3. Test for Continuity (Thermal Fuse & Thermostat)
With your multimeter set to continuity, touch the probes to each end of the thermal fuse. If the multimeter beeps or shows a zero reading, the fuse is good. If there’s no reading, it’s blown and needs replacement. For the thermostat, test it as described above, turning the dial and checking for continuity changes.
4. Test Heating Element Resistance
Set your multimeter to ohms. Touch the probes to the terminals of the heating element. Compare your reading to the manufacturer’s specifications. A reading of infinity (open circuit) or a very high/low reading typically means the element is faulty.
5. Replace Faulty Components
If you’ve identified a faulty component (thermal fuse, heating element, or thermostat), order a compatible replacement part. When replacing, ensure all connections are secure and match the original configuration. It’s crucial to use parts with the exact same specifications to ensure safe and correct operation.
6. Reassemble and Test
Once replacements are installed, carefully reassemble your crepe maker, ensuring all wires are tucked away and panels are securely fastened. Plug it back in and test for proper heating. Observe any indicator lights and confirm the cooking surface warms up as expected.
When to Call a Professional or Consider Replacement
While many issues can be DIY-fixed, some situations warrant professional help or considering a new appliance.
- Complex Electrical Issues: If you’re uncomfortable working with electrical wiring, or if your multimeter readings are ambiguous, it’s safer to contact a qualified appliance technician.
- Parts Unavailability: For older or less common models, finding compatible replacement parts can be difficult or impossible.
- Cost of Repair vs. Replacement: Sometimes, the cost of parts and labor for a repair can approach or exceed the price of a new crepe maker. In such cases, investing in a new, more efficient model might be a better long-term solution.
- Extensive Damage: If there’s widespread damage, such as melted plastic or multiple burnt components, a repair might not be feasible or safe.
Maintaining Your Crepe Maker to Prevent Future Issues
Regular maintenance can significantly extend the lifespan of your crepe maker and prevent heating problems.
- Keep it Clean: Always clean the cooking surface after each use, once the unit has cooled down. Food residue can accumulate and affect heat distribution or even seep into internal components.
- Store Properly: Store your crepe maker in a dry, safe place to prevent damage to the cord or external casing.
- Avoid Overheating: While safety cut-outs exist, try to avoid prolonged periods of high heat without use. If not making crepes, turn off or lower the temperature of the machine to reduce stress on components.
- Gentle Use: Avoid dropping or knocking the appliance, as internal components are delicate and can be easily damaged.
By following these guidelines, you can not only troubleshoot and repair a crepe maker that won’t heat up but also take proactive steps to ensure it keeps making perfect crepes for years to come.
Frequently Asked Questions
What causes a crepe maker to stop heating?
Several factors can cause a crepe maker to stop heating, including issues with the power supply (outlet, cord, switch), a tripped thermal fuse, a faulty heating element, or a malfunctioning thermostat. Identifying the specific cause usually involves a process of elimination, starting with external checks and moving to internal component testing.
Can I replace a crepe maker’s heating element myself?
Yes, replacing a heating element is often a DIY task for those comfortable with basic appliance repair and electrical safety. It typically involves disassembling the unit, disconnecting wires, unbolting the old element, and installing a new, compatible one. Always ensure the appliance is unplugged and cooled before starting any work.
How do I test a thermal fuse in a crepe maker?
To test a thermal fuse, you’ll need a multimeter set to the continuity setting. After unplugging the crepe maker and accessing the fuse (usually near the heating element), touch the multimeter probes to each end of the fuse. A good fuse will show continuity (a beep or a reading of 0), while a blown fuse will show an open circuit.
Is it worth repairing an old crepe maker?
The decision to repair an old crepe maker depends on the cost of parts and labor versus the price of a new unit, as well as the sentimental value of the appliance. If the repair cost is high, or if multiple components are failing, it might be more economical to purchase a new Crepe Maker with a warranty.
How do I maintain my crepe maker to prevent heating issues?
Regular maintenance includes cleaning the cooking surface after each use, storing the appliance properly, and avoiding overheating. Periodically inspecting the power cord for damage and resetting the thermal cut-out (if applicable) after a cool-down period can also help prevent future heating problems.