There’s little more disappointing for a crepe enthusiast than pouring a batch of meticulously mixed batter onto a hot surface, only to see it dotted with stubborn, unsightly lumps. As someone who has spent over a decade deep in the mechanics of crepe making, from simple home units to high-volume restaurant griddles, I understand the science behind every perfect pour and every frustrating clump. Achieving that dreamily thin, silky-smooth crepe isn’t just about the machine; it starts with the batter itself. If your crepe batter is constantly betraying you with lumps, it’s time to dive into the core reasons and arm yourself with the knowledge to conquer them, transforming your crepe-making experience from frustrating to flawless.
Common Culprits: Why Your Crepe Batter Gets Lumpy
Understanding the ‘why’ is the first step to mastering the ‘how.’ Lumps in crepe batter aren’t random occurrences; they’re usually a tell-tale sign of specific overlooked steps in the mixing process. Let’s break down the most frequent offenders.
The Flour Factor: Uneven Hydration and Undermixing
|
Our Picks for the Best Crepe maker in 2026
As an Amazon Associate I earn from qualifying purchases.
|
||
| Num | Product | Action |
|---|---|---|
| 1 | Moss & Stone Electric Crepe Maker 8 Inch, Portable Crepe Maker & Hot Plate Cooktop On/Off Switch, Nonstick Coating, Automatic Temperature Control, Easy To Use For Pancakes, Blintz, Chapati |

|
| 2 | 16 Inch Commercial Crepe Maker, Dual-Head, Dual Zone Temp Setting, Nonstick Pancake Griddle Machine, 50-300°C(120-570℉), 3400W, S.S. Shell, for Catering, Restaurant, Snack Stand, CE Certified |
|
| 3 | Electric Crepe Maker 12'' & Griddle - Non-Stick Pan With Spreader for Roti, Tortilla, Blintzes, Pancakes - Adjustable Temperature, 1000W |
|
| 4 | Baker's Friend Instant Crepe Maker with Handle, Electric Crepe Maker Machine, Crepera Electrica, 8 Inch Non-stick Cooking Surface, Aqua |
|
| 5 | Nutrichef Electric Crepe Maker - 8-inch Nonstick Cooktop with On/Off Switch - Cooks Roti, Tortillas & Pancakes - Automatic Temperature Control & Cool Touch Handle - Includes Food Bowl, Whisk & Spatula |
|
| 6 | Gourmia 8” Electric Crepe Maker – Nonstick Ceramic Surface, One-Touch Operation, Includes Batter Tray, Compact & Easy to Clean, Crepe, Pancake & Tortilla Maker |
|
| 7 | Nutrichef Electric Crepe Maker & Griddle Cooktop - Nonstick 12 Inch Aluminum Hot Plate with LED Indicator Lights & Adjustable Temperature Control - Wooden Spatula & Batter Spreader Included |
|
| 8 | Gourmia 12” Crepe Maker – Nonstick Electric Griddle for Pancakes, Omelets & More, Precise Temp Control with Indicator Lights, Includes Spatula & Batter Spreader, Quick Cleanup, Stainless Steel Trim |
|
| 9 | Moss & Stone Electric Crepe Maker – 8” Portable Crepe Pan Nonstick with Dipping Plate, Auto Shut-Off, On/Off Switch, Even Heating & One Automatic Temperature Control – Compact Crepe Maker |
|
| 10 | Moss & Stone 12” Electric Griddle Pan & Crepe Machine, Non-Stick Electric Crepe Maker with Adjustable Temperature, Includes Spreader & Spatula – Ideal for Pancakes, Blintzes & Tortillas |
|
One of the primary reasons for lumpy crepe batter stems from how flour interacts with liquid. When dry flour meets wet ingredients, water molecules need to fully and evenly hydrate the gluten proteins and starch within the flour. If this hydration is inconsistent, pockets of dry flour can remain, forming sticky clumps. This often happens if the flour isn’t adequately sifted, or if the initial mixing isn’t thorough enough to break down these dry pockets before more liquid is added. Insufficient initial mixing prevents the even distribution of liquid, leading to those frustrating clumps of partially hydrated flour.
The Gluten Dilemma: Overworking Your Batter
While gluten is essential for structure in many baked goods, too much gluten development in crepe batter can contribute to lumps and a tougher texture. This might seem counter-intuitive after discussing undermixing, but excessive, vigorous whisking, especially when flour first comes into contact with a small amount of liquid, can overwork the gluten. Instead of smoothly incorporating, the gluten proteins can bind together too tightly, creating small, rubbery nodules within the batter that stubbornly resist dissolving. It’s a delicate balance: enough mixing to hydrate, but not so much as to overdevelop.
Temperature Troubles: Cold Meets Hot
The temperature of your ingredients plays a more significant role than you might think. A common culprit for small, greasy lumps, especially when using butter, is a temperature mismatch. If you add warm, melted butter to a cold batter, the butter can rapidly solidify into tiny, hard clumps upon contact. Similarly, very cold milk or eggs can hinder the smooth incorporation of dry ingredients, making it harder to achieve a homogenous mixture from the start. Ingredients that are closer to room temperature blend more harmoniously, preventing these thermal shocks.
The Swift Pour: Adding Liquids Too Quickly
Patience is a virtue in crepe making, particularly when combining your wet and dry ingredients. Pouring all the liquid into the flour at once can overwhelm the dry ingredients, making it incredibly difficult to whisk out lumps effectively. The flour, unable to absorb the liquid gradually, will form large, dense pockets that are challenging to break down. This “swift pour” technique almost guarantees a lumpy start, forcing you into a battle against unyielding flour clumps.
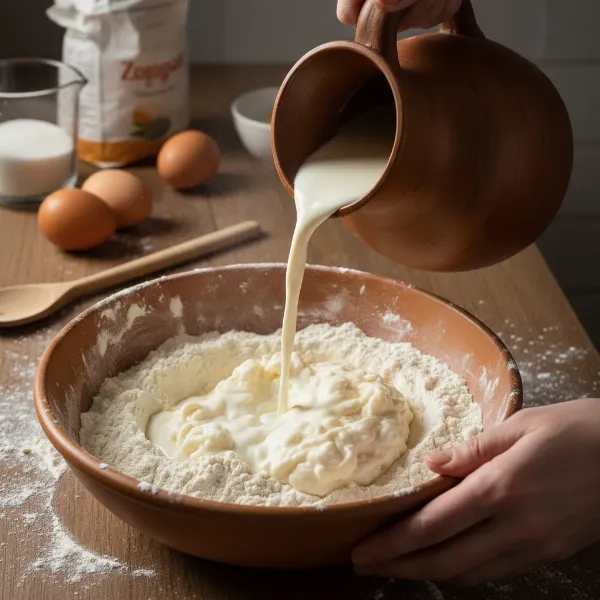 Hands quickly pouring milk into flour, creating a lumpy, inconsistent crepe batter mixture in a bowl.
Your Toolkit for a Smooth Comeback: Fixing Lumpy Batter
Even if you find yourself with a lumpy batch, don’t despair! Several effective techniques can rescue your batter and get you back on track to crepe perfection.
The Sifting Solution: A Pre-Emptive Strike and a Remedy
Sifting your flour before mixing is a crucial preventative step, but it’s also a powerful tool if you’re already facing lumps. Sifting aerates the flour and breaks up any existing clumps, making it easier for liquids to incorporate smoothly. If your batter is already lumpy, a fine-mesh sieve can be your best friend.
“The secret to smooth batter often begins before the first ingredient is mixed: a simple sift of the flour can make all the difference.” – Admin, CrepeMakerDepot.com
Pouring your prepared batter through a fine-mesh sieve or strainer can physically remove those stubborn lumps, leaving you with a beautifully smooth consistency. For particularly thick or stubborn lumps, you might need to use a spatula or the back of a spoon to gently press the batter through the sieve.
The Power of the Blender (or Immersion Blender)
For an almost instant fix, nothing beats the mechanical power of a blender, food processor, or immersion blender. These tools are exceptionally effective at breaking down flour clumps and creating a consistently smooth batter. Simply pour your lumpy batter into the blender, pulse it for 10-30 seconds, or until all lumps have disappeared. Be cautious not to over-blend, as this can still lead to excess gluten development and a slightly tougher crepe, but for lump removal, it’s a game-changer. An immersion blender is particularly convenient as you can use it directly in your mixing bowl.
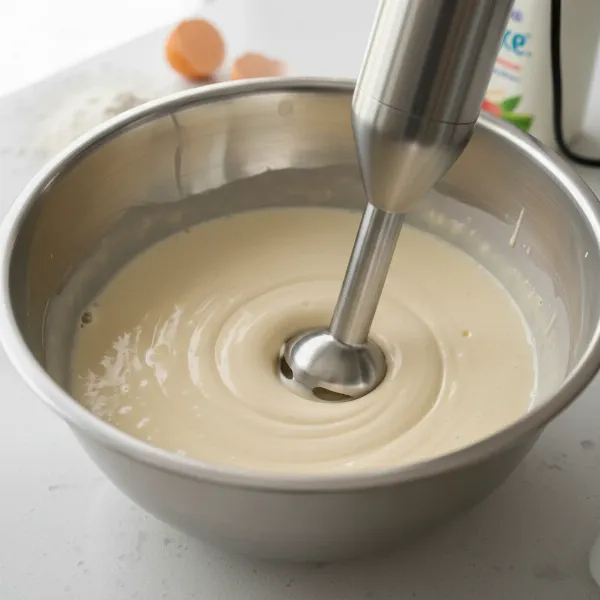 An immersion blender smoothing out a lumpy crepe batter in a mixing bowl, creating a perfect consistency.
Resting for Perfection: Time is Your Ally
One of the simplest, yet most overlooked, remedies for lumpy batter is patience. Allowing your crepe batter to rest for at least 30 minutes, or ideally 1-2 hours (and even overnight in the refrigerator), works wonders. During this resting period:
- Flour Hydrates Fully: The starch molecules in the flour get ample time to absorb the liquid, swelling and dissolving any remaining small clumps naturally.
- Gluten Relaxes: Any gluten that developed during mixing gets a chance to relax, leading to a more tender and pliable crepe texture.
- Air Bubbles Escape: Trapped air bubbles, which can cause holes or a bready texture, slowly work their way out, ensuring a thinner, more uniform crepe.
A rested batter is not only lump-free but also yields crepes that are more delicate, less prone to tearing, and cook more evenly.
Mastering the Art: Preventing Lumps from the Start
Prevention is always better than a cure. Incorporating these practices into your crepe-making routine will significantly reduce the chances of encountering lumpy batter.
Ingredient Temperature: The Foundation of Smoothness
Always aim to use ingredients that are at room temperature, especially eggs and milk. This ensures they emulsify smoothly with the other components. If your recipe calls for melted butter, allow it to cool slightly before adding it to the batter to prevent it from solidifying into undesirable clumps. A consistent temperature across all ingredients fosters a more harmonious and lump-free mixture.
The Gradual Approach: Mixing Techniques that Work
When combining dry and wet ingredients, adopt a gradual, controlled approach.
- Sift Dry Ingredients: Always start by sifting your flour and any other dry ingredients (like sugar or salt) into a large bowl. This breaks up clumps and aerates them.
- Create a Well: Make a well in the center of your dry ingredients.
- Add Wet Gradually: Begin by adding a small amount of your liquid ingredients (eggs, milk) to the well. Whisk from the center outwards, slowly incorporating flour from the sides into the wet mixture. This creates a thick paste initially, which is easier to control and smooth out.
- Continuous Whisking: As you continue to slowly add the remaining liquid, whisk continuously and thoroughly, ensuring each addition is fully incorporated before adding more. This gradual process minimizes the chances of dry pockets forming.
Knowing When to Stop: Avoiding Overmixing
While thorough mixing is necessary, overmixing is detrimental. Mix just until the ingredients are combined and no visible streaks of flour remain. Overmixing can overdevelop the gluten, leading to a tougher, chewier crepe, and paradoxically, can also create tiny, rubbery lumps from overworked gluten strands. The goal is smooth, not vigorous for an extended period.
The Essential Rest: Why Patience Pays Off
As mentioned, letting your batter rest is critical. Even if your batter looks perfectly smooth after mixing, a minimum 30-minute rest (covered, in the fridge) is highly recommended. This pause allows the flour to fully hydrate, the gluten to relax, and any tiny air bubbles to dissipate. This resting phase is where the magic truly happens, transforming a merely mixed batter into one primed for delicate, golden-brown crepes.
Beyond the Basics: Expert Tips for Crepe Batter Excellence
Elevating your crepe game goes beyond just avoiding lumps; it’s about achieving consistent excellence.
The Role of Quality Ingredients
Just as a machine performs best with quality parts, your crepe batter thrives on good ingredients. High-quality all-purpose flour, fresh eggs, and rich milk contribute significantly to the flavor and texture of your crepes, making them inherently easier to work with. While not directly lump-related, superior ingredients often lead to a more stable and forgiving batter.
Adjusting Batter Consistency on the Fly
Even with the best preparation, you might need to fine-tune your batter. The ideal crepe batter consistency is thin, similar to heavy cream.
- If too thick: Gradually add a tablespoon of milk or water at a time, whisking gently until you reach the desired consistency.
- If too thin: Carefully whisk in a small amount (e.g., a tablespoon) of sifted flour. Remember to mix gently to avoid introducing new lumps.
Storing Your Perfect Batter
Once you’ve achieved that perfect, lump-free consistency, you can store your batter for later use. Transfer it to an airtight container and refrigerate for up to 2-3 days. Before using, give it a gentle whisk as some ingredients, like butter, might separate slightly. This also helps to ensure any gluten that reformed during chilling can relax once more.
In the world of crepe making, a lumpy batter is a common hurdle, but it’s far from an insurmountable one. By understanding the underlying causes—be it uneven hydration, temperature clashes, or improper mixing techniques—you gain the power to not only fix existing lumps but to prevent them altogether. With the right tools, a bit of patience, and a methodical approach to ingredient preparation and mixing, you’ll consistently achieve that delicate, silky-smooth crepe batter that forms the foundation of truly exceptional crepes. So, go forth, armed with this knowledge, and may your crepes always be perfectly smooth! What culinary creation will you embark on once you master this fundamental skill?
Frequently Asked Questions
How long should crepe batter rest?
Crepe batter should rest for a minimum of 30 minutes, and ideally 1-2 hours, in the refrigerator. This crucial resting period allows the flour to fully hydrate, gluten to relax for tenderness, and air bubbles to dissipate, resulting in a smoother, more pliable batter and better crepes.
Can I use a blender to fix lumpy crepe batter?
Yes, a blender or immersion blender is an excellent tool for fixing lumpy crepe batter. Briefly pulsing the batter in a blender for 10-30 seconds can quickly break down flour clumps and achieve a silky-smooth consistency. Just be careful not to over-blend, which can overdevelop gluten.
What happens if I don’t rest my crepe batter?
If you don’t rest your crepe batter, you risk producing crepes that are tougher, gummier, and more prone to tearing. The flour won’t be fully hydrated, and the gluten won’t have relaxed, leading to an inconsistent texture and potentially more holes or a less delicate finish.
Should all crepe ingredients be at room temperature?
Ideally, yes. Using room temperature ingredients, especially eggs and milk, helps them emulsify smoothly and integrate more easily with the dry ingredients. This minimizes temperature shocks that can cause issues like melted butter solidifying into lumps and promotes an overall more uniform and lump-free batter.
How do I know if my crepe batter is the right consistency?
The ideal crepe batter should have a thin consistency, similar to heavy cream or buttermilk, easily coating the back of a spoon. It should flow smoothly when poured, without being too watery or overly thick. If it’s too thick, add liquid; if too thin, add a little sifted flour.