Imagine waking up to the aroma of freshly made crepes, even when you’re miles away from the nearest bistro. For passionate cooks and crepe enthusiasts, hitting the open road in an RV or setting up camp shouldn’t mean sacrificing the simple pleasure of a perfectly thin, golden-brown crepe. The challenge lies in finding a crepe maker that’s compact, reliable, and suits the unique constraints of mobile living. This guide will help you navigate the options, ensuring your next outdoor adventure is filled with delightful, paper-thin treats.
Types of Crepe Makers for Camping & RV Living
Choosing the right crepe maker for your mobile kitchen depends heavily on your power sources, space, and cooking preferences. Each type offers distinct advantages and considerations for life on the go.
Electric Portable Crepe Makers
These are essentially smaller, lighter versions of their kitchen counterparts, designed for convenience.
- Advantages: Electric crepe makers offer precise temperature control, ensuring even cooking and consistent results. They heat up quickly and are incredibly easy to use – just plug them in, wait for the light, and start pouring batter. Their non-stick surfaces make for effortless crepe removal and cleanup. Many models feature compact designs, making them relatively easy to store in an RV cabinet or a camping gear box.
- Disadvantages: The primary limitation is the need for an electrical outlet. While RVs often have shore power or onboard generators, relying on battery-powered inverters can be tricky due to their wattage requirements. Some higher-wattage models might trip breakers if not managed carefully in a smaller electrical system.
- Best for: RV owners with reliable power hookups or generators, glampers who have access to electricity, and those who prioritize consistent results and ease of use over extreme portability or off-grid capability.
|
Our Picks for the Best Crepe maker in 2026
As an Amazon Associate I earn from qualifying purchases.
|
||
| Num | Product | Action |
|---|---|---|
| 1 | Baker's Friend Instant Crepe Maker with Handle, Electric Crepe Maker Machine, Crepera Electrica, 8 Inch Non-stick Cooking Surface, Aqua |

|
| 2 | Gourmia 12” Crepe Maker – Nonstick Electric Griddle for Pancakes, Omelets & More, Precise Temp Control with Indicator Lights, Includes Spatula & Batter Spreader, Quick Cleanup, Stainless Steel Trim |
|
| 3 | Nutrichef Electric Crepe Maker - 8-inch Nonstick Cooktop with On/Off Switch - Cooks Roti, Tortillas & Pancakes - Automatic Temperature Control & Cool Touch Handle - Includes Food Bowl, Whisk & Spatula |
|
| 4 | Gourmia 8” Electric Crepe Maker – Nonstick Ceramic Surface, One-Touch Operation, Includes Batter Tray, Compact & Easy to Clean, Crepe, Pancake & Tortilla Maker |
|
| 5 | Moss & Stone Electric Crepe Maker – 8” Portable Crepe Pan Nonstick with Dipping Plate, Auto Shut-Off, On/Off Switch, Even Heating & One Automatic Temperature Control – Compact Crepe Maker |
|
| 6 | Electric Crepe Maker 12'' & Griddle - Non-Stick Pan With Spreader for Roti, Tortilla, Blintzes, Pancakes - Adjustable Temperature, 1000W |
|
| 7 | Nutrichef Electric Crepe Maker & Griddle Cooktop - Nonstick 12 Inch Aluminum Hot Plate with LED Indicator Lights & Adjustable Temperature Control - Wooden Spatula & Batter Spreader Included |
|
| 8 | 16 Inch Commercial Crepe Maker, Dual-Head, Dual Zone Temp Setting, Nonstick Pancake Griddle Machine, 50-300°C(120-570℉), 3400W, S.S. Shell, for Catering, Restaurant, Snack Stand, CE Certified |
|
| 9 | Moss & Stone 12” Electric Griddle Pan & Crepe Machine, Non-Stick Electric Crepe Maker with Adjustable Temperature, Includes Spreader & Spatula – Ideal for Pancakes, Blintzes & Tortillas |
|
| 10 | Moss & Stone Electric Crepe Maker 8 Inch, Portable Crepe Maker & Hot Plate Cooktop On/Off Switch, Nonstick Coating, Automatic Temperature Control, Easy To Use For Pancakes, Blintz, Chapati |
|
Stovetop Griddles & Pans
Embracing simplicity, stovetop griddles and specialized crepe pans are a versatile choice for any outdoor setting.
- Advantages: The biggest benefit of a stovetop griddle or pan is its independence from electricity. You can use it on an RV’s gas stove, a portable camping stove, or even over a campfire grate. Many are made from durable materials like cast iron, which offers excellent heat retention and can last for decades with proper care. They are often multi-functional, doubling as a surface for pancakes, eggs, or quesadillas.
- Disadvantages: Achieving an even temperature across the surface can be more challenging compared to electric models, requiring a bit more practice and skill to consistently produce perfect crepes. They also tend to be heavier, especially cast iron models, which might be a consideration for weight-conscious travelers.
- Best for: Avid campers, boondockers, or RVers who frequently dry camp without electrical hookups. They are ideal for those who appreciate traditional cooking methods and value durability and multi-functionality in their outdoor gear.
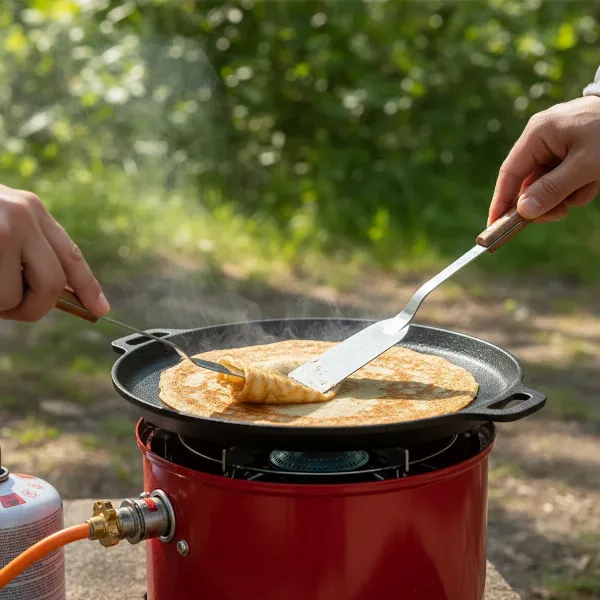 Person cooking crepes on a cast iron griddle over a portable camping stove outdoors
Dedicated Propane/Gas Crepe Makers
While less common for individual campers, some larger, more robust propane crepe makers exist, often bridging the gap between home-use and light commercial options.
- Advantages: These units are built for outdoor use, offering powerful and consistent heat without needing electricity. They are typically very durable and designed to handle frequent use in variable outdoor conditions. The larger cooking surface can be a significant advantage for feeding a hungry crowd.
- Disadvantages: They are often much bulkier and heavier than other options, making storage and transport more challenging for smaller RVs or basic camping trips. The initial cost is also generally higher, and they require a separate propane tank connection.
- Best for: Larger groups camping together, those with bigger RVs or dedicated outdoor kitchens, or individuals who might use their crepe maker for small-scale events or gatherings in addition to personal travel.
Comparing Top Crepe Makers for Your Mobile Kitchen
When selecting the ideal crepe maker for your adventures, it’s helpful to consider a range of features. Below is a generalized comparison of common types you might encounter, focusing on features crucial for camping and RV living.
| Feature | Electric Portable Crepe Maker | Stovetop Griddle/Pan | Dedicated Propane Crepe Maker |
|---|---|---|---|
| Power Source | Electric (120V) | Gas stove, campfire, portable burner | Propane Tank |
| Portability | High (Compact, lightweight) | Medium (Varies by material/size) | Low (Bulky, heavy) |
| Heat Control | Excellent (Thermostatic) | Good (Requires practice) | Excellent (Manual dial) |
| Ease of Use | Very Easy (Plug & Play) | Moderate (Skill-dependent) | Easy (Once connected) |
| Cleanup | Easy (Non-stick surfaces) | Varies (Cast iron needs seasoning) | Easy (Usually smooth surfaces) |
| Durability | Good (Can be fragile if dropped) | Excellent (Cast iron, heavy gauge) | Excellent (Built for outdoor use) |
| Versatility | Limited (Mostly crepes/pancakes) | High (Multi-purpose cooking) | Good (Pancakes, tortillas) |
| Price Range | Low to Mid | Low to Mid | High |
Buying Guide: Choosing Your Perfect Camping & RV Crepe Maker
Navigating the various options can feel overwhelming, but focusing on a few key factors will simplify your decision and lead you to the perfect crepe maker for your mobile lifestyle.
Assess Your Needs and Lifestyle
Before diving into features, consider how you intend to use your crepe maker.
- Who are you cooking for? A single person or a couple might be fine with a smaller, 8-inch crepe maker, while families or groups might prefer a larger 10-inch or 12-inch surface to churn out crepes more quickly.
- How often will you make crepes? If it’s an occasional treat, a more basic or manual option might suffice. For daily breakfasts, ease of use and consistent results from an electric model might be preferred.
- What are your power limitations? RVers with ample shore power or a robust inverter might easily accommodate an electric model. Those who primarily boondock or camp off-grid will need to prioritize propane or stovetop options.
- What’s your budget? Prices vary significantly, from inexpensive stovetop pans to premium electric griddles or dedicated propane units. Determine what you’re willing to invest for your crepe-making pleasure on the road.
Key Features to Prioritize
Once you understand your needs, these features will guide your selection process:
- Plate Material: A high-quality non-stick coating is paramount for easy crepe flipping and cleanup, especially in environments where water might be scarce. Cast iron is excellent for durability and heat retention but requires seasoning.
- Size & Weight: For camping and RVs, compact and lightweight designs are crucial. Measure your available storage space before purchasing. A smaller footprint doesn’t mean less deliciousness!
- Power/Heat Source: As discussed, electric offers convenience and precision, while propane/gas provides versatility for off-grid cooking. Ensure the wattage of electric models is compatible with your RV’s electrical system or inverter.
- Temperature Control: Consistent heat is the secret to perfect crepes. Look for electric models with adjustable thermostats or stovetop options that distribute heat evenly. Even basic stovetop pans should have a thick, flat bottom for even heating.
- Portability & Durability: The best crepe makers for travel should withstand bumps and jostles. Look for sturdy construction, cool-touch handles (for electric), and thoughtful design elements like cord wraps or secure storage for accessories.
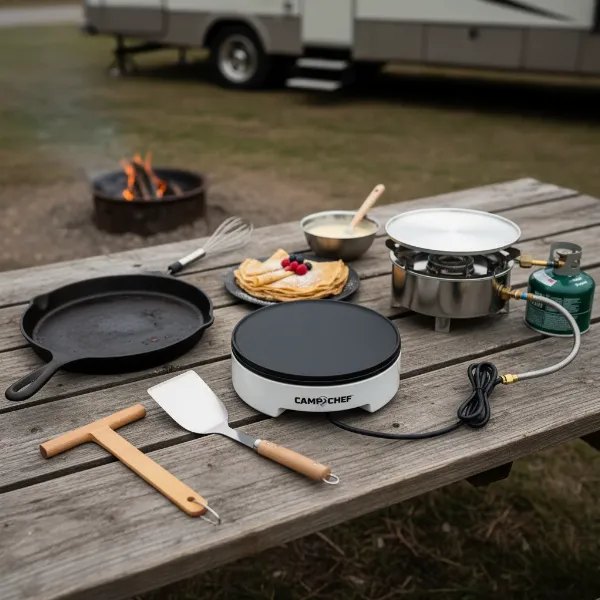 Diverse crepe makers for travel, including electric, stovetop, and portable propane models
Usage & Maintenance Tips for the Road
Even the best crepe maker needs a little care, especially when traveling.
- Preheat Thoroughly: Regardless of the type, always allow your crepe maker to reach its optimal temperature before pouring batter. This ensures a crisp, even cook from the start.
- Use the Right Amount of Batter: Less is more with crepes. A small ladle or a dedicated batter spreader (often included with electric models) helps create that signature thinness.
- Mind Your Flipping: Wait until the edges are golden and the surface appears dry before gently lifting and flipping. A thin, flat spatula is your best friend here.
- Cleaning on the Go: For non-stick electric models, simply wipe down the cool surface with a damp cloth after use. For cast iron, scrape off any residue, wipe with a paper towel, and apply a thin layer of cooking oil to maintain seasoning. Avoid harsh soaps on cast iron.
- Proper Storage: Always store your crepe maker in a clean, dry place, ideally in a protective bag or box to prevent scratches or damage during transit. Ensure all parts are completely dry before storing to prevent rust or mildew.
“The true joy of RV cooking comes from adapting and making every meal an adventure. A good crepe maker transforms a simple breakfast into a gourmet experience, no matter where you park.” – Chef Elena Rodriguez, Mobile Culinary Expert
Conclusion
Choosing the ideal crepe maker for your camping or RV adventures is about balancing convenience, power availability, and your personal cooking style. Whether you opt for the plug-and-play ease of an electric model, the rugged versatility of a stovetop griddle, or the robust power of a dedicated propane unit, the right choice will enhance your outdoor culinary experiences. With the perfect crepe maker in your mobile kitchen, you’re not just making breakfast; you’re creating delicious memories wherever the road takes you. So, which crepe maker will accompany you on your next journey?
Frequently Asked Questions
Can I use a regular crepe maker in an RV?
Yes, many standard electric crepe makers can be used in an RV, provided you have sufficient power (shore power or an inverter capable of handling the wattage). Always check the appliance’s wattage and your RV’s electrical capacity to avoid overloading circuits.
What’s the best power source for a camping crepe maker?
For off-grid camping, a propane-powered stovetop griddle or pan is ideal as it doesn’t require electricity. For RVs with reliable shore power or a robust generator, an electric crepe maker offers convenient and consistent results.
How do I clean a crepe maker while camping with limited water?
For non-stick electric models, let it cool, then wipe the surface thoroughly with a damp cloth or paper towel, followed by a dry one. For cast iron griddles, scrape off food residue with a spatula, wipe with a paper towel, and re-season with a thin layer of oil.
Are cast iron griddles good for crepes when camping?
Absolutely! Cast iron griddles are excellent for camping crepes due to their durability, superior heat retention, and versatility over various heat sources like campfires or portable gas stoves. They require proper seasoning and care.
What accessories do I need for crepe making on the go?
Essential accessories include a small ladle for portioning batter, a wooden batter spreader for even thinness, a thin spatula for flipping, and a small whisk for mixing batter. A portable cooler for ingredients and a protective bag for the crepe maker are also helpful.