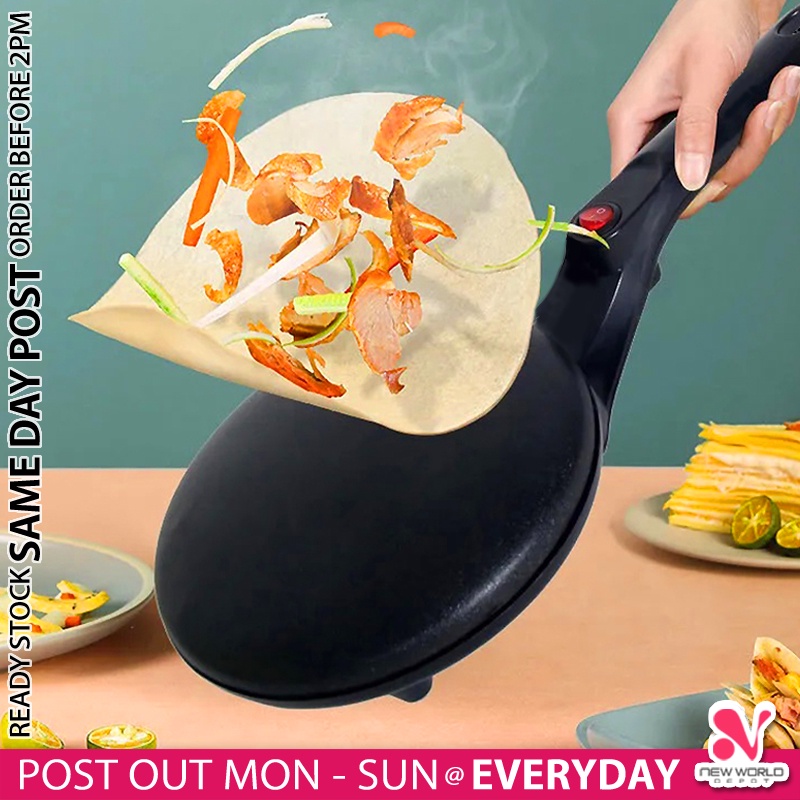
Hello and welcome to the Crepe Maker Depot family! I’m your resident crepe enthusiast, and honestly, there’s nothing quite like the sizzle of batter hitting a hot plate, filling the air with that warm, toasty aroma. If you’re here, you’re probably staring at your new machine, bubbling with excitement and maybe a little uncertainty. You’re wondering how to use a crepe maker step by step to achieve those paper-thin, golden-brown circles of perfection you see in French cafes. Well, you’ve come to the right place. Forget those thick, doughy imposters. We’re about to turn you into a crepe-flipping artist.
Before we dive into the nitty-gritty, it’s worth exploring the fundamentals. For those of you just starting your culinary journey, our guide on how to make crepes with crepe maker is a fantastic starting point for mastering the batter itself.
What Exactly Is a Crepe Maker and Why Do You Need One?
A crepe maker is a specialized cooking appliance designed for one glorious purpose: making perfect crepes. Think of it as a flat, circular griddle. Unlike a standard frying pan, it has a large, completely flat surface with a minimal lip, which makes spreading the batter evenly and flipping the crepe an absolute breeze.
So, why not just use a pan? You certainly can, but a dedicated crepe maker offers two game-changing advantages: consistent, even heat distribution and precise temperature control. This eliminates the dreaded hot spots that burn your crepe in the middle while leaving the edges raw. It’s the secret weapon for achieving that uniform, delicate texture every single time.
What Are the Main Types of Crepe Makers?
Crepe makers generally fall into two categories, each with its own fan club. Understanding the difference will help you master the one you have or choose the right one for your kitchen.
| Feature | Electric Crepe Maker | Stovetop Crepe Pan (Billig) |
|---|---|---|
| Heat Source | Self-contained electric element | Gas or electric stovetop |
| Heat Control | Precise thermostat dial | Relies on stovetop controls; can be inconsistent |
| Portability | Requires an outlet | Highly portable; great for camping |
| Surface Size | Typically larger (12-16 inches) | Standard pan sizes (10-12 inches) |
| Ease of Use | Very beginner-friendly | Requires more practice to manage heat |
| Best For | Consistency, parties, beginners | Experienced cooks, small kitchens |
Key Features to Look For in a Crepe Maker
When you’re getting familiar with your machine, it helps to know what the key components do. These features are what separate a good crepe-making experience from a frustrating one.
Size Matters
Most home crepe makers range from 12 to 13 inches in diameter. This is the sweet spot for creating substantial, restaurant-style crepes that are easy to fill and fold.
Temperature Control
This is the most crucial feature. A good electric crepe maker has an adjustable thermostat. Lower temperatures are for delicate, sweet crepes, while higher temperatures can give you a crispier finish, perfect for savory galettes.
Non-Stick Surface
A high-quality non-stick coating is non-negotiable. It ensures your delicate crepes release effortlessly without tearing and makes cleanup a dream. Most modern units are PFOA-free.
The Essential Tools
Your crepe maker should have come with a couple of sidekicks:
- A Batter Spreader: This T-shaped wooden tool is used to spread the batter in a thin, even circle.
- A Long Spatula: This is your flipping and folding champion, designed to get under the entire crepe without tearing it.
|
Our Picks for the Best Crepe Maker in 2025
As an Amazon Associate, we earn from qualifying purchases.
|
||
| Num | Product | Action |
|---|---|---|
| 1 | 24PCS Mini Pancake Maker Machine, Nonstick Electric Dutch Pancakes Griddle, Adjustable Heat Multi-Use Poffertjes Pan, Simple & Easy Baker for Home and Restaurants, Perfect for Breakfast & Desserts |

|
| 2 | Proctor Silex Electric Crepe Maker with 13” Nonstick Griddle for Eggs, Pancakes, Omelets and Quesadillas, with Temperature Control, Spatula, Spreader, Batter Cup, Stainless Steel (38400PS) |
|
| 3 | Moss & Stone Electric Crepe Maker – 8” Portable Crepe Pan Nonstick with Dipping Plate, Auto Shut-Off, On/Off Switch, Even Heating & One Automatic Temperature Control – Compact Crepe Maker |
|
| 4 | 110V US Commercial 25PCS Mini Pancake Maker,950W Mini Dutch Pancake Maker,Non-stick,Dutch Poffertjes Grill,Stainless Steel,Breakfast,Snacks,Desserts. |
|
| 5 | Baker\'s Friend Instant Crepe Maker with Handle, Electric Crepe Maker Machine, Crepera Electrica, 8 Inch Non-stick Cooking Surface, Aqua |
|
| 6 | nutrichef Electric Crepe Maker Pan & Griddle, 12 Inch Nonstick Cooktop, LED Indicators & Adjustable Temperature Control, Includes Spatula, Batter Spreader, Cooks Crepes, Roti & Pancakes |
|
| 7 | Gourmia 12” Crepe Maker – Nonstick Electric Griddle for Pancakes, Omelets & More, Precise Temp Control with Indicator Lights, Includes Spatula & Batter Spreader, Quick Cleanup, Stainless Steel Trim |
|
| 8 | Gourmia 8” Crepe Maker – Nonstick Ceramic Electric Griddle for Crepes, Tortillas & Omelets, Automatic Batter Dipping, Compact & Lightweight, Quick Heat-Up, Includes Batter Plate, Easy Cleanup |
|
| 9 | ULTICOR Mini Pancake Maker – 14-Hole Electric Poffertjes Pan – Non-Stick Dutch Mini Pancakes Griddle – Easy to Use, Easy to Clean – Perfect for Breakfast, Desserts, Snacks & More |
|
| 10 | Nutrichef Electric Crepe Maker & Griddle Cooktop - Nonstick 12 Inch Aluminum Hot Plate with LED Indicator Lights & Adjustable Temperature Control - Wooden Spatula & Batter Spreader Included |
|
Your Ultimate Guide on How to Use a Crepe Maker Step by Step
Alright, let’s get down to business. The moment you’ve been waiting for! Grab your batter, and let’s make some magic.
- Preparation is Everything: Before you even think about plugging it in, make sure your crepe maker is clean and dry. Place it on a stable, heat-resistant surface. Prepare your crepe batter and let it rest in the fridge for at least 30 minutes. This allows the gluten to relax, which is the secret to a tender, not chewy, crepe.
- Season the Surface (First Use Only): If your machine is brand new, it’s a good idea to season it. Lightly grease the cold surface with a neutral oil (like canola or grapeseed oil) using a paper towel. Plug it in, set it to medium heat, and let it warm up for a few minutes until the oil is absorbed. Turn it off, let it cool completely, and wipe away any excess oil. This creates a more robust non-stick layer.
- Preheat to Perfection: Turn your crepe maker on and set the temperature dial to a medium setting. A common mistake is starting with a surface that’s either too hot or too cold. Too hot, and the batter sets before you can spread it. Too cold, and you’ll get a pale, rubbery crepe. Give it a good 5-10 minutes to heat up evenly.
Expert Tip from Pastry Chef Isabelle Dubois: “The perfect crepe surface is hot enough that a drop of water sizzles and evaporates in a couple of seconds. This is your cue that the stage is set for a flawless performance.”
- The Pour and Spread: Now for the fun part! Ladle about 1/4 to 1/3 cup of batter directly onto the center of the hot plate. Immediately grab your T-shaped spreader. Place it in the center of the batter puddle and, using a light, confident touch, rotate it in a circular motion to spread the batter out to the edges. Work quickly and smoothly.
- Patience and the Cook: Let the crepe cook for about 45-60 seconds on the first side. You’ll see the edges start to dry out and curl up slightly. The surface will change from glossy to matte. Don’t be tempted to peek too early!
- The Moment of Truth: The Flip: Gently slide your long spatula under the edge of the crepe. If it’s ready, it will lift easily. Work the spatula about halfway underneath the crepe, lift it confidently, and flip it over in one swift motion. The cooked side should be a beautiful, lightly speckled golden brown.
- The Finishing Touch: The second side cooks much faster, usually only needing 20-30 seconds. Once it’s cooked, you’re ready to fill and fold! Knowing the right technique is key; for a deeper dive, understanding how to fold a crepe can elevate your presentation from home-style to bistro-chic.
Pro Tips for Flawless Crepes Every Time
- The First Crepe is for the Chef: It’s an unwritten rule in the culinary world that the first crepe (or pancake) is always a dud. It’s the sacrificial one that helps you gauge the temperature and get your rhythm. Don’t be discouraged; just eat it and move on!
- Mind Your Batter: Your batter should have the consistency of heavy cream. If it’s too thick, it won’t spread easily. Add milk, one tablespoon at a time, until it’s right. If it’s too thin, it might tear. Add a tablespoon of flour.
- A Little Grease Goes a Long Way: Even with a non-stick surface, it’s a good idea to lightly grease the plate with a bit of melted butter or oil on a paper towel between every few crepes. This ensures a perfect release and adds a lovely flavor.
For those planning a brunch or get-together, learning how to use crepe maker for parties can turn your kitchen into an interactive food station that everyone will love.
How Do You Clean a Crepe Maker Properly?
Keeping your crepe maker in pristine condition is simple but crucial for its longevity.
A Quick Cleaning Checklist:
- Safety First: Always unplug the crepe maker and let it cool down completely before cleaning.
- Wipe It Down: Use a soft, damp cloth or sponge to wipe the cooking surface. For any stubborn bits of batter, you can use a cloth with a drop of dish soap, but be sure to wipe it clean with a fresh damp cloth afterward to remove any residue.
- Never Submerge: Do not, under any circumstances, submerge the electric base in water. This will ruin the appliance.
- Avoid Abrasives: Steer clear of steel wool, scouring pads, or abrasive cleaners. They will scratch and destroy the non-stick coating.
- Store with Care: Once clean and dry, store your crepe maker in a safe place where the cooking surface won’t get scratched.
Beyond the Crepe: What Else Can You Make?
Your crepe maker is more versatile than you think! Its large, even heating surface is perfect for a variety of other dishes. Consider it your new breakfast workhorse. You can make:
- American-style pancakes and flapjacks
- Lacy potato latkes
- Fluffy omelets and scrambled eggs
- Warming tortillas or flatbreads
- Grilling sandwiches like a panini press
For more inspiration, check out our collection of creative breakfast ideas with crepe maker. You’ll be amazed at what this simple machine can do.
Frequently Asked Questions
Why are my crepes sticking to the crepe maker?
This usually happens for two reasons: the surface isn’t hot enough when you pour the batter, or it needs a light coating of butter or oil. Ensure it’s properly preheated and wipe it with a little butter between every two or three crepes.
What is the best temperature for making crepes?
A medium heat setting is the ideal starting point. For a 1-5 dial, start at 3. For a specific temperature, aim for around 375°F (190°C). You can adjust slightly up or down depending on how quickly your crepes are browning.
Can I use pancake batter on a crepe maker?
Absolutely! A crepe maker is essentially a perfect pancake griddle. Just be aware that pancake batter is much thicker, so you won’t be spreading it. Simply pour it into the center and let it form its own circle.
How do I know when to flip my crepe?
The visual cues are key. The top surface of the crepe will go from looking wet and glossy to dry and matte. The edges will also begin to look dry and may even start to lift away from the surface on their own.
What are the best crepe recipes for beginners?
The best way to start is with a simple, classic recipe. Once you’ve mastered the technique, you can explore more complex flavors. We’ve curated a list of the best crepe recipes 2025 to get you started on your delicious journey.
Your Crepe-Making Adventure Awaits
And there you have it—your comprehensive guide on how to use a crepe maker step by step. What once seemed like a mysterious kitchen gadget is now your partner in culinary creation. It’s more than just an appliance; it’s a gateway to delicious breakfasts, elegant desserts, and fun family meals. Embrace the process, don’t be afraid to make a few mistakes, and most importantly, have fun with it. Now go on, fire up that machine, and share your creations with the world! We’d love to hear about your crepe-making adventures in the comments below.