Hey there, future crepe connoisseur! Let’s talk dorm life. It’s a world of late-night study sessions, new friends, and… questionable cafeteria food. You’re craving something warm, delicious, and not from a microwaveable pouch. What if I told you the answer fits on your desk? Enter the Mini Crepe Maker For Dorms, a compact powerhouse that’s about to become your new best friend. Forget sad instant noodles; we’re about to upgrade your entire dorm-room dining experience, one perfect, golden-brown crepe at a time.
What Exactly is a Crepe Maker, and Why Do You Need One?
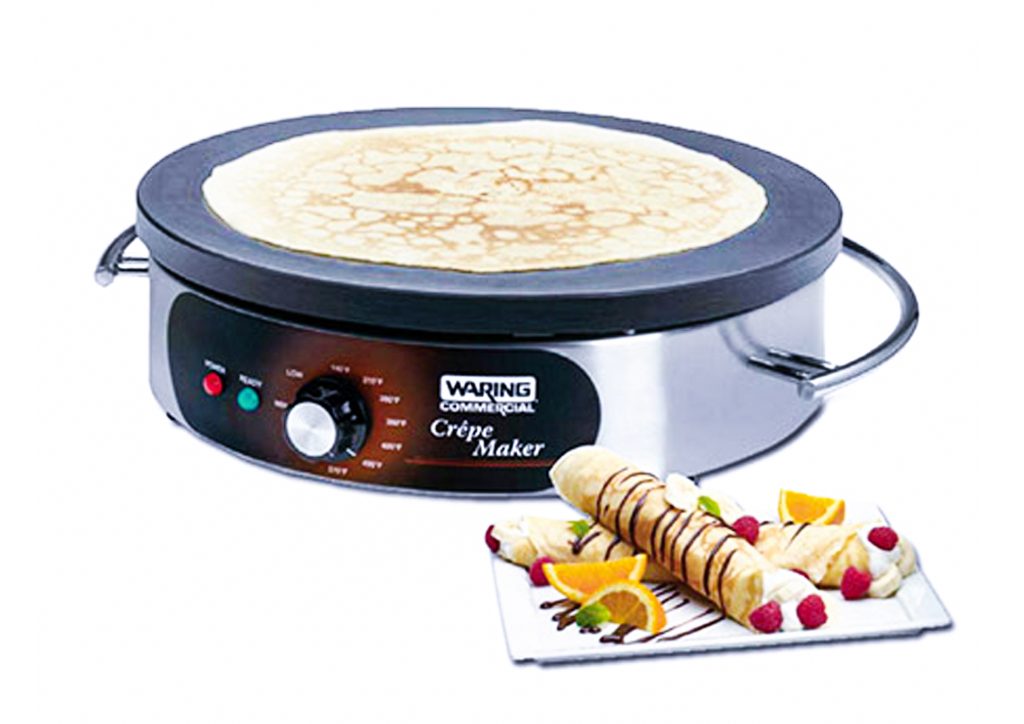
Think of a crepe maker as a specialized, flat-surface griddle designed for one thing: creating incredibly thin, delicate pancakes, or crepes. Unlike a clunky frying pan that heats unevenly, a dedicated crepe maker provides consistent, edge-to-edge heat. This is the secret to getting that signature paper-thin texture without any burnt spots or doughy centers.
So, why do you, a busy college student, need one? Simple: versatility in a tiny footprint. It’s more than just a crepe maker; it’s your breakfast station, lunch counter, and dessert bar all rolled into one. It’s the ultimate space-saving solution for making real food in a small space.
Types of Crepe Makers: More Than Just One Flavor
When you start looking, you’ll mainly see two kinds of crepe makers. Let’s break down the difference so you can pick the right teammate for your dorm room adventures.
| Feature | Electric Crepe Maker | Crepe Pan (Stovetop) |
|---|---|---|
| Heat Source | Self-contained, plugs into an outlet | Requires a stovetop or induction burner |
| Heat Control | Often has built-in temperature settings | Relies on the stovetop’s controls |
| Portability | Excellent. Just need an outlet. | Limited by the need for a stove. |
| Best for Dorms? | Absolutely. It’s a standalone appliance. | Not ideal, as most dorms don’t have stovetops. |
| Ease of Use | Very beginner-friendly. | Has a steeper learning curve. |
For dorm life, an electric mini crepe maker for dorms is a no-brainer. It’s safe, self-contained, and designed for precisely the kind of setup you have.
Key Features for Your Mini Crepe Maker for Dorms
Alright, you’re convinced. But not all mini crepe makers are created equal. When you’re scrolling through options, here’s what you should be looking for. Think of this as your pre-purchase checklist.
Size and Portability: The Dorm Room Golden Rule
The keyword here is “mini.” You’re not feeding an army. Look for a model with a cooking surface between 7.5 to 10 inches. This size is perfect for single-serving crepes and is small enough to tuck away in a drawer or on a shelf when you’re done. Weight matters too—a lightweight model is easier to handle and store.
Temperature Control: Don’t Burn Your Midnight Snack
Does the crepe maker have temperature control? Some of the simplest models are just “on/off,” which can work but offers little finesse. A model with an adjustable temperature dial gives you the power to go from a gently warmed tortilla to a perfectly seared crepe. Look for indicator lights that tell you when the surface is preheated and ready for batter.
“Consistent temperature is the single most important factor in making a great crepe. A quality crepe maker isn’t just a hot plate; it’s a precision instrument. It gives you the control needed to achieve that delicate, lacy texture without fail.” – Chef Antoine Dubois, Pastry Innovator
Non-Stick Surface: The Secret to a Perfect Flip
This is non-negotiable. A good non-stick coating means your crepes will slide right off without tearing, and more importantly, it makes cleanup an absolute dream. A simple wipe-down with a damp cloth is often all you need. No one wants to be scrubbing pans in a tiny dorm bathroom sink.
Included Accessories: The Little Things That Count
The best crepe maker kits come with a couple of essential tools:
- A Batter Spreader: This T-shaped wooden tool is used to spread the batter into a perfect, thin circle. It looks intimidating, but you’ll get the hang of it after one or two tries!
- A Spatula: A long, thin spatula is designed to get under the delicate crepe for a clean, flawless flip.
Having these included saves you the hassle of trying to find them separately.
|
Our Picks for the Best Crepe Maker in 2026
As an Amazon Associate, we earn from qualifying purchases.
|
||
| Num | Product | Action |
|---|---|---|
| 1 | Gourmia 8” Crepe Maker – Nonstick Ceramic Electric Griddle for Crepes, Tortillas & Omelets, Automatic Batter Dipping, Compact & Lightweight, Quick Heat-Up, Includes Batter Plate, Easy Cleanup |

|
| 2 | 110V US Commercial 25PCS Mini Pancake Maker,950W Mini Dutch Pancake Maker,Non-stick,Dutch Poffertjes Grill,Stainless Steel,Breakfast,Snacks,Desserts. |
|
| 3 | Gourmia 12” Crepe Maker – Nonstick Electric Griddle for Pancakes, Omelets & More, Precise Temp Control with Indicator Lights, Includes Spatula & Batter Spreader, Quick Cleanup, Stainless Steel Trim |
|
| 4 | Baker\'s Friend Instant Crepe Maker with Handle, Electric Crepe Maker Machine, Crepera Electrica, 8 Inch Non-stick Cooking Surface, Aqua |
|
| 5 | Nutrichef Electric Crepe Maker & Griddle Cooktop - Nonstick 12 Inch Aluminum Hot Plate with LED Indicator Lights & Adjustable Temperature Control - Wooden Spatula & Batter Spreader Included |
|
| 6 | ULTICOR Mini Pancake Maker – 14-Hole Electric Poffertjes Pan – Non-Stick Dutch Mini Pancakes Griddle – Easy to Use, Easy to Clean – Perfect for Breakfast, Desserts, Snacks & More |
|
| 7 | Moss & Stone Electric Crepe Maker – 8” Portable Crepe Pan Nonstick with Dipping Plate, Auto Shut-Off, On/Off Switch, Even Heating & One Automatic Temperature Control – Compact Crepe Maker |
|
| 8 | nutrichef Electric Crepe Maker Pan & Griddle, 12 Inch Nonstick Cooktop, LED Indicators & Adjustable Temperature Control, Includes Spatula, Batter Spreader, Cooks Crepes, Roti & Pancakes |
|
| 9 | Proctor Silex Electric Crepe Maker with 13” Nonstick Griddle for Eggs, Pancakes, Omelets and Quesadillas, with Temperature Control, Spatula, Spreader, Batter Cup, Stainless Steel (38400PS) |
|
| 10 | 24PCS Mini Pancake Maker Machine, Nonstick Electric Dutch Pancakes Griddle, Adjustable Heat Multi-Use Poffertjes Pan, Simple & Easy Baker for Home and Restaurants, Perfect for Breakfast & Desserts |
|
How to Use Your Crepe Maker: A Beginner’s Guide
Ready to make some magic? Using a mini crepe maker for dorms is way easier than it looks. Let’s walk through it step-by-step.
- Prep Your Station: Find a flat, stable surface near an outlet. Get your batter, spreader, spatula, and a plate for the finished crepes ready to go.
- Preheat the Machine: Plug in your crepe maker and turn it on to the desired temperature (medium is usually a great starting point). Wait for the indicator light to signal it’s reached the right heat. This usually only takes a few minutes.
- Pour the Batter: Pour a small amount of batter—about 1/4 cup for a mini maker—onto the center of the hot surface. Don’t overdo it! You can always add a little more if needed.
- Spread it Thin: This is the fun part! Take your T-shaped spreader and, starting from the center, gently spread the batter outwards in a circular motion. The goal is to create a thin, even layer. Work quickly but don’t panic.
- Cook and Wait: Let the crepe cook for about 30-60 seconds. You’ll see the edges start to dry and lift slightly from the surface. The top will go from shiny to matte.
- The Flip: Slide your long spatula completely under the crepe. Take a deep breath and, in one confident motion, lift and flip it over. The other side only needs about 20-30 seconds.
- Serve and Repeat: Slide the finished crepe onto your plate and get ready for the next one!
Pro Tips for Perfect Crepes Every Single Time
Want to level up from beginner to dorm-room pro? Here are a few secrets I’ve picked up over the years.
- Rest Your Batter: After mixing your crepe batter, let it rest in the fridge for at least 30 minutes. This allows the gluten to relax and results in a more tender, delicate crepe.
- The First One is a Test: Never judge your skills by the first crepe. The first one is always a sacrifice to the crepe gods. It helps you test the temperature and get your technique down.
- Don’t Grease a Non-Stick: If you have a good non-stick surface, you shouldn’t need any butter or oil. Adding it can sometimes make the crepe cook unevenly.
- Consistency is Key: Your batter should have the consistency of heavy cream. Too thick, and it won’t spread. Too thin, and it will tear. Adjust with a tablespoon of milk or flour as needed.
Keeping It Clean: Maintenance and Storage 101
Taking care of your crepe maker is simple and will ensure it lasts through all four years of college (and beyond).
Crepe Maker Cleanup Checklist
- [ ] Unplug and Cool Down: Always, always let the machine cool down completely before you even think about cleaning it.
- [ ] Wipe, Don’t Scrub: Use a soft, damp cloth or paper towel to wipe the surface clean. For any stubborn bits, a little bit of warm, soapy water on the cloth should do the trick.
- [ ] Never Submerge: Your electric crepe maker is an electrical appliance. Never put it in the sink or run it under water.
- [ ] Dry Thoroughly: Make sure the surface is completely dry before storing it to prevent any damage.
- [ ] Store Smart: Store it flat to protect the non-stick surface. If it came with a box, keeping it in there isn’t a bad idea.
Beyond the Crepe: Creative Uses for Your Mini Maker
Here’s where your mini crepe maker for dorms truly shines. It’s not a one-trick pony! Think of it as your personal mini griddle for all sorts of deliciousness.
- Quesadillas: Perfect for a quick, cheesy lunch.
- Fried or Scrambled Eggs: Just use it like a small frying pan.
- Pancakes: You can make small, fluffy pancakes with ease.
- Heating Tortillas: Ideal for making soft tacos or wraps.
- Blintzes: A close cousin to the crepe, filled with sweet cheese.
- Melty Sandwiches: A mini grilled cheese is just minutes away.
Frequently Asked Questions
Q: Can I use pancake mix in a mini crepe maker for dorms?
A: You can, but you’ll need to thin it out significantly. Add milk or water to your pancake mix until it reaches the consistency of heavy cream to get a crepe-like result. Otherwise, you’ll just be making a very flat pancake!
Q: Is a mini crepe maker safe to use in a dorm room?
A: Generally, yes. Most dorms allow small, enclosed-heating-element appliances like this. It’s much safer than an open hot plate. However, always check your specific dorm’s rules and regulations first.
Q: How do I know when to flip the crepe?
A: The best visual cue is the edges. They will start to look dry and may even curl up slightly. The surface of the crepe will also change from a wet sheen to a matte finish. When you can easily slide a spatula underneath, it’s ready.
Q: My crepes keep tearing. What am I doing wrong?
A: Tearing is usually caused by one of three things: the batter is too thin, the heat is too low, or you’re not letting it cook long enough before flipping. Try letting it cook for another 15-20 seconds.
Q: Do I need to season my crepe maker like a cast-iron skillet?
A: No, you do not. Modern crepe makers come with a non-stick coating that is ready to use right out of the box. Seasoning is a process for porous materials like cast iron, not for non-stick surfaces.
Your Dorm Room Culinary Adventure Awaits
So there you have it. A mini crepe maker for dorms isn’t just another gadget; it’s a ticket to better food, a fun way to de-stress from classes, and a fantastic tool for making friends (who doesn’t love the person making fresh crepes?). It’s compact, versatile, and opens up a world of culinary possibilities that go far beyond the humble crepe. It proves that even in the smallest of spaces, you can create something truly delicious.
Now go on, get that crepe maker, and start flipping! We’d love to hear about the amazing creations you cook up in your dorm room.