Hey there, fellow crepe enthusiast! Welcome to the heart of Crepe Maker Depot, where we believe a perfect crepe can turn any day around. If you’re here, you’ve either just unboxed a shiny new crepe maker or you’re looking to up your game. You’re in the right place. To truly master this culinary art, having the right tools is non-negotiable. That’s why we’ve put together the definitive list of Crepe Maker Accessories Must Have 2025. Think of this as your secret weapon to crafting those paper-thin, golden-brown circles of joy, every single time. Let’s dive in and transform your kitchen into a little slice of Parisian heaven.
What is a Crepe Maker, Anyway?
So, what exactly sets a crepe maker apart from a standard frying pan? A crepe maker is a specialized cooking appliance, typically a flat, circular griddle, designed specifically for cooking crepes. Its large, rimless or low-rimmed surface gives you the space and freedom to spread batter incredibly thin and flip with ease—something that’s a real headache with a regular skillet. Whether electric or a stovetop pan, its purpose is to provide consistent, even heat, which is the secret to avoiding those dreaded burnt spots and uncooked centers.
Electric vs. Pan: Which Crepe Companion is Right for You?
Choosing between an electric crepe maker and a traditional crepe pan can feel like a big decision. Let’s be real, both can get the job done, but they offer very different experiences. One isn’t inherently “better” than the other; it’s all about your cooking style, kitchen space, and how much control you crave.
| Feature | Electric Crepe Maker | Traditional Crepe Pan (Stovetop) |
|---|---|---|
| Heat Control | Excellent. Usually has a built-in thermostat for precise temperature settings. | Varies. Depends on your stovetop’s performance and your ability to manage it. |
| Ease of Use | Very beginner-friendly. “Set it and forget it” temperature. | Requires more practice to find and maintain the perfect heat level. |
| Portability | Can be used anywhere with an outlet. Great for parties or brunch stations. | Limited to the stovetop. |
| Versatility | Primarily for crepes, but also great for pancakes, blinis, and tortillas. | Can double as a regular frying pan for eggs, bacon, etc. |
| Storage | Can be bulkier and require dedicated storage space. | Often thinner and easier to store with other pans. |
Ultimately, if you’re serious about making crepes often and want foolproof results, an electric model is a fantastic investment. If you’re a minimalist or a seasoned cook who trusts their stovetop skills, a high-quality pan will serve you beautifully.
Key Features and Crepe Maker Accessories Must Have 2025
This is where the magic happens. A crepe maker is a fantastic start, but the accessories are what elevate your process from clumsy to graceful. Having the right crepe maker accessories must have 2025 is essential for achieving that professional, uniform look and taste.
The Batter Spreader: Your Magic Wand
The ‘T’-shaped wooden or nylon tool is iconic for a reason. Its job is to thinly and evenly spread the batter across the hot surface in a swift, circular motion. Without it, you’re likely to end up with a thick, pancake-like blob instead of a delicate crepe.
- Pro Tip: Dip the spreader in water just before you use it. This prevents the batter from sticking to it, allowing for a super smooth glide.
The Spatula: The Flipper’s Best Friend
Forget your chunky silicone spatula. A proper crepe spatula is long, thin, and slightly flexible. This design allows you to slide it completely under the delicate crepe without tearing it, making that crucial flip an act of elegance rather than a moment of panic. Stainless steel and wood are popular choices.
The Batter Dispenser: For No-Mess Perfection
Tired of dripping batter all over your counter and getting inconsistent crepe sizes? A batter dispenser is a game-changer. It allows you to pour the perfect amount of batter onto the griddle every time, with zero mess. It’s a simple tool that brings a surprising amount of control and cleanliness to your workflow.
The Oiling Pad and Tray: The Pro’s Secret
Ever wonder how crêperies get that perfect, non-stick surface batch after batch? They use an oiling pad. It’s a simple felt pad on a handle that you lightly dip in oil and wipe across the crepe maker’s surface between each crepe. It creates a micro-thin, even layer of oil that a brush or paper towel simply can’t replicate.
|
Our Picks for the Best Crepe Maker in 2025
As an Amazon Associate, we earn from qualifying purchases.
|
||
| Num | Product | Action |
|---|---|---|
| 1 | 24PCS Mini Pancake Maker Machine, Nonstick Electric Dutch Pancakes Griddle, Adjustable Heat Multi-Use Poffertjes Pan, Simple & Easy Baker for Home and Restaurants, Perfect for Breakfast & Desserts |

|
| 2 | Proctor Silex Electric Crepe Maker with 13” Nonstick Griddle for Eggs, Pancakes, Omelets and Quesadillas, with Temperature Control, Spatula, Spreader, Batter Cup, Stainless Steel (38400PS) |
|
| 3 | 110V US Commercial 25PCS Mini Pancake Maker,950W Mini Dutch Pancake Maker,Non-stick,Dutch Poffertjes Grill,Stainless Steel,Breakfast,Snacks,Desserts. |
|
| 4 | Gourmia 8” Crepe Maker – Nonstick Ceramic Electric Griddle for Crepes, Tortillas & Omelets, Automatic Batter Dipping, Compact & Lightweight, Quick Heat-Up, Includes Batter Plate, Easy Cleanup |
|
| 5 | Moss & Stone Electric Crepe Maker – 8” Portable Crepe Pan Nonstick with Dipping Plate, Auto Shut-Off, On/Off Switch, Even Heating & One Automatic Temperature Control – Compact Crepe Maker |
|
| 6 | nutrichef Electric Crepe Maker Pan & Griddle, 12 Inch Nonstick Cooktop, LED Indicators & Adjustable Temperature Control, Includes Spatula, Batter Spreader, Cooks Crepes, Roti & Pancakes |
|
| 7 | Gourmia 12” Crepe Maker – Nonstick Electric Griddle for Pancakes, Omelets & More, Precise Temp Control with Indicator Lights, Includes Spatula & Batter Spreader, Quick Cleanup, Stainless Steel Trim |
|
| 8 | Baker\'s Friend Instant Crepe Maker with Handle, Electric Crepe Maker Machine, Crepera Electrica, 8 Inch Non-stick Cooking Surface, Aqua |
|
| 9 | Nutrichef Electric Crepe Maker & Griddle Cooktop - Nonstick 12 Inch Aluminum Hot Plate with LED Indicator Lights & Adjustable Temperature Control - Wooden Spatula & Batter Spreader Included |
|
| 10 | ULTICOR Mini Pancake Maker – 14-Hole Electric Poffertjes Pan – Non-Stick Dutch Mini Pancakes Griddle – Easy to Use, Easy to Clean – Perfect for Breakfast, Desserts, Snacks & More |
|
How Do You Use a Crepe Maker for the First Time?
Feeling a little intimidated? Don’t be! Using a crepe maker is surprisingly simple once you get the hang of it. Follow these steps for your first successful batch.
- Preparation is Key: Lightly grease your cold crepe maker with butter or oil using an oiling pad or a paper towel. Then, turn it on and set it to your desired temperature (medium-high is usually a good starting point, around 400°F or 200°C). Let it heat up completely.
- The Perfect Pour: Once hot, pour a small amount of batter (about 1/4 to 1/3 cup, depending on the size of your maker) onto the center of the griddle. A batter dispenser makes this step foolproof.
- Spread the Love: Immediately grab your batter spreader. Starting from the center, use a light, confident, circular motion to spread the batter out into a large, thin circle. Work quickly!
- Cook and Watch: Let the crepe cook for about 30-60 seconds. You’ll see the edges start to dry and lift slightly from the surface. The top should no longer look wet.
- The Moment of Truth (The Flip): Take your long spatula and gently slide it all the way under the crepe. Lift and flip it over in one smooth motion.
- The Final Touch: Cook the other side for another 20-30 seconds. It won’t need as long. Once it’s lightly golden, slide it off onto a plate and get ready for the next one!
My Pro Tips for Flawless Crepes Every Single Time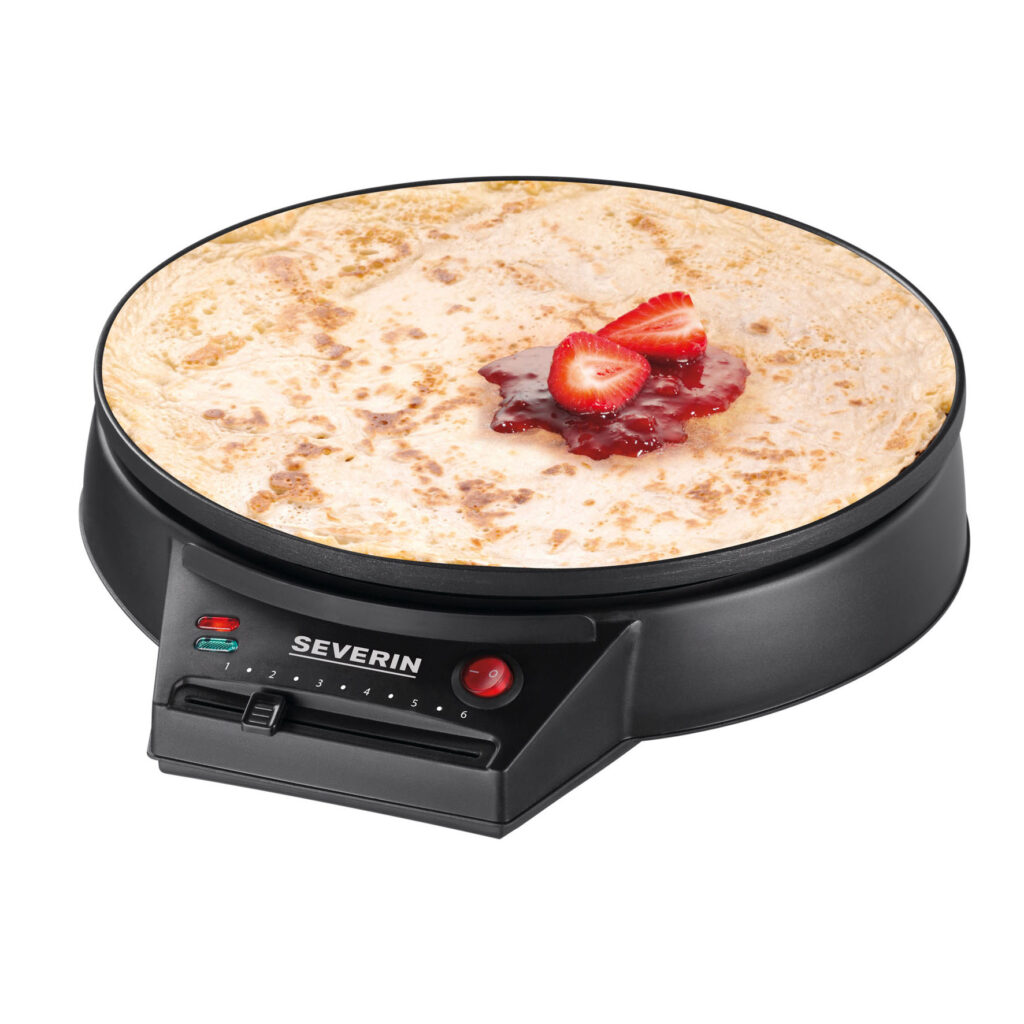
I remember my first attempts at making crepes were, to put it mildly, a disaster. We’re talking torn, lumpy, and unevenly cooked messes. But over the years, I’ve picked up a few tricks that I swear by.
- Rest Your Batter: This is the most important tip. Let your batter rest in the fridge for at least 30 minutes, or even overnight. This allows the gluten to relax and the flour to fully hydrate, resulting in a much more tender and less “stretchy” crepe.
- Temperature is Everything: Too hot, and your crepe will burn before you can spread it. Too cool, and it will be pale and rubbery. You’re looking for that perfect medium-high sweet spot where a drop of water sizzles instantly but doesn’t evaporate aggressively.
- Don’t Be Afraid to Toss the First One: It’s a running joke among chefs that the first pancake or crepe is always a throwaway. Use it as a test to gauge your temperature and technique.
- Keep it Light: Use a very light touch when spreading the batter. You’re guiding it, not forcing it.
“The single most critical factor for a perfect crepe is consistent heat distribution. An electric crepe maker with precise thermostatic control takes the guesswork out of the equation, giving you that uniform, golden finish every time.” – Chef Isabelle Dubois, Pastry Consultant
How to Clean Your Crepe Maker (The Right Way)
Proper cleaning is essential to protect the non-stick surface and extend the life of your machine. Never, ever submerge an electric crepe maker in water.
- Let it Cool Down: Always wait for the crepe maker to cool down completely before cleaning.
- Wipe it Down: Use a soft, damp cloth or sponge to wipe away any leftover crumbs or batter bits.
- Tackle Stubborn Spots: For any stuck-on batter, pour a little warm water onto the spot, let it sit for a few minutes to soften, and then gently wipe it away. Avoid using metal utensils or abrasive scrubbers, which will scratch the non-stick coating.
- Dry Thoroughly: Once clean, wipe the surface dry with a soft cloth before storing it.
Think Beyond the Crepe: What Else Can You Cook?
Your crepe maker is more versatile than you think! Its large, flat, consistent heating surface is perfect for a variety of other delicious treats. Think of it as a specialized electric griddle. You can easily make:
- American-style pancakes
- Delicate blinis for appetizers
- Flour tortillas
- Crispy quesadillas
- Indian dosa or uttapam
- Sizzling bacon or sausage patties
Frequently Asked Questions
Q: What is the best temperature for making crepes?
A: The ideal temperature is typically between 375-400°F (190-200°C). This is hot enough to cook the crepe quickly and create a golden color without burning it before you’ve had a chance to spread the batter.
Q: Why are my crepes sticking to the crepe maker?
A: Sticking usually happens for two reasons: the surface isn’t hot enough when you pour the batter, or it’s not lightly greased. Ensure your crepe maker is fully preheated and wipe it with a very thin layer of butter or oil before the first crepe and every few crepes after.
Q: Can I use regular pancake batter in a crepe maker?
A: You can, but you won’t get a true crepe. Pancake batter is much thicker and contains leavening agents like baking powder, which will result in a fluffier, thicker product. Crepe batter is thin and liquidy by design to create that signature delicate texture.
Q: Do I really need a special crepe spreader and spatula?
A: While you can try to make do with other tools, a dedicated spreader and spatula make the process infinitely easier and give you far better results. They are specifically designed for the unique challenges of spreading and flipping a large, delicate crepe.
Q: How often should I season my cast iron crepe pan?
A: If you’re using a traditional cast iron crepe pan, you should season it before the first use and then re-season it whenever you notice food starting to stick. A well-seasoned pan will develop a natural non-stick patina over time.
Your Crepe Adventure Awaits
Stepping into the world of crepe making is more than just learning a recipe; it’s about embracing a process. With a great machine and the right toolkit, you unlock a world of culinary creativity, from sweet breakfast treats to savory dinner masterpieces. Investing in the crepe maker accessories must have 2025 isn’t just about buying gadgets; it’s about setting yourself up for success and making the entire experience smoother, more fun, and more delicious. Now, go on and get flipping! We’d love to hear about your favorite crepe fillings in the comments below.