Hey there, fellow food lover! Welcome to Crepe Maker Depot. If you’re here, you’ve probably dreamt of flipping those paper-thin, golden-brown crepes right in your own kitchen. I get it. There’s a certain magic to it. But then you start shopping, and things get confusing fast. Why is one model $30 and another $150? That’s exactly why we’ve put together this ultimate Crepe Maker Price Comparison 2025 guide. We’re going to break down everything you need to know, so you can stop guessing and start flipping with confidence.
What Exactly Is a Crepe Maker, and Why Bother?
So, what’s the big deal? Can’t you just use a frying pan? Well, you can, but it’s a bit like trying to paint a masterpiece with a house roller. A dedicated crepe maker is designed for one primary mission: to give you a large, perfectly even cooking surface with consistent, controllable heat. This consistency is the secret sauce to achieving those impossibly thin, tender crepes without the dreaded burnt spots or raw centers. It takes the guesswork out of the equation, turning a potentially frustrating process into a fun and delicious one.
Navigating the World of Crepe Makers: Electric vs. Pan
When you start your search, you’ll quickly notice two main players in the game: electric models and traditional stovetop pans. Each has its own vibe and is suited for different kinds of cooks.
| Feature | Electric Crepe Maker | Stovetop Crepe Pan |
|---|---|---|
| Heat Source | Self-contained, plugs into an outlet | Requires a stove (gas, electric, induction) |
| Heat Control | Often has precise temperature dials | Depends on your stove’s control |
| Portability | Can be used anywhere with an outlet | Limited to the kitchen |
| Ease of Use | Generally easier for beginners | Requires more skill to manage heat |
| Best For | Consistency, parties, beginners | Traditional feel, experienced cooks |
| Price Range | $30 – $150+ | $25 – $100+ |
An electric model is your best friend if you’re looking for plug-and-play simplicity. A stovetop pan offers a more classic, hands-on experience, but you’ll need to be comfortable managing your burner’s heat.
Decoding the Price Tag: A Crepe Maker Price Comparison 2025 Deep Dive
Alright, let’s get to the heart of the matter. What separates a budget-friendly model from a high-end machine? It all comes down to a few key features. Understanding these will be your superpower when navigating the crepe maker price comparison 2025 landscape.
### Size Matters: From Personal to Party-Sized
The diameter of the cooking surface is a major price driver.
- 7-10 inches: These are smaller, budget-friendly options. Perfect for breakfast for one or two people, or for making smaller blinis or pancakes. They take up less counter space.
- 12-13 inches: This is the sweet spot for most home users. It’s the standard size for a classic, foldable crepe and gives you plenty of room to work. You’ll find the widest variety of models in this size range.
- 14-16 inches: Welcome to the big leagues! These are commercial-grade or prosumer models. They’re fantastic for feeding a crowd but come with a higher price tag and require more storage space.
### The Heat is On: Temperature Control
How well a machine manages its temperature is arguably the most important feature.
- Basic Models (Low-Price): Often have a simple on/off switch with a preset temperature. They get the job done but offer little flexibility.
- Mid-Range Models (Medium-Price): Typically feature a variable temperature dial (e.g., low, medium, high settings). This gives you more control to find the perfect heat for your batter.
- High-End Models (High-Price): Boast precise, thermostat-controlled temperature settings. This means you can set it to an exact temperature, and the machine will maintain it, ensuring flawless results every single time.
As our friend and renowned pastry expert, Chef Isabelle Dubois, always says, “Precision temperature control is the unsung hero of a perfect crepe. It’s what separates a beautifully golden, delicate lace from a tough, unevenly cooked pancake.”
### Surface Level: Non-Stick Coatings
The cooking surface is where the magic happens. A good non-stick surface means easy flipping and even easier cleanup.
- Standard Teflon/PTFE: Found on most entry-level to mid-range models. It’s effective and affordable but requires care to avoid scratching.
- Ceramic Non-Stick: A popular alternative, often marketed as a more “natural” option. It performs very well but can sometimes lose its non-stick properties faster than traditional coatings if not cared for properly.
- Enameled Cast Iron: The gold standard found on premium, often French-made, models. It offers unparalleled heat retention and durability but requires seasoning and more careful maintenance. This is a key reason for a higher price point.
### The Extras: What’s in the Box?
Often, a higher price includes a suite of helpful accessories that make the process smoother, especially for beginners. Look for kits that include:
- A Batter Spreader (The “T”): Essential for getting that signature paper-thin layer of batter.
- A Spatula: A long, thin spatula (often wood or heat-safe nylon) is crucial for lifting and flipping the delicate crepe.
- Recipe Book: A nice bonus to give you some inspiration beyond the basic sugar and lemon.
|
Our Picks for the Best Crepe Maker in 2025
As an Amazon Associate, we earn from qualifying purchases.
|
||
| Num | Product | Action |
|---|---|---|
| 1 | ULTICOR Mini Pancake Maker – 14-Hole Electric Poffertjes Pan – Non-Stick Dutch Mini Pancakes Griddle – Easy to Use, Easy to Clean – Perfect for Breakfast, Desserts, Snacks & More |

|
| 2 | Baker\'s Friend Instant Crepe Maker with Handle, Electric Crepe Maker Machine, Crepera Electrica, 8 Inch Non-stick Cooking Surface, Aqua |
|
| 3 | Moss & Stone Electric Crepe Maker – 8” Portable Crepe Pan Nonstick with Dipping Plate, Auto Shut-Off, On/Off Switch, Even Heating & One Automatic Temperature Control – Compact Crepe Maker |
|
| 4 | Gourmia 8” Crepe Maker – Nonstick Ceramic Electric Griddle for Crepes, Tortillas & Omelets, Automatic Batter Dipping, Compact & Lightweight, Quick Heat-Up, Includes Batter Plate, Easy Cleanup |
|
| 5 | 24PCS Mini Pancake Maker Machine, Nonstick Electric Dutch Pancakes Griddle, Adjustable Heat Multi-Use Poffertjes Pan, Simple & Easy Baker for Home and Restaurants, Perfect for Breakfast & Desserts |
|
| 6 | Proctor Silex Electric Crepe Maker with 13” Nonstick Griddle for Eggs, Pancakes, Omelets and Quesadillas, with Temperature Control, Spatula, Spreader, Batter Cup, Stainless Steel (38400PS) |
|
| 7 | Nutrichef Electric Crepe Maker & Griddle Cooktop - Nonstick 12 Inch Aluminum Hot Plate with LED Indicator Lights & Adjustable Temperature Control - Wooden Spatula & Batter Spreader Included |
|
| 8 | nutrichef Electric Crepe Maker Pan & Griddle, 12 Inch Nonstick Cooktop, LED Indicators & Adjustable Temperature Control, Includes Spatula, Batter Spreader, Cooks Crepes, Roti & Pancakes |
|
| 9 | Gourmia 12” Crepe Maker – Nonstick Electric Griddle for Pancakes, Omelets & More, Precise Temp Control with Indicator Lights, Includes Spatula & Batter Spreader, Quick Cleanup, Stainless Steel Trim |
|
| 10 | 110V US Commercial 25PCS Mini Pancake Maker,950W Mini Dutch Pancake Maker,Non-stick,Dutch Poffertjes Grill,Stainless Steel,Breakfast,Snacks,Desserts. |
|
How Do I Use a Crepe Maker for the First Time?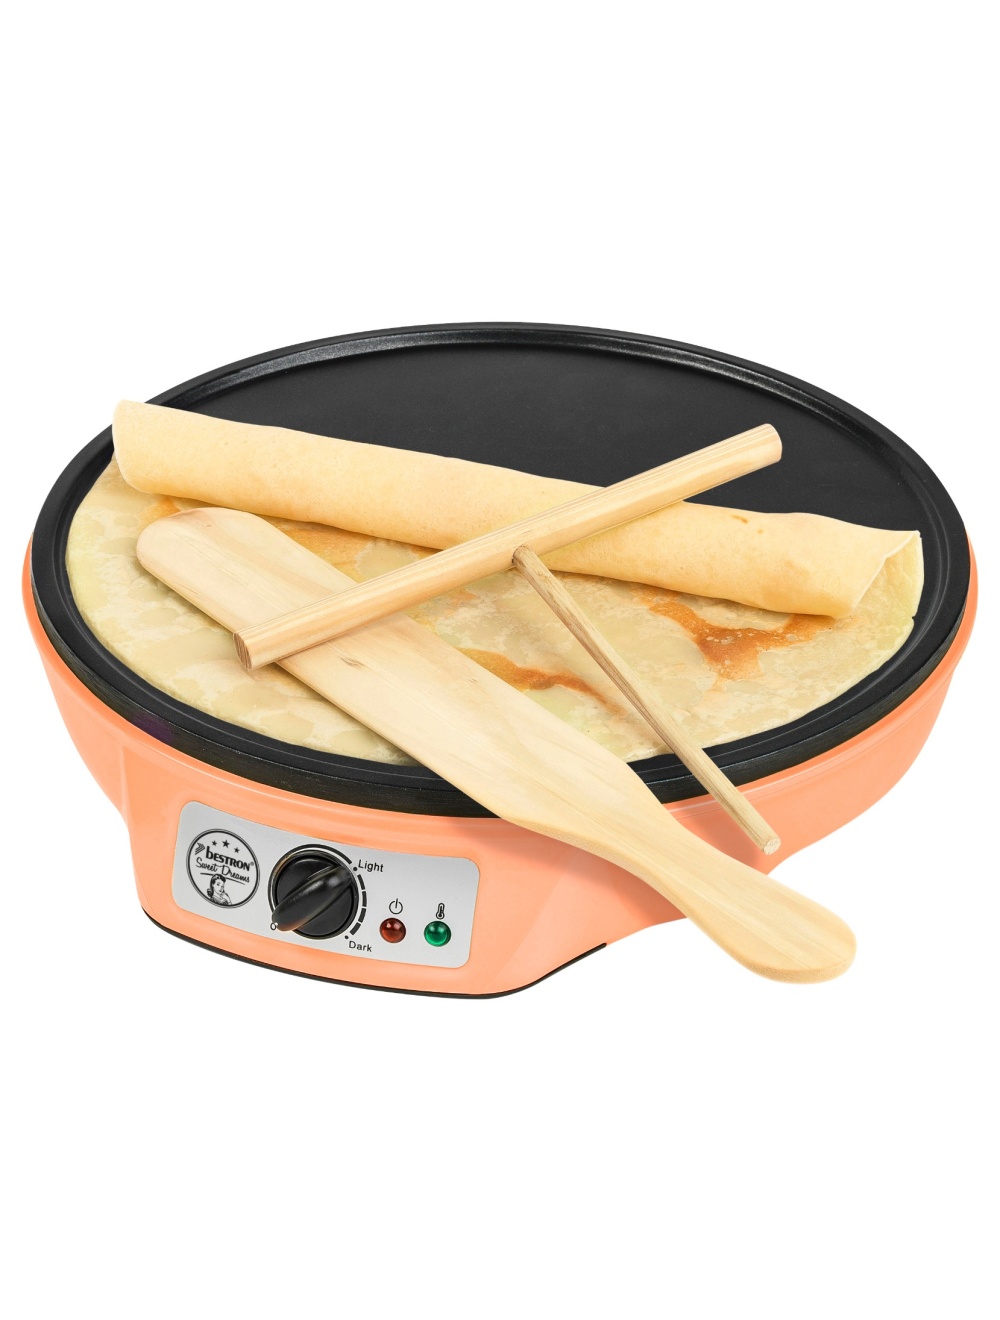
Don’t be intimidated! It’s easier than it looks. A great crepe maker does most of the heavy lifting for you. Here’s a quick-start guide to get you going.
- Preparation is Key: Lightly grease the surface with a bit of butter or oil on a paper towel. Do this before you turn it on for the first time.
- Heat It Up: Turn your crepe maker on and let it preheat completely. Most models have an indicator light that tells you when it’s ready. A hot surface is critical for a good crepe.
- Pour and Spread: Ladle a small amount of batter (about 1/4 to 1/3 cup for a 12-inch maker) onto the center. Immediately grab your T-shaped spreader and, starting from the center, spread the batter outwards in a smooth, circular motion. Don’t press down hard. Just let the spreader glide over the batter.
- Cook and Wait: Let it cook for about 30-60 seconds. You’ll see the edges start to dry and lift slightly. The surface will change from shiny to matte.
- The Flip: Gently slide your spatula under the edge of the crepe. Lift it up and quickly flip it over. This second side only needs about 20-30 seconds.
- Fill and Fold: Slide your perfect crepe onto a plate, add your favorite fillings, and fold it up. Voila!
Tips from the Depot: Achieving Crepe Perfection
I remember my first crepe… it looked more like a scrambled pancake. We’ve all been there! Here are a few tricks I’ve learned over the years to guarantee success.
- Rest Your Batter: Always let your batter rest in the fridge for at least 30 minutes. This allows the gluten to relax, resulting in a much more tender crepe.
- The First One is for the Chef: Don’t stress if the first crepe is a dud. It’s a tradition! The first one is usually a test to see if the heat is right and the surface is seasoned.
- Keep ’em Warm: If you’re making a big batch, place a plate over a pot of simmering water. As you finish each crepe, stack it on the plate. The gentle steam will keep them warm and soft.
- Control Your Pour: Use a measuring cup or ladle for your batter. Using the same amount each time will give you consistently sized crepes.
Keeping It Clean: How to Care for Your Crepe Maker
Proper care will keep your crepe maker happy for years to come.
- Cool Down Completely: Never pour cold water on a hot surface. Let it cool down first.
- Wipe, Don’t Scrub: For non-stick surfaces, a simple wipe with a damp, soft cloth is usually all you need.
- Avoid Metal Utensils: Stick to the wood or plastic tools that came with your maker to avoid scratching the non-stick coating.
- Deep Clean (Rarely): If you have buildup, use a soft cloth with a tiny bit of dish soap and warm water. Wipe it clean with a fresh damp cloth afterward.
More Than Just Crepes: Unlocking Your Maker’s Potential
Don’t put that machine away after breakfast! Your crepe maker is a surprisingly versatile kitchen gadget. Think of it as a mini griddle. You can use it to make:
- American-style pancakes and silver dollars
- Flour tortillas
- Scrambled eggs or a thin omelet
- Grilled cheese sandwiches
- Quesadillas
Frequently Asked Questions
What’s the best temperature for making crepes?
The ideal temperature is medium-high, typically around 375-400°F (190-200°C). If your maker has a dial, start in the middle and adjust as needed. You want the batter to set quickly but not burn before you can spread it.
Can I use pancake batter on a crepe maker?
Absolutely! Pancake batter is thicker, so you won’t be able to spread it as thin, but it works perfectly for making fluffy, evenly cooked pancakes. Just pour it on and let it be.
Is a more expensive crepe maker really worth it?
It depends on your goals. If you plan to make crepes often and value precision and durability, investing in a model with better heat control and a higher-quality surface is definitely worth it. For occasional use, a reliable mid-range model is often the perfect choice.
What are the essential accessories I need?
The two non-negotiables are a T-shaped batter spreader and a long, thin spatula for flipping. Most quality makers include these, but they can also be purchased separately.
How do I stop my crepes from tearing when I flip them?
This usually happens for two reasons: the heat is too low (the crepe isn’t set enough) or you’re trying to flip it too early. Make sure the surface looks matte and the edges are lifting before you go in with the spatula.
We hope this crepe maker price comparison 2025 guide has armed you with the knowledge to choose the perfect machine for your culinary adventures. Owning a crepe maker is about more than just a piece of equipment; it’s about creating moments, sharing delicious food, and bringing a little bit of that Parisian cafe magic into your home. Now, go get flipping! We’d love to hear about your creations in the comments below.