Welcome to the heart of the kitchen, where the magic happens! If you’re reading this Dual Plate Crepe Maker Review, you’ve probably faced the classic breakfast bottleneck: one delicious crepe is ready, but three hungry family members are waiting. Or perhaps you’re a budding entrepreneur dreaming of a bustling market stall, where speed and consistency are the name of the game. Whatever your story, you’ve realized that a single cooking surface just isn’t cutting it anymore. I’ve been there, spatula in hand, feeling the pressure. That’s where the dual plate crepe maker steps in, not just as a kitchen appliance, but as a game-changer. It’s about doubling your output without doubling your effort, transforming a frantic cooking session into a graceful, delicious dance.
Why You Absolutely Need a Crepe Maker in Your Kitchen
First things first, let’s talk about why a dedicated crepe maker is a must-have for any serious foodie. You might think, “Can’t I just use a frying pan?” And sure, you can, in the same way you can use a butter knife as a screwdriver. It might get the job done, but it’s messy, inconsistent, and frankly, a bit of a hassle. A real crepe maker is designed for one purpose: to create impossibly thin, perfectly even, golden-brown crepes every single time. Its large, flat, and often non-stick surface gives you the canvas you need to spread your batter paper-thin, something that’s nearly impossible with the sloped sides of a standard skillet.
A Quick Tour of the Crepe Maker Universe
Before we dive deep into the dual plate models, it’s helpful to understand the landscape. Crepe makers generally fall into a few main categories.
| Feature | Electric Crepe Maker | Traditional Crepe Pan |
|---|---|---|
| Heat Source | Built-in electric coil | Stovetop (gas, electric, induction) |
| Temperature | Precise, adjustable thermostat | Requires manual heat management |
| Consistency | Excellent; even heat distribution | Can have hot spots; requires practice |
| Portability | Requires an outlet | Highly portable; can use anywhere |
| Best For | Beginners, high-volume cooking | Experienced cooks, camping, small kitchens |
While traditional pans have their rustic charm, electric models offer a level of control that is essential for achieving perfection. And when you want to take that control to the next level for efficiency, the dual plate is king.
The Heart of Our Dual Plate Crepe Maker Review: Key Features
So, what makes a dual plate crepe maker the ultimate tool for crepe enthusiasts and professionals? It’s all in the details. When you’re looking to invest in one, these are the non-negotiable features you should be examining.
What Makes a Dual Plate Crepe Maker a Smart Investment?
A dual plate crepe maker is a specialized appliance featuring two independent cooking surfaces, allowing you to cook two crepes simultaneously. This design is incredibly efficient for anyone serving multiple people, running a small food business, or simply wanting to speed up their breakfast routine significantly, cutting cooking time in half.
Size and Surface: Your Culinary Canvas
The first thing you’ll notice is the size. Most professional-grade dual plate models feature two large surfaces, typically around 15-16 inches (40cm) in diameter. This generous size allows you to make substantial, restaurant-quality crepes that can be folded around a host of fillings. The cooking surface itself is usually made of cast iron or coated with a commercial-grade non-stick material.
- Cast Iron: The choice of the pros. It requires “seasoning” but provides unparalleled heat retention and distribution. A well-seasoned cast iron surface gives crepes a distinct, slightly crispy texture that’s to die for.
- Non-stick: More user-friendly and easier to clean, making it a great option for home use or for those just starting out. Just be sure to use wooden or silicone tools to avoid scratching the surface.
Temperature Control is Everything
This is where a quality machine truly shines. Look for a dual plate crepe maker with independent thermostatic controls for each plate. Why? Because you might be at different stages on each side. One crepe might be finishing up while you’re just spreading the batter for the next. Independent controls give you the flexibility to maintain a perfect cooking temperature (usually around 375-400°F or 190-200°C) on one side while slightly adjusting the other.
As my friend, renowned Pastry Chef Jean-Luc Moreau, always says, “The secret to a perfect crepe is not in the batter, but in the heat. Unstable heat gives you a pancake; precise, consistent heat gives you art.”
Material Matters: Built to Last
These machines are workhorses. The body should be constructed from durable stainless steel. It’s not just for looks; stainless steel is hygienic, easy to wipe down, and resistant to rust and corrosion, which is crucial in a busy kitchen environment. A sturdy build also means the machine won’t wobble as you’re spreading batter or flipping crepes.
|
Our Picks for the Best Crepe Maker in 2025
As an Amazon Associate, we earn from qualifying purchases.
|
||
| Num | Product | Action |
|---|---|---|
| 1 | 110V US Commercial 25PCS Mini Pancake Maker,950W Mini Dutch Pancake Maker,Non-stick,Dutch Poffertjes Grill,Stainless Steel,Breakfast,Snacks,Desserts. |

|
| 2 | Baker\'s Friend Instant Crepe Maker with Handle, Electric Crepe Maker Machine, Crepera Electrica, 8 Inch Non-stick Cooking Surface, Aqua |
|
| 3 | ULTICOR Mini Pancake Maker – 14-Hole Electric Poffertjes Pan – Non-Stick Dutch Mini Pancakes Griddle – Easy to Use, Easy to Clean – Perfect for Breakfast, Desserts, Snacks & More |
|
| 4 | Gourmia 8” Crepe Maker – Nonstick Ceramic Electric Griddle for Crepes, Tortillas & Omelets, Automatic Batter Dipping, Compact & Lightweight, Quick Heat-Up, Includes Batter Plate, Easy Cleanup |
|
| 5 | 24PCS Mini Pancake Maker Machine, Nonstick Electric Dutch Pancakes Griddle, Adjustable Heat Multi-Use Poffertjes Pan, Simple & Easy Baker for Home and Restaurants, Perfect for Breakfast & Desserts |
|
| 6 | Gourmia 12” Crepe Maker – Nonstick Electric Griddle for Pancakes, Omelets & More, Precise Temp Control with Indicator Lights, Includes Spatula & Batter Spreader, Quick Cleanup, Stainless Steel Trim |
|
| 7 | nutrichef Electric Crepe Maker Pan & Griddle, 12 Inch Nonstick Cooktop, LED Indicators & Adjustable Temperature Control, Includes Spatula, Batter Spreader, Cooks Crepes, Roti & Pancakes |
|
| 8 | Proctor Silex Electric Crepe Maker with 13” Nonstick Griddle for Eggs, Pancakes, Omelets and Quesadillas, with Temperature Control, Spatula, Spreader, Batter Cup, Stainless Steel (38400PS) |
|
| 9 | Moss & Stone Electric Crepe Maker – 8” Portable Crepe Pan Nonstick with Dipping Plate, Auto Shut-Off, On/Off Switch, Even Heating & One Automatic Temperature Control – Compact Crepe Maker |
|
| 10 | Nutrichef Electric Crepe Maker & Griddle Cooktop - Nonstick 12 Inch Aluminum Hot Plate with LED Indicator Lights & Adjustable Temperature Control - Wooden Spatula & Batter Spreader Included |
|
Your First Crepe: A Step-by-Step Guide for Newbies
Got your new crepe maker? Fantastic! Let’s get you from zero to crepe hero. Don’t be intimidated; it’s easier than it looks.
- Prepare the Machine: If you have a cast iron surface, you’ll need to season it first (follow the manufacturer’s instructions). For any model, give it a wipe-down and preheat it to your desired temperature. A little droplet of water should sizzle and evaporate almost instantly when it’s ready.
- Grease Lightly: A tiny bit of butter or oil on a paper towel, wiped quickly across the surface, is all you need. You’re not frying it, just creating a micro-layer to prevent any sticking.
- The Pour: Use a ladle to pour a controlled amount of batter into the center of the hot plate. For a 16-inch surface, about 2/3 of a cup is a good starting point.
- The Spread: This is the fun part! Take your T-shaped crepe spreader. Start in the center and, with a light, fluid motion, pull the batter outwards in a spiral. The goal is to create a thin, even circle. Don’t press down hard! Let the tool do the work.
- The Cook: It happens fast! After about 30-45 seconds, the edges will start to look dry and may curl up slightly. The surface will look set, not liquidy.
- The Flip: Slide a long, thin spatula under the crepe to loosen it. In one confident motion, lift and flip it over. The second side needs even less time, maybe 15-20 seconds.
- Serve and Repeat: Slide the finished crepe onto a plate and get started on your next one. With a dual plate model, you can get the second one going while the first one is cooking!
From Good to Gourmet: Tips for Perfect Crepes Every Time
- Let Your Batter Rest: After mixing, let your batter rest in the fridge for at least 30 minutes. This allows the gluten to relax and the flour to fully hydrate, resulting in a more tender, flavorful crepe.
- The First Crepe is for the Chef: It’s an old saying for a reason. The first crepe is almost always a sacrifice. Use it to test the temperature and your spreading technique. Don’t get discouraged!
- Keep Them Warm: If you’re making a big batch, you can keep the finished crepes warm by stacking them on a plate with a piece of parchment paper between each one and covering them with a clean kitchen towel.
How Do You Clean a Crepe Maker to Make It Last?
Proper care is essential. Always let the machine cool down completely first. For non-stick surfaces, a simple wipe with a damp cloth or sponge is usually sufficient. For cast iron, scrape off any residue with a wooden spatula and then wipe it with a paper towel and a little oil to maintain the seasoning. Never submerge an electric crepe maker in water or use harsh, abrasive scrubbers.
Think Outside the Circle: More Than Just Crepes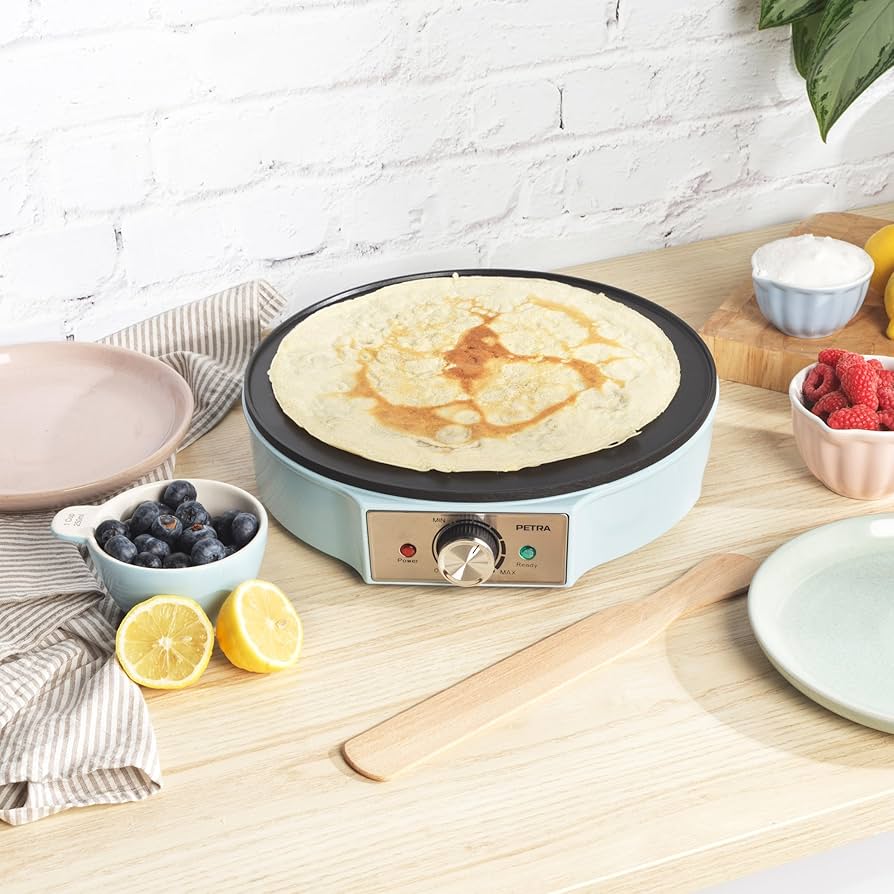
Your dual plate crepe maker is more versatile than you think! The large, flat, temperature-controlled surfaces are perfect for other culinary creations:
- Indian Dosa or Uttapam
- Large, fluffy American-style pancakes
- Heating tortillas for quesadillas
- Frying eggs or bacon for a full breakfast
- Grilling flatbreads
Frequently Asked Questions
Is a dual plate crepe maker worth it for home use?
If you have a large family, entertain often, or are simply passionate about efficiency in the kitchen, it’s absolutely worth it. It turns a time-consuming process into a quick and enjoyable one, making “crepes for everyone” a reality, not a chore.
Can I use different temperatures on each plate?
Yes, and that’s one of their biggest advantages! High-quality models come with two independent thermostats, so you can have one plate on a high searing heat and the other on a lower holding temperature, or cook two different items at once.
What are the essential accessories I need?
At a minimum, you’ll need a T-shaped batter spreader and a long, thin spatula for flipping. Many crepe makers come with these tools included, but it’s always good to have a quality set on hand.
Can I use pancake batter on a crepe maker?
You certainly can! The even heat is fantastic for pancakes. Just be aware that pancake batter is thicker, so you won’t spread it. Simply pour it on and let it cook like you would in a pan.
How much power does a commercial dual plate crepe maker use?
These are powerful machines, often requiring a dedicated electrical circuit, especially in a commercial setting. For home use, be sure to check the wattage and your home’s electrical capacity. They typically range from 2400 to 6000 watts.
The Final Fold
Stepping up to a dual plate crepe maker is about more than just cooking; it’s about embracing efficiency, consistency, and the sheer joy of creating beautiful food for people you care about. It’s an investment that pays for itself in time saved and delicious results. Whether you’re chasing the perfect sweet Nutella-filled dessert or a savory buckwheat galette, having two surfaces ready to go empowers you to be more creative and productive. Hopefully, this dual plate crepe maker review has demystified the process and inspired you to take your crepe game to the next level. Now, what’s the first recipe you’re going to try?