For anyone who has savored the unique, spongy texture and delightful sour tang of injera, the staple flatbread of Ethiopian and Eritrean cuisine, bringing that experience into your home kitchen is a true culinary goal. Traditionally made on a large, flat clay griddle called a mitad, achieving this distinct bread can seem daunting. But what if your trusty crepe maker, a tool often overlooked for such a specific dish, is actually your secret weapon? With over a decade of hands-on experience troubleshooting and perfecting cooking surfaces, I can assure you that your crepe maker is remarkably well-suited to the task, offering consistent heat and a broad, non-stick surface perfect for recreating the authentic injera experience.
Why Your Crepe Maker Is the Ideal Injera Griddle
You might associate your crepe maker with delicate French crepes or fluffy American pancakes, but its design makes it an unexpectedly perfect stand-in for a traditional mitad or electric injera stove. Modern crepe makers boast features crucial for successful injera production:
- Even Heat Distribution: Critical for injera to cook uniformly and develop its signature “eyes” (small holes). Crepe makers are engineered for consistent temperature across their entire surface.
- Non-Stick Surface: Injera is delicate and prone to sticking, especially in its raw form. The high-quality non-stick coating on most crepe makers ensures easy release without tearing.
- Large Cooking Area: Many electric crepe makers offer a generous cooking surface, allowing you to make larger injera, closer to the traditional size, or multiple smaller ones simultaneously.
- Precise Temperature Control: The adjustable thermostats on crepe makers give you granular control over the cooking temperature, enabling you to find and maintain the perfect heat for your batter.
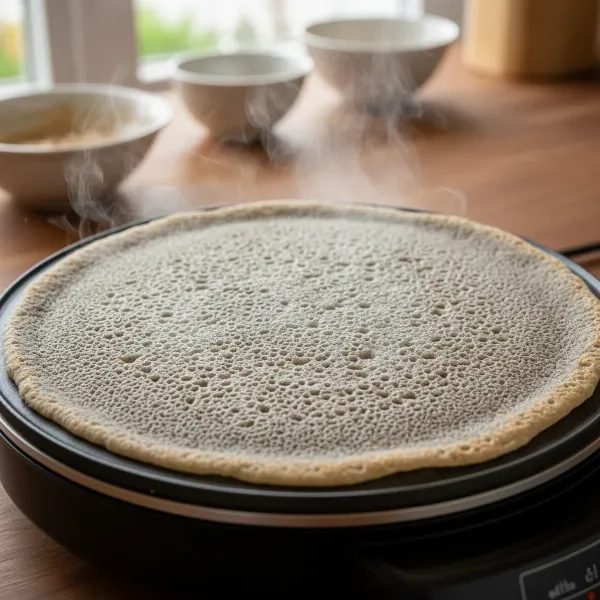 Fresh injera cooking on an electric crepe maker, showing characteristic "eyes" and steam
Understanding Injera Batter: Traditional Fermentation vs. Quick Methods
The heart of great injera lies in its unique batter. There are two primary approaches to preparing it, each with its own characteristics:
Traditional Fermentation for Authentic Flavor
The most authentic injera is a product of slow fermentation, typically over 2 to 5 days. This process develops the characteristic sour flavor and contributes significantly to the spongy texture.
- Ingredients: Primarily 100% teff flour (the tiny, gluten-free grain native to Ethiopia), and water. Some recipes may include a small portion of barley or wheat flour, especially for beginners, as 100% teff can be more challenging to work with.
- Process: Teff flour and water are mixed into a thin batter and left to ferment at room temperature. During this time, natural yeasts and bacteria work their magic, creating lactic acid, which gives injera its distinct sour tang. A traditional step, absit, involves cooking a small portion of the fermented batter into a roux-like paste and stirring it back into the main batter. This gelatinizes starches, adding structure and elasticity, which is vital for the final texture.
|
Our Picks for the Best Crepe maker in 2026
As an Amazon Associate I earn from qualifying purchases.
|
||
| Num | Product | Action |
|---|---|---|
| 1 | Electric Crepe Maker 12'' & Griddle - Non-Stick Pan With Spreader for Roti, Tortilla, Blintzes, Pancakes - Adjustable Temperature, 1000W |

|
| 2 | Nutrichef Electric Crepe Maker - 8-inch Nonstick Cooktop with On/Off Switch - Cooks Roti, Tortillas & Pancakes - Automatic Temperature Control & Cool Touch Handle - Includes Food Bowl, Whisk & Spatula |
|
| 3 | Moss & Stone 12” Electric Griddle Pan & Crepe Machine, Non-Stick Electric Crepe Maker with Adjustable Temperature, Includes Spreader & Spatula – Ideal for Pancakes, Blintzes & Tortillas |
|
| 4 | Gourmia 12” Crepe Maker – Nonstick Electric Griddle for Pancakes, Omelets & More, Precise Temp Control with Indicator Lights, Includes Spatula & Batter Spreader, Quick Cleanup, Stainless Steel Trim |
|
| 5 | 16 Inch Commercial Crepe Maker, Dual-Head, Dual Zone Temp Setting, Nonstick Pancake Griddle Machine, 50-300°C(120-570℉), 3400W, S.S. Shell, for Catering, Restaurant, Snack Stand, CE Certified |
|
| 6 | Moss & Stone Electric Crepe Maker – 8” Portable Crepe Pan Nonstick with Dipping Plate, Auto Shut-Off, On/Off Switch, Even Heating & One Automatic Temperature Control – Compact Crepe Maker |
|
| 7 | Baker's Friend Instant Crepe Maker with Handle, Electric Crepe Maker Machine, Crepera Electrica, 8 Inch Non-stick Cooking Surface, Aqua |
|
| 8 | Nutrichef Electric Crepe Maker & Griddle Cooktop - Nonstick 12 Inch Aluminum Hot Plate with LED Indicator Lights & Adjustable Temperature Control - Wooden Spatula & Batter Spreader Included |
|
| 9 | Gourmia 8” Electric Crepe Maker – Nonstick Ceramic Surface, One-Touch Operation, Includes Batter Tray, Compact & Easy to Clean, Crepe, Pancake & Tortilla Maker |
|
| 10 | Moss & Stone Electric Crepe Maker 8 Inch, Portable Crepe Maker & Hot Plate Cooktop On/Off Switch, Nonstick Coating, Automatic Temperature Control, Easy To Use For Pancakes, Blintz, Chapati |
|
Quick Methods for Convenience
For those who don’t have several days to wait, quicker injera recipes offer a delicious alternative, often achieving a similar texture, though sometimes with a milder sourness.
- Ingredients: These recipes often combine teff flour with all-purpose flour, and incorporate leavening agents like instant yeast, baking soda, and sometimes a splash of apple cider vinegar to speed up fermentation and add a touch of acidity.
- Process: The batter typically ferments for a much shorter period, usually an hour or a few hours, before cooking. While not identical to traditional injera, these methods still yield a satisfyingly soft and bubbly flatbread.
Ingredients You’ll Need
Regardless of whether you choose the traditional or quick method, the basic components are straightforward. Here’s what to gather:
- Teff Flour: The cornerstone of injera. Available in brown or ivory varieties. While 100% teff is ideal, a blend with all-purpose, barley, or whole wheat flour can be more forgiving for newcomers.
- Water: Essential for the batter and fermentation.
- Salt: To season the injera.
- (For Quick Methods): Active dry yeast or instant yeast, baking soda, and apple cider vinegar.
- Cooking Oil or Ghee: For lightly greasing your crepe maker, if necessary, or for seasoning the surface.
Preparing Your Injera Batter: The Foundation of Success
The correct batter consistency is paramount for injera. It needs to be thin enough to spread easily but thick enough to hold its structure and develop the signature “eyes.”
- Mixing: Combine your chosen flours (teff, or teff with other flours) and salt in a large bowl. If using yeast for a quick recipe, activate it in warm water before adding it to the flour. Gradually add water, whisking constantly to prevent lumps.
- Consistency Check: The batter should be similar to a thick crepe batter or thin pancake batter – often described as the consistency of thin gravy. If it’s too thick, add water a tablespoon at a time; if too thin, a spoonful of teff flour can help.
- Fermentation:
- Traditional: Cover the bowl loosely with plastic wrap or a clean cloth and let it sit at room temperature for 2 to 5 days. You’ll notice bubbles forming, and a distinct sour, yeasty aroma developing. After a few days, a layer of clear liquid might form on top; this is normal and can be poured off or stirred back in, depending on preference.
- Quick: Cover the bowl and let it rise in a warm spot for 1 to 3 hours, or until visibly bubbly.
- The Absit Step (Traditional Method Only): After fermentation (and after pouring off any excess liquid if desired), take about ½ to 1 cup of the batter. In a small saucepan, bring 1 cup of water to a boil, then whisk in the reserved batter until it thickens into a gelatinous paste, similar to a roux. Let it cool slightly, then stir this absit back into your main fermented batter until thoroughly combined. This step enhances the injera’s texture and flexibility.
- Final Batter Check: Before cooking, stir the batter gently. It should be smooth, pourable, and if fermented, slightly fizzy with tiny bubbles.
Mastering the Cook: How to Make Injera on Your Crepe Maker
Now for the exciting part – bringing your injera to life on your crepe maker! The technique is unique compared to typical crepes, so pay close attention to these steps.
- Crepe Maker Setup: Preheat your crepe maker to a medium-high setting. The ideal temperature often falls between 215°F and 350°F (100°C-175°C), but this can vary. A well-heated surface is crucial for the “eyes” to form.
- The First Injera (The Test): It’s always wise to make a smaller, test injera first. This allows you to gauge the temperature and batter consistency before committing to a full-sized one. Ladle a small amount of batter onto the hot surface, observe the bubble formation, and adjust your heat or batter consistency (add water if it’s too thick, or a tiny bit of flour if too thin) as needed.
- Pouring and Spreading: Lightly oil your crepe maker if it’s not perfectly non-stick (a quick wipe with an oiled paper towel is sufficient). Using a ladle or an easy-pour measuring cup, pour about ½ to ¾ cup of batter (depending on your crepe maker size) onto the hot surface. Immediately and quickly, swirl the batter to coat the entire cooking area evenly, working from the outside in, just like you would for a crepe.
- The “Eyes” and Steaming:
- Cook Uncovered: Let the injera cook uncovered for about 20-30 seconds. You should begin to see numerous small bubbles, or “eyes,” appearing across the surface. These bubbles will pop, leaving characteristic little holes. This is the hallmark of well-made injera.
- Cover and Steam: Once about 80% of the “eyes” have formed and popped, immediately cover your injera with a large lid (a clean pot lid or even an inverted bowl will work if your crepe maker doesn’t have a dedicated lid). This traps steam, cooking the top surface.
- No Flipping! Unlike crepes or pancakes, injera is never flipped. It cooks only on one side.
- Steaming Time: Let it steam for 60-90 seconds, or until the top surface is no longer shiny or wet to the touch and the edges begin to slightly lift from the cooking surface. If using a glass lid, wipe off any condensation periodically to prevent drips onto the injera.
- Removing: Once cooked, use a thin, non-stick safe spatula to gently loosen the edges, then slide it off the crepe maker onto a clean plate lined with parchment paper or a plastic surface.
- Cooling and Stacking: Allow the injera to cool completely before stacking to prevent them from sticking together. As you cook more injera, stack them on top of each other and cover them immediately with a clean kitchen towel or plastic wrap to keep them soft and pliable.
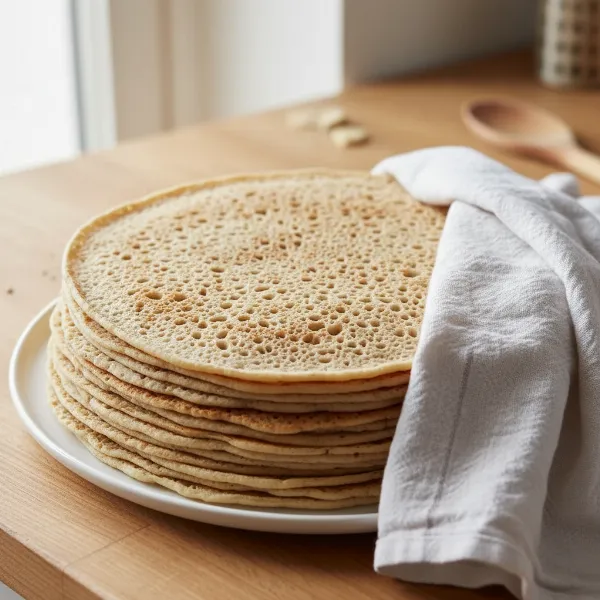 Stack of freshly made injera cooling on a plate, ready for serving
Troubleshooting Common Injera Issues
Even with the right equipment, injera can be a finicky bread. Here are some common problems and how to solve them:
- No “Eyes” or Too Few Bubbles:
- Issue: Batter might be too thick, or the crepe maker isn’t hot enough. Lack of sufficient fermentation (for traditional method) or leavening agents (for quick method).
- Solution: Thin the batter with a tablespoon of water at a time. Increase crepe maker temperature slightly. Ensure proper fermentation or sufficient yeast/baking soda.
- Injera is Sticking:
- Issue: Crepe maker not hot enough, or insufficient oiling. Batter might be too wet or sticky.
- Solution: Increase heat slightly. Ensure a very light oiling if your non-stick is failing. Adjust batter consistency.
- Injera is Gummy or Soggy:
- Issue: Overcooked or undercooked; possibly too thick.
- Solution: Reduce cooking time. Ensure proper steaming. Thin the batter slightly.
- Injera is Crispy or Cracking:
- Issue: Overcooked, or batter is too dry.
- Solution: Reduce cooking time. Add a little more water to the batter. Ensure it’s covered immediately after cooking to retain moisture.
- Edges are too thick:
- Issue: Batter not spread evenly or too much batter for the size of the crepe maker.
- Solution: Use slightly less batter. Practice swirling to ensure even distribution to the very edge.
Conclusion
Making injera at home, especially with a versatile appliance like a crepe maker, is a rewarding experience that connects you with a rich culinary tradition. While the journey might require a bit of patience and practice to master the perfect batter consistency and cooking temperature, the satisfaction of tearing off a piece of your own homemade, spongy injera to scoop up delicious stews is unparalleled. Your crepe maker, with its even heat and non-stick prowess, proves to be a fantastic tool for this ancient bread, bridging the gap between traditional techniques and modern kitchens. So, go ahead, experiment with your batter, perfect your technique, and enjoy the incredible flavors of Ethiopia and Eritrea right in your home.
What authentic international dish will you attempt to master on your crepe maker next?
Frequently Asked Questions
What is the ideal batter consistency for injera on a crepe maker?
The batter should be pourable yet substantial, similar to a thin gravy or a heavy cream. It needs to be thin enough to spread easily but thick enough to form distinct “eyes” when cooked and to hold its shape without tearing. Adjust with water or a small amount of flour as needed.
Can I make injera without teff flour?
While 100% teff flour yields the most authentic taste and texture, you can use a blend of teff with all-purpose, barley, or whole wheat flour. Some quick recipes even use all-purpose flour predominantly, though the flavor and elasticity will differ from traditional teff injera.
Why do injera need “eyes” (small holes) on the surface?
The “eyes” are a hallmark of properly fermented and cooked injera. They indicate the release of carbon dioxide bubbles during cooking, resulting in the bread’s characteristic airy, spongy texture, which is essential for absorbing the flavors of accompanying dishes.
How do I prevent injera from sticking to my crepe maker?
Ensure your Crepe Maker is properly preheated to medium-high heat. A good non-stick surface is key. You can lightly grease the surface with a tiny bit of oil or ghee before the first injera, or if you notice any sticking. Avoid overcrowding the surface.
Do I need to flip injera like a regular crepe or pancake?
No, injera is never flipped. It cooks only on one side. After pouring the batter and allowing the “eyes” to form, you cover it with a lid to steam the top surface until it’s set and no longer wet. This unique cooking method contributes to its distinct texture.