As an Admin at CrepeMakerDepot.com and a seasoned crepe machine technician with over a decade of hands-on experience, I’ve seen countless crepes made, from simple home batches to intricate restaurant creations. Today, I want to guide you through mastering the delightful Japanese Harajuku style crepe right in your own kitchen. Forget complex techniques or expensive equipment; with the right approach and a few expert tips, you can replicate these iconic street food treats, famous for their thin texture, generous fillings, and charming cone shape. Get ready to transform your home into a vibrant Harajuku cafe and impress everyone with your newfound crepe-making prowess.
Unveiling the Magic of Harajuku Style Crepes
Japanese Harajuku style crepes are a culinary phenomenon, distinct from their French counterparts. Originating from the bustling Takeshita Street in Tokyo’s Harajuku district, these crepes evolved into an art form, becoming a beloved street food icon. Unlike the often savory and simply folded French crepes, Harajuku crepes are predominantly sweet, served as a decadent dessert or snack. They are characterized by their delicate, thin, and slightly crispy texture, expertly spread and cooked on a hot griddle. The real spectacle, however, lies in their presentation: generously filled with an assortment of fresh fruits, luscious whipped cream, rich chocolate sauces, and often ice cream or other sweet delights, then artfully folded or rolled into a portable, cone-like shape, perfect for enjoying on the go. This unique combination of texture, flavor, and visual appeal makes Harajuku crepes an irresistible treat that captures the vibrant spirit of Tokyo’s youth culture.
 A vibrant Harajuku style crepe, cone-shaped, filled with cream, strawberries, and bananas.
Essential Ingredients for Authentic Harajuku Crepes
Crafting the perfect Harajuku style crepe begins with understanding its core ingredients. While seemingly simple, the quality and preparation of these components are paramount to achieving that authentic taste and texture.
For the crepe batter, you’ll need:
- Cake Flour: This is key for a tender, delicate crepe. Its lower protein content results in a softer texture compared to all-purpose flour.
- Granulated Sugar: Just enough to add a subtle sweetness to the crepe itself, complementing the fillings.
- A Pinch of Salt: Essential for balancing the flavors and enhancing the overall taste.
- Large Eggs: Bring them to room temperature for better emulsion and a smoother batter.
- Whole Milk: Also at room temperature. Whole milk contributes to richness and a desirable texture.
- Unsalted Butter (Melted): Adds a beautiful richness and helps with the crepe’s pliability. Ensure it’s melted but not hot, and incorporated into a room-temperature batter.
- Vanilla Extract (Optional but Recommended): A touch of vanilla elevates the flavor profile.
For the quintessential Harajuku fillings and toppings, focus on:
- Heavy Whipping Cream: Look for cream with a higher fat content if possible for a richer, more stable whipped cream, typical of Japanese preparations.
- Powdered Sugar: For sweetening the whipped cream, ensuring a smooth, melt-in-your-mouth texture.
- Fresh Fruits: Sliced strawberries and bananas are classic choices, but feel free to experiment with blueberries, kiwis, or mangoes.
- Chocolate Syrup: A drizzle of chocolate sauce adds a delightful finishing touch. Caramel sauce or condensed milk can also be used.
- Optional Additions: Consider adding scoops of ice cream, a dusting of matcha powder, or even a dollop of Japanese custard cream for extra indulgence.
Having all your ingredients at room temperature before mixing is a small but critical step that greatly impacts the final batter consistency and crepe quality.
The Right Equipment for Crepe Perfection
While specialized tools can be fun, you don’t need a professional crepe maker to achieve excellent Harajuku style crepes at home. Many common kitchen items will suffice, along with a few recommendations to elevate your experience.
For Batter Preparation:
- Large Mixing Bowls: You’ll need at least two – one for dry ingredients and one for wet.
- Whisk: A good quality whisk is essential for achieving a lump-free batter. Electric hand mixers can also speed up the process.
- Fine-Mesh Sieve (Sifter): Sifting flour and powdered sugar is crucial for a smooth batter and lump-free whipped cream.
- Measuring Cups and Spoons: Accurate measurements are key in crepe making.
- Kitchen Scale: For precise measurement of flour and other ingredients, especially if you want to avoid variations that come with cup measurements.
For Cooking the Crepes:
- Non-Stick Frying Pan or Crepe Pan: A 10-inch (25 cm) non-stick pan is ideal. Its flat bottom and low sides make spreading batter and flipping crepes much easier. While a dedicated crepe maker (electric griddle) offers consistent heat, a good quality frying pan works wonderfully.
- Silicone Pastry Brush or Paper Towel: For lightly greasing the pan between crepes. Neutral oil is often preferred over butter for greasing the pan to prevent burning.
- 1/3-Cup Measuring Cup or Small Ladle: For consistent batter portioning, ensuring uniform crepe size and thickness.
- Long Cooking Chopsticks or Thin Spatula: These tools are excellent for gently loosening the edges and flipping the delicate crepes without tearing them.
While dedicated crepe spreaders and spatulas exist, many home cooks find that a quick tilt and swirl of the pan, combined with a thin spatula or chopsticks, is perfectly effective for spreading batter and flipping. Investing in a good non-stick pan is often more beneficial than specialty tools for beginners.
Step-by-Step Guide: Crafting Your Harajuku Crepe Batter
The secret to perfectly thin and pliable Harajuku crepes lies in the batter. Follow these steps to create a smooth, lump-free mixture that will yield outstanding results.
- Bring Ingredients to Room Temperature: This is a golden rule. Remove eggs and milk from the refrigerator about 30 minutes before you begin. Cold ingredients can cause the melted butter to seize and create a grainy batter. If you’re in a rush, gently warm the milk to lukewarm and place cold eggs in lukewarm water for a few minutes.
- Combine Dry Ingredients: In a large bowl, sift together the cake flour, granulated sugar, and salt. Sifting prevents lumps and aerates the flour, contributing to a lighter crepe. Whisk them briefly to ensure they are well combined.
- Prepare Wet Ingredients: In a separate medium bowl, beat the eggs thoroughly until smooth. Then, gradually add the room-temperature milk, whisking constantly until the mixture is homogenous. This pre-mix of wet ingredients helps prevent lumps when combining with flour.
- Gradually Incorporate Wet into Dry: Create a well in the center of your dry ingredients. Pour about one-third of the egg and milk mixture into the well. Begin whisking gently from the center, gradually incorporating the flour from the sides. This technique helps form a smooth paste first, preventing large lumps. Continue adding the remaining wet mixture in two more additions, whisking until the batter is completely smooth and free of any visible lumps. Avoid overmixing, as this can develop the gluten too much, leading to tough crepes.
- Add Melted Butter: Gently whisk in the melted, but not hot, unsalted butter into the room-temperature batter. Ensure the butter is fully incorporated. If the batter is cold, the butter might solidify, creating a grainy texture.
- Rest the Batter (Optional, but Recommended): While some recipes claim no rest is needed, allowing the batter to rest for at least 30 minutes at room temperature, or even overnight in the refrigerator, allows the flour to fully hydrate and the gluten to relax. This results in a more tender crepe with fewer chances of tearing. If refrigerating, bring the batter back to room temperature before cooking. Give it a gentle whisk before use to redistribute any settled flour.
By meticulously following these steps, you’ll create a perfectly smooth, thin batter that is the foundation for delicious Harajuku style crepes.
Mastering the Cook: Techniques for Perfect Crepes
Once your batter is ready, the next step is cooking these delicate treats. Precision and observation are key to achieving that signature thinness and light golden hue.
- Preheat Your Pan: Place your non-stick frying pan or crepe pan over medium heat. It’s crucial to get the pan to the right temperature. A good trick is to splash a tiny bit of water onto the pan – if it sizzles and evaporates immediately, your pan is ready. If it just sits there, it’s not hot enough; if it burns instantly, it’s too hot. Adjust your heat as needed, often reducing it slightly as you go to prevent over-browning.
- Lightly Grease the Pan: Using a silicone brush or a paper towel dipped in neutral oil (like vegetable or canola oil), lightly grease the pan. You want a very thin, almost invisible layer of oil. Excess oil can make the crepes greasy and uneven. Wipe off any visible streaks. Avoid butter for greasing the pan, as it can burn easily at high temperatures.
- Pour and Swirl the Batter: Using a 1/3-cup measuring cup or a small ladle, pour the batter into the center of the hot pan. Immediately lift the pan off the heat and quickly tilt and swirl it in a circular motion to spread the batter evenly across the entire surface. Work quickly, as the batter sets fast. If you see any small holes, gently shake the pan sideways to fill them in before the crepe sets.
- Cook the First Side: Return the pan to the heat. Let the crepe cook for about 1 to 2 minutes. You’ll know it’s ready to flip when the edges start to look dry and slightly golden brown, and the surface of the crepe appears set and not wet. Avoid constantly lifting the crepe to check, as this can slow down the cooking and browning process.
- Flip the Crepe: Once the first side is done, gently slide a long cooking chopstick or a thin, flexible spatula under the edges of the crepe, carefully loosening it from the pan. Then, slide the tool further underneath and, with a quick, confident motion, flip the crepe over. If you’re using a non-stick pan, you might even be able to lift it with your fingertips.
- Cook the Second Side: Cook the second side for a much shorter duration, typically about 15-20 seconds, until it’s lightly golden. This side cooks faster as the pan is already hot.
- Remove and Stack: Slide the cooked crepe onto a plate. To keep your crepes warm and prevent them from drying out or sticking, stack them “pretty side” (the first cooked side, which is usually more evenly browned) down. Cover the stack with another plate or a clean kitchen towel.
- Repeat and Adjust: Continue with the remaining batter, lightly greasing the pan and making sure to wipe away any crumbs between each crepe. Adjust the heat as needed to maintain consistent cooking. If crepes are browning too quickly, lower the heat; if they are too pale or taking too long, increase it slightly.
Consistent heat management and quick batter swirling are the hallmarks of a master crepe maker. Don’t be discouraged if your first few crepes aren’t perfect – they’re often called “tester crepes” and are a rite of passage!
Crafting the Iconic Harajuku Fold and Fillings
The presentation of a Harajuku crepe is just as important as its taste. Learning the distinct folding technique and selecting delicious fillings will bring your homemade crepes to life.
The Art of the Cone Fold
|
Our Picks for the Best Crepe maker in 2026
As an Amazon Associate I earn from qualifying purchases.
|
||
| Num | Product | Action |
|---|---|---|
| 1 | Nutrichef Electric Crepe Maker & Griddle Cooktop - Nonstick 12 Inch Aluminum Hot Plate with LED Indicator Lights & Adjustable Temperature Control - Wooden Spatula & Batter Spreader Included |

|
| 2 | Electric Crepe Maker 12'' & Griddle - Non-Stick Pan With Spreader for Roti, Tortilla, Blintzes, Pancakes - Adjustable Temperature, 1000W |
|
| 3 | 16 Inch Commercial Crepe Maker, Dual-Head, Dual Zone Temp Setting, Nonstick Pancake Griddle Machine, 50-300°C(120-570℉), 3400W, S.S. Shell, for Catering, Restaurant, Snack Stand, CE Certified |
|
| 4 | Gourmia 12” Crepe Maker – Nonstick Electric Griddle for Pancakes, Omelets & More, Precise Temp Control with Indicator Lights, Includes Spatula & Batter Spreader, Quick Cleanup, Stainless Steel Trim |
|
| 5 | Moss & Stone Electric Crepe Maker 8 Inch, Portable Crepe Maker & Hot Plate Cooktop On/Off Switch, Nonstick Coating, Automatic Temperature Control, Easy To Use For Pancakes, Blintz, Chapati |
|
| 6 | Gourmia 8” Electric Crepe Maker – Nonstick Ceramic Surface, One-Touch Operation, Includes Batter Tray, Compact & Easy to Clean, Crepe, Pancake & Tortilla Maker |
|
| 7 | Nutrichef Electric Crepe Maker - 8-inch Nonstick Cooktop with On/Off Switch - Cooks Roti, Tortillas & Pancakes - Automatic Temperature Control & Cool Touch Handle - Includes Food Bowl, Whisk & Spatula |
|
| 8 | Moss & Stone Electric Crepe Maker – 8” Portable Crepe Pan Nonstick with Dipping Plate, Auto Shut-Off, On/Off Switch, Even Heating & One Automatic Temperature Control – Compact Crepe Maker |
|
| 9 | Baker's Friend Instant Crepe Maker with Handle, Electric Crepe Maker Machine, Crepera Electrica, 8 Inch Non-stick Cooking Surface, Aqua |
|
| 10 | Moss & Stone 12” Electric Griddle Pan & Crepe Machine, Non-Stick Electric Crepe Maker with Adjustable Temperature, Includes Spreader & Spatula – Ideal for Pancakes, Blintzes & Tortillas |
|
Unlike flat or quarter-folded French crepes, Harajuku crepes are typically rolled into a cone, making them easy to hold and eat on the go.
- Lay it Flat: Place a freshly cooked crepe (pretty side facing down, as this will be the outside of the cone) on a clean surface or a sheet of wax paper.
- Spread the Base: On one quarter of the crepe (imagine dividing it into four), spread a generous layer of freshly whipped cream. This acts as the foundation for your fillings.
- Arrange Fillings: Artfully arrange sliced fruits (strawberries, bananas) and any other desired additions like a dollop of custard or a sprinkle of chocolate chips on top of the cream.
- Drizzle and Fold: Drizzle with chocolate syrup or your favorite sauce. Then, fold the crepe in half, covering the fillings.
- Roll into a Cone: Starting from the side with the filling, gently but firmly roll the half-crepe into a tight cone shape. The wax paper can help you achieve a stable cone that holds its shape.
- Serve Immediately: These crepes are best enjoyed fresh to appreciate their warm, delicate texture and cool, creamy fillings.
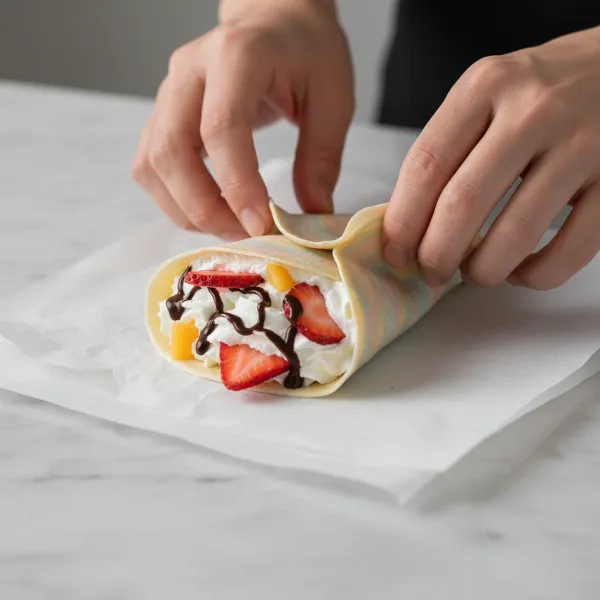 Hands demonstrating the final steps of folding a Harajuku crepe into a cone with fruit.
Delectable Filling Ideas
The beauty of Harajuku crepes lies in their endless filling possibilities. Here are some popular combinations:
- Classic Strawberry & Banana: Freshly whipped cream, sliced strawberries, sliced bananas, and a generous drizzle of chocolate syrup. This is the most iconic combination.
- Matcha Dream: Whipped cream, red bean paste (anko), a few mochi pieces, and a dusting of matcha powder.
- Chocolate Lovers: Whipped cream, chocolate fudge chunks, chocolate syrup, and a sprinkle of chocolate shavings.
- Fruity Paradise: A mix of seasonal fresh berries (strawberries, blueberries, raspberries), whipped cream, and a light fruit sauce.
- Custard Delight: Whipped cream, a spoonful of rich Japanese custard cream, and your choice of fruit.
- Savory Twist (Less Common): While Harajuku crepes are primarily sweet, if you’re feeling adventurous, some shops offer savory options like teriyaki chicken with lettuce, or egg and ham. However, stick to sweet for the authentic Harajuku experience.
The key is to layer your fillings, creating both visual appeal and a delightful explosion of flavors and textures with every bite. Don’t be afraid to get creative and customize your crepes to your personal taste!
Expert Tips for the Best Harajuku Crepe Experience
Drawing from years of experience with every type of crepe maker, I’ve compiled essential tips to ensure your Harajuku crepe journey is a resounding success.
- Temperature Control is Paramount: Just like with my top-tier restaurant machines, consistent heat is non-negotiable. Too low, and your crepes will be pale and rubbery; too high, and they’ll burn before setting. Watch your pan, adjust your stove, and don’t hesitate to take the pan off the heat briefly if it gets too hot. A well-heated pan makes all the difference in achieving that thin, even golden color.
- Thin Batter, Thin Crepes: The batter consistency is crucial. It should be thin enough to spread easily but not watery. If your batter seems too thick, add a tablespoon of milk at a time until it reaches the right consistency – like heavy cream. Remember, a thin crepe is a hallmark of the Harajuku style.
- Don’t Overfill: While tempting to load up on fillings, a common mistake is overfilling the crepe before folding. This makes it difficult to roll neatly and can cause the crepe to tear. Be generous, but also mindful of the crepe’s capacity.
- Freshly Whipped Cream is Key: For the authentic Harajuku experience, fresh whipped cream is non-negotiable. Avoid canned whipped cream. Whip your heavy cream with powdered sugar until it forms medium peaks – firm enough to hold its shape but still light and airy. Some sources suggest a higher fat content cream for extra stability, which can be a valuable insight.
- Experiment with Flour: While cake flour is recommended for tenderness, some might find a blend of all-purpose and a small amount of rice flour yields a slightly crisper edge, which can also be appealing. Experiment to find your preferred texture.
- Practice Makes Perfect: Crepe making is a skill that improves with repetition. Your first few crepes might not be perfect, but don’t get discouraged. Each crepe teaches you something about your pan, your heat, and your technique. Embrace the learning curve!
- Cleanliness Between Crepes: Just as I emphasize cleaning commercial griddles, it’s vital to quickly wipe your home pan between each crepe. This removes any small burnt bits that could stick to the next crepe and ensures even cooking. A dry paper towel is usually sufficient.
“The secret to a truly great crepe isn’t just the recipe; it’s the intuition you develop for your equipment and ingredients. Every sizzle, every swirl, tells a story.” – Admin, CrepeMakerDepot.com
These tips, honed over countless hours in the presence of crepe makers, will empower you to create crepes that not only taste incredible but also capture the authentic spirit of Harajuku.
Using and Maintaining Your Crepe Making Tools
Even with the simplest home setup, proper use and maintenance of your crepe-making tools ensure longevity and consistent performance. Think of it like caring for a high-end commercial crepe maker; a little attention goes a long way.
Preheating Your Pan: Always allow your pan to preheat thoroughly and evenly before adding batter. A cold spot can lead to unevenly cooked crepes. If using an electric crepe maker, ensure it reaches the set temperature before you start.
Greasing Techniques: For non-stick pans, a minimal amount of neutral oil spread thinly with a silicone brush or a paper towel is best. Avoid excessive oil, which can make crepes greasy. If you’re using a well-seasoned carbon steel pan, you might need even less.
Cleaning After Each Crepe: A quick wipe with a dry paper towel between crepes is important to remove any tiny batter crumbs or residual oil. This prevents build-up that can cause subsequent crepes to stick or burn in spots.
Post-Cooking Clean-up:
- Non-Stick Pans: Allow the pan to cool completely before washing with warm, soapy water and a soft sponge. Avoid abrasive scrubbers that can damage the non-stick coating.
- Carbon Steel Pans: Clean with hot water and a stiff brush (no soap if seasoned). Dry immediately and thoroughly, then apply a very thin layer of cooking oil to maintain seasoning and prevent rust.
- Crepe Makers (Electric): Always unplug and allow the machine to cool. Wipe the surface clean with a damp cloth. For tougher spots, a non-abrasive scrubber can be used carefully. Never submerge the electrical unit in water.
Storage: Store your pan and tools in a dry, cool place. If stacking pans, place a paper towel or felt protector between them to prevent scratches. Proper storage prevents damage and ensures your equipment is ready for your next crepe-making session. Just as with professional machines, proper care extends the life and performance of your home tools.
Conclusion
Embracing the art of making Japanese Harajuku style crepes at home is a rewarding culinary adventure. From carefully selecting your ingredients and perfecting your batter to mastering the delicate cooking and iconic cone-folding techniques, each step brings you closer to recreating that vibrant Tokyo street food experience. Remember, the journey is as enjoyable as the destination, and every crepe you make builds your expertise. With patience, attention to detail, and the tips shared, you’ll be delighting friends and family with these irresistible treats in no time. So, what delicious filling combination will you try first in your homemade Harajuku crepe?
Frequently Asked Questions
What makes Japanese Harajuku crepes different from French crepes?
Japanese Harajuku crepes are typically thinner, often slightly crispier, and primarily sweet, rolled into a cone shape with generous fillings like whipped cream, fruits, and sauces. French crepes, while also thin, can be sweet or savory and are usually folded into quarters or simply rolled without the elaborate fillings or cone presentation.
Can I make the crepe batter ahead of time?
Yes, you can! Making the crepe batter ahead of time, usually the night before, allows the flour to fully hydrate and the gluten to relax, which can result in even more tender and pliable crepes. Store the batter covered in the refrigerator and bring it back to room temperature before cooking. Give it a gentle whisk to combine any settled ingredients.
What kind of pan is best for making Harajuku crepes?
A 10-inch (25 cm) non-stick frying pan or a dedicated non-stick crepe pan is ideal for making Harajuku crepes at home. Its flat surface and low sides make it easy to spread the batter thinly and flip the delicate crepes without tearing. While not strictly necessary, an electric Crepe Maker can offer very consistent heat.
What are the most popular fillings for Harajuku crepes?
The most popular fillings for Harajuku crepes include freshly whipped cream, sliced fresh fruits like strawberries and bananas, and chocolate syrup. Other common additions are Japanese custard cream, red bean paste, ice cream, and various sweet sauces. The combinations are often elaborate and visually appealing.
My crepes are tearing when I try to flip them. What am I doing wrong?
Crepes tearing usually points to a few issues: the batter might be too thick (add a little more milk), the pan might not be hot enough (which makes the crepe stick), or you might be trying to flip it too soon before it’s fully set. Ensure the edges are dry and slightly golden before attempting to flip, and use a thin, flexible spatula or chopsticks.
Is it necessary to sift the flour for the crepe batter?
While not strictly “necessary” if you whisk thoroughly, sifting the flour is highly recommended. It helps prevent lumps in the batter and aerates the flour, contributing to a smoother, lighter, and more delicate crepe texture, which is desirable for Harajuku style crepes.
Can I use all-purpose flour instead of cake flour?
Yes, you can use all-purpose flour. However, cake flour is preferred for Harajuku crepes as its lower protein content results in a more tender and delicate texture, closer to the authentic style. If using all-purpose flour, your crepes might be slightly chewier, but they will still be delicious.