The Mille Crêpe Cake, a culinary marvel of French origin, captivates with its delicate layers and rich, creamy filling. Traditionally, making dozens of paper-thin crepes can be a labor of love, but with an electric crepe maker, this elegant dessert becomes surprisingly accessible for any home baker. This guide will walk you through creating a show-stopping Mille Crêpe Cake with the efficiency and ease of your electric appliance.
The Essentials: What You’ll Need
To embark on your Mille Crêpe adventure, gather the following:
Equipment:
- Electric crepe maker
- Blender or large mixing bowls and a whisk
- Rubber spatula or crepe spreading tool
- Offset spatula (for spreading filling)
- Serving platter or cake stand
- Plastic wrap
Ingredients (Classic Vanilla Cream Filling):
For the Crêpes:
- 2 cups (480ml) whole milk, at room temperature
- 4 large eggs, at room temperature
- 1 ½ cups (180g) all-purpose flour, sifted
- ¼ cup (50g) granulated sugar
- 4 tablespoons (60g) unsalted butter, melted and cooled
- 1 teaspoon vanilla extract
- ½ teaspoon salt
For the Vanilla Whipped Cream Filling:
- 2 cups (480ml) heavy cream, chilled
- ½ cup (60g) confectioners’ sugar (powdered sugar), sifted
- 1 teaspoon vanilla extract
Crafting the Perfect Crêpes: Step-by-Step with an Electric Maker
The secret to a beautiful Mille Crêpe Cake lies in its uniformly thin crepes. Your electric maker simplifies this process.
Preparing the Batter
|
Our Picks for the Best Crepe maker in 2026
As an Amazon Associate I earn from qualifying purchases.
|
||
| Num | Product | Action |
|---|---|---|
| 1 | 16 Inch Commercial Crepe Maker, Dual-Head, Dual Zone Temp Setting, Nonstick Pancake Griddle Machine, 50-300°C(120-570℉), 3400W, S.S. Shell, for Catering, Restaurant, Snack Stand, CE Certified |

|
| 2 | Nutrichef Electric Crepe Maker - 8-inch Nonstick Cooktop with On/Off Switch - Cooks Roti, Tortillas & Pancakes - Automatic Temperature Control & Cool Touch Handle - Includes Food Bowl, Whisk & Spatula |
|
| 3 | Moss & Stone Electric Crepe Maker 8 Inch, Portable Crepe Maker & Hot Plate Cooktop On/Off Switch, Nonstick Coating, Automatic Temperature Control, Easy To Use For Pancakes, Blintz, Chapati |
|
| 4 | Baker's Friend Instant Crepe Maker with Handle, Electric Crepe Maker Machine, Crepera Electrica, 8 Inch Non-stick Cooking Surface, Aqua |
|
| 5 | Electric Crepe Maker 12'' & Griddle - Non-Stick Pan With Spreader for Roti, Tortilla, Blintzes, Pancakes - Adjustable Temperature, 1000W |
|
| 6 | Moss & Stone Electric Crepe Maker – 8” Portable Crepe Pan Nonstick with Dipping Plate, Auto Shut-Off, On/Off Switch, Even Heating & One Automatic Temperature Control – Compact Crepe Maker |
|
| 7 | Gourmia 8” Electric Crepe Maker – Nonstick Ceramic Surface, One-Touch Operation, Includes Batter Tray, Compact & Easy to Clean, Crepe, Pancake & Tortilla Maker |
|
| 8 | Gourmia 12” Crepe Maker – Nonstick Electric Griddle for Pancakes, Omelets & More, Precise Temp Control with Indicator Lights, Includes Spatula & Batter Spreader, Quick Cleanup, Stainless Steel Trim |
|
| 9 | Moss & Stone 12” Electric Griddle Pan & Crepe Machine, Non-Stick Electric Crepe Maker with Adjustable Temperature, Includes Spreader & Spatula – Ideal for Pancakes, Blintzes & Tortillas |
|
| 10 | Nutrichef Electric Crepe Maker & Griddle Cooktop - Nonstick 12 Inch Aluminum Hot Plate with LED Indicator Lights & Adjustable Temperature Control - Wooden Spatula & Batter Spreader Included |
|
- Combine Wet Ingredients: In a blender, combine the milk, eggs, melted butter, vanilla extract, and salt. Blend until smooth.
- Add Dry Ingredients: Gradually add the sifted flour and granulated sugar to the blender. Blend on low speed until the batter is completely smooth, avoiding overmixing. The batter should have a consistency similar to heavy cream.
- Rest the Batter: Transfer the batter to a bowl, cover with plastic wrap, and refrigerate for at least 30 minutes, or ideally 1-2 hours. This resting period allows the flour to fully hydrate, resulting in more tender crepes and fewer air bubbles. You can even prepare the batter the day before.
Using Your Electric Crepe Maker
- Preheat: Plug in your electric crepe maker and allow it to preheat fully. Most makers have an indicator light that signals when the desired temperature is reached.
- Lightly Grease: While many electric crepe makers feature a non-stick surface, a very light swipe of butter or cooking spray on the hot plate before the first crepe can help ensure easy release.
- Dip and Cook: Pour a small amount of batter into the shallow dipping tray that often accompanies the maker. Invert the hot crepe maker plate directly into the batter for about 3-5 seconds. Lift the maker straight up, allowing any excess batter to drip off, and place it upright on its base.
- Monitor and Flip (if needed): Cook the crepe for approximately 30-60 seconds. You’ll notice the edges beginning to crisp and lift slightly, and the surface will look set. Some electric makers are designed to cook only one side, while others may require a quick flip for a few extra seconds on the second side.
- Remove and Cool: Gently loosen the edges with a plastic spatula and slide the cooked crepe onto a parchment-lined baking sheet or a clean plate. Continue cooking the remaining batter, stacking the cooled crepes. Don’t worry if the first one isn’t perfect; it’s often considered the “tester.”
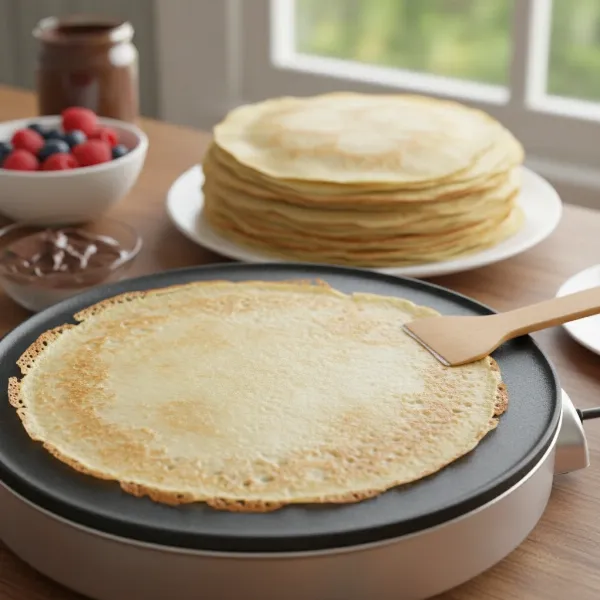 Thin golden crepes cooking on an electric crepe maker, ready for stacking.
Creating the Luxurious Filling
While the crepes cool, prepare your simple yet delightful vanilla whipped cream filling.
- Whip Cream: In a chilled mixing bowl, combine the cold heavy cream, sifted confectioners’ sugar, and vanilla extract.
- Beat to Stiff Peaks: Using an electric mixer, beat on medium-high speed until the cream forms stiff peaks. Be careful not to overmix, or it may curdle.
For a richer experience, you could consider a pastry cream or diplomat cream (pastry cream folded with whipped cream), but the simplicity of whipped cream beautifully complements the delicate crepes.
Assembling Your Masterpiece: The Mille Crêpe Layers
Now comes the fun part – building your elegant cake.
- First Layer: Place one cooled crepe flat on your chosen serving platter or cake stand.
- Spread Filling: Using an offset spatula or the back of a spoon, spread a thin, even layer of whipped cream over the entire surface of the crepe, reaching almost to the edges. Aim for about ¼ cup of filling per layer.
- Repeat: Carefully place another crepe directly on top of the cream layer. Continue this process, alternating crepes and cream, until all your crepes are used. You should have an impressive stack of around 20-25 layers.
- Chill to Set: Once assembled, cover the cake loosely with plastic wrap and refrigerate for at least 2 hours. This crucial step allows the cream to firm up and the flavors to meld, ensuring clean slices. Overnight chilling is even better.
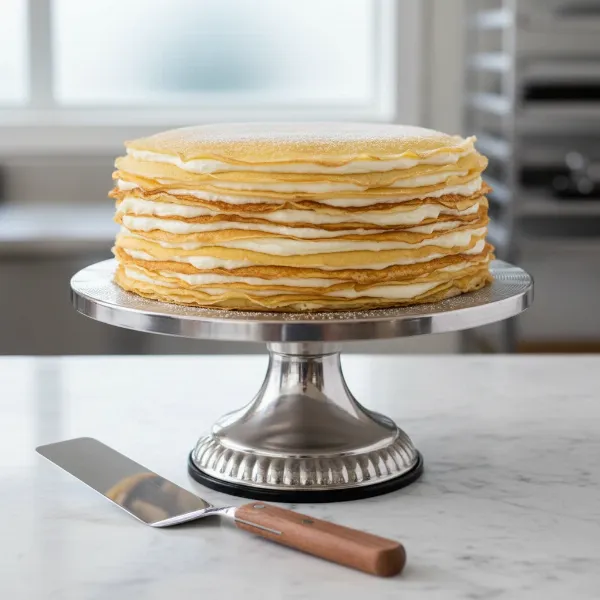 Assembled Mille Crêpe Cake with visible layers of crepes and vanilla cream.
Finishing Touches and Serving Suggestions
Before serving, consider these enhancements:
- Simple Elegance: Dust the top layer generously with a fine layer of confectioners’ sugar.
- Fresh Fruit: Garnish with fresh berries, sliced mango, or peaches for a vibrant touch.
- Chocolate Drizzle: A light drizzle of chocolate ganache or melted chocolate can add decadence.
- Slicing: For the cleanest cuts, use a sharp, thin knife, wiping it clean between each slice.
Tips for Success: Your Mille Crêpe Journey
- Rest the Batter: This is non-negotiable for tender, pliable crepes.
- Don’t Overcook: Crepes should be lightly golden and flexible, not crispy.
- Chill Time: Allow ample time for the cake to set in the refrigerator; impatience leads to a messy cake.
- Even Spreading: Aim for consistent, thin layers of cream to achieve the signature striped look of a Mille Crêpe.
With your electric Crepe Maker, creating this sophisticated dessert is no longer an intimidating task. Enjoy the process of layering and the delight of presenting a homemade Mille Crêpe Cake that’s sure to impress.