Are you craving a warm, gooey quesadilla but find yourself without a dedicated quesadilla maker? Don’t fret! Your trusty crepe maker, often hailed for its ability to produce delicate pancakes, holds a surprising secret: it’s an incredibly versatile tool for crafting perfect quesadillas. Far from being a single-purpose gadget, the flat, even heating surface of your crepe maker provides an ideal environment for crisping tortillas and melting cheese to perfection. This guide will walk you through transforming your crepe maker into a quesadilla-making powerhouse, offering tips, techniques, and insights from over a decade of experience with these fantastic appliances.
The Unexpected Versatility: Why Your Crepe Maker Excels at Quesadillas
At first glance, a crepe maker might seem an unconventional choice for quesadillas. However, its core design features—a large, flat, and consistently heated non-stick surface—make it remarkably well-suited for the task. Unlike a traditional pan where heat distribution can be uneven, a good crepe maker ensures that your tortilla cooks uniformly, leading to a beautifully golden and crispy exterior. The precise temperature control on most electric models also gives you an edge, allowing you to achieve that ideal balance of melted interior and crunchy shell without burning. It’s akin to having a professional-grade griddle right on your countertop, ready for more than just breakfast.
Types of Crepe Makers for Quesadillas: Choosing Your Appliance
Understanding the different types of crepe makers can help you maximize your quesadilla-making potential. Each offers unique advantages, depending on your needs and the volume of quesadillas you plan to create.
Traditional Electric Crepe Makers (Tabletop Models)
These are the most common crepe makers found in homes. They typically feature a round, non-stick cooking plate with an integrated heating element and temperature dial.
- Advantages: Provide consistent, even heat distribution across a wide surface, making them excellent for larger quesadillas. Many offer precise temperature control, crucial for perfectly melted cheese and crispy tortillas. Their sturdy base makes them easy to work with.
- Disadvantages: Can be bulkier than handheld models, requiring dedicated counter or storage space.
- Best for: Families or individuals who frequently make quesadillas and value consistent results and ease of use.
|
Our Picks for the Best Crepe maker in 2026
As an Amazon Associate I earn from qualifying purchases.
|
||
| Num | Product | Action |
|---|---|---|
| 1 | Moss & Stone Electric Crepe Maker 8 Inch, Portable Crepe Maker & Hot Plate Cooktop On/Off Switch, Nonstick Coating, Automatic Temperature Control, Easy To Use For Pancakes, Blintz, Chapati |

|
| 2 | Moss & Stone 12” Electric Griddle Pan & Crepe Machine, Non-Stick Electric Crepe Maker with Adjustable Temperature, Includes Spreader & Spatula – Ideal for Pancakes, Blintzes & Tortillas |
|
| 3 | Electric Crepe Maker 12'' & Griddle - Non-Stick Pan With Spreader for Roti, Tortilla, Blintzes, Pancakes - Adjustable Temperature, 1000W |
|
| 4 | Baker's Friend Instant Crepe Maker with Handle, Electric Crepe Maker Machine, Crepera Electrica, 8 Inch Non-stick Cooking Surface, Aqua |
|
| 5 | Nutrichef Electric Crepe Maker - 8-inch Nonstick Cooktop with On/Off Switch - Cooks Roti, Tortillas & Pancakes - Automatic Temperature Control & Cool Touch Handle - Includes Food Bowl, Whisk & Spatula |
|
| 6 | Nutrichef Electric Crepe Maker & Griddle Cooktop - Nonstick 12 Inch Aluminum Hot Plate with LED Indicator Lights & Adjustable Temperature Control - Wooden Spatula & Batter Spreader Included |
|
| 7 | Gourmia 12” Crepe Maker – Nonstick Electric Griddle for Pancakes, Omelets & More, Precise Temp Control with Indicator Lights, Includes Spatula & Batter Spreader, Quick Cleanup, Stainless Steel Trim |
|
| 8 | 16 Inch Commercial Crepe Maker, Dual-Head, Dual Zone Temp Setting, Nonstick Pancake Griddle Machine, 50-300°C(120-570℉), 3400W, S.S. Shell, for Catering, Restaurant, Snack Stand, CE Certified |
|
| 9 | Gourmia 8” Electric Crepe Maker – Nonstick Ceramic Surface, One-Touch Operation, Includes Batter Tray, Compact & Easy to Clean, Crepe, Pancake & Tortilla Maker |
|
| 10 | Moss & Stone Electric Crepe Maker – 8” Portable Crepe Pan Nonstick with Dipping Plate, Auto Shut-Off, On/Off Switch, Even Heating & One Automatic Temperature Control – Compact Crepe Maker |
|
Handheld Crepe Makers (Immersion Style)
These innovative devices consist of a heating element and a small, round non-stick plate that you dip into batter. For quesadillas, you’d place the tortilla on the heated plate.
- Advantages: Extremely compact and portable, making them ideal for small kitchens or dorm rooms. They heat up quickly and are great for single-serve portions or smaller tortillas.
- Disadvantages: Their smaller size limits the dimensions of your quesadillas, and they might require more careful handling since you’re maneuvering the entire unit.
- Best for: Quick snacks, individual servings, or when space is at a premium.
Gas-Powered Crepe Makers (Professional Grade)
Typically found in commercial settings, these robust machines offer powerful and highly responsive heating, often with multiple burners for precise control.
- Advantages: Unmatched power and extremely precise temperature regulation, allowing for rapid cooking and consistent output. Built for durability and high volume.
- Disadvantages: Very expensive and large, making them impractical for most home kitchens. Requires a gas connection.
- Best for: If you happen to own one for a catering business or professional kitchen, it will undoubtedly produce outstanding quesadillas with incredible speed and efficiency.
Step-by-Step Guide: How to Make Perfect Quesadillas on a Crepe Maker
Making quesadillas on a crepe maker is surprisingly straightforward, mirroring the process of using a griddle or a flat-bottomed pan. The key is proper preparation and attention to detail.
1. Preparation is Key: Gather Your Ingredients
Before you even plug in your crepe maker, ensure all your quesadilla components are ready. Shred your cheese (a good melting cheese like Monterey Jack, cheddar, or a Mexican blend works best), chop any vegetables, and pre-cook any meats you plan to add. This is vital, as the quesadilla will only cook long enough to melt the cheese and crisp the tortilla, not to cook raw ingredients thoroughly. Having everything prepped makes the cooking process smooth and enjoyable.
2. Preheat Your Crepe Maker to Optimal Temperature
Plug in your crepe maker and set it to a medium-high heat setting, typically around 350-375°F (175-190°C) if it has temperature markings, or roughly a “7” on a scale of 10. Allow it to fully preheat; this usually takes 5-10 minutes. Most electric models will have an indicator light that turns off or changes color once the desired temperature is reached. Proper preheating ensures the tortilla starts crisping immediately upon contact.
3. Lightly Oil the Surface for a Golden Crisp
Even with a non-stick surface, a very light brush of oil or a quick spray with cooking oil can significantly enhance the crispness of your tortilla and add a beautiful golden hue. It also helps prevent any potential sticking, especially if cheese happens to ooze out slightly. Use a high smoke point oil like canola, grapeseed, or avocado oil.
4. Place Your Tortilla: The Foundation
You have a couple of options for tortilla placement:
- Single Folded Tortilla: Place one whole tortilla flat on the heated surface. This is often easier to manage.
- Two Separate Tortillas: Place one tortilla on the surface, add fillings, then gently top with a second tortilla. This is ideal for larger quesadillas.
5. Add Fillings: The “Less is More” Rule
If using a single tortilla, sprinkle cheese over one half, leaving a small border for sealing. Then add your pre-cooked fillings sparingly on top of the cheese. If using two tortillas, distribute cheese and fillings evenly over the entire first tortilla, again, keeping a small margin around the edges. Overfilling is the most common pitfall when making quesadillas on an open surface, as it leads to spillage and a messy result. Aim for a thin, even layer.
6. The Fold or Second Tortilla: Sealing the Deal
For a single tortilla, carefully fold the empty half over the filled half. Gently press down to help it seal. If you’re using two separate tortillas, carefully place the second tortilla directly on top of the fillings. Press down lightly with a spatula to encourage contact and aid in melting.
7. Cook to Golden Perfection: Time and Visual Cues
Cook the quesadilla for approximately 3-5 minutes per side. Watch for visual cues: the tortilla should turn golden brown and develop a crisp texture, and you should see the cheese bubbling and melting through the tortilla’s edges. The exact time will depend on your crepe maker’s heat, the tortilla’s thickness, and the amount of filling.
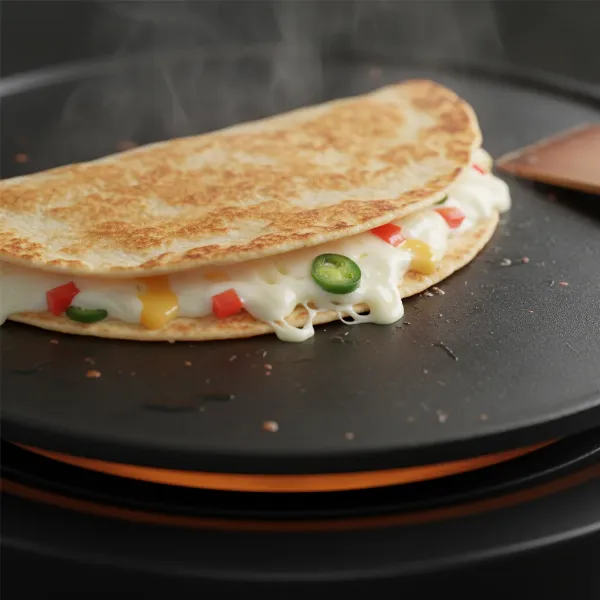 A quesadilla cooking on a round electric crepe maker, turning golden brown with melted cheese visible.
8. The Flip (If Necessary): Mastering the Turn
If you’re using a single folded tortilla, you’ll definitely need to flip it once the first side is golden. Use a wide, thin spatula (a metal one works best for scraping under the tortilla) to carefully slide under the quesadilla, then swiftly flip it over to cook the second side until it’s equally golden and crispy. If you used two tortillas, you can often skip a full flip if the top tortilla browns sufficiently from the residual heat and melted cheese, but a gentle turn might be needed for even crisping.
9. Serve and Enjoy!
Once cooked, transfer your quesadilla to a cutting board. Allow it to cool for a minute or two to let the cheese set slightly, then slice it into wedges using a pizza cutter or a sharp knife. Serve immediately with your favorite toppings like salsa, guacamole, sour cream, or hot sauce.
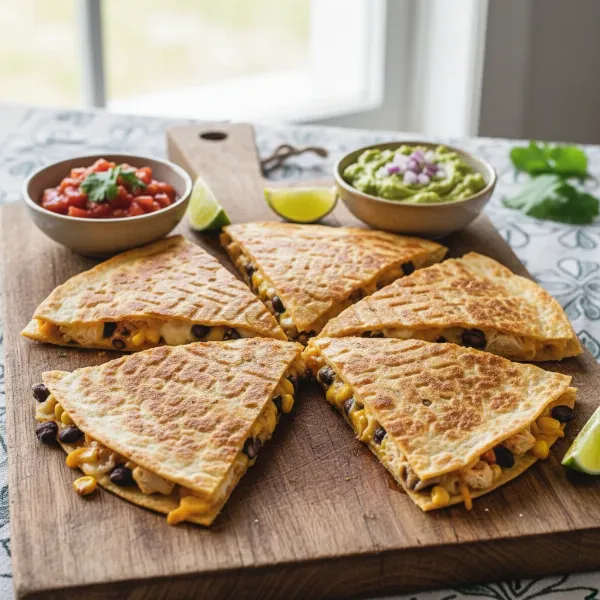 A perfectly golden and crispy quesadilla, sliced into wedges, served with salsa and guacamole.
Essential Tips for Quesadilla Success on Your Crepe Maker
Achieving quesadilla perfection on a crepe maker often comes down to a few key strategies that enhance both flavor and texture.
- Don’t Overfill: This cannot be stressed enough. A thin, even layer of fillings is easier to manage, cooks more evenly, and is less likely to spill out, making flipping much simpler.
- Pre-Cook Meats and Veggies: Any meat, chicken, or denser vegetables like bell peppers or onions should be cooked and seasoned beforehand. The crepe maker’s job is to heat, melt, and crisp, not to cook raw ingredients from scratch.
- Choose the Right Cheese: Opt for cheeses known for their excellent melting properties. Monterey Jack, cheddar, Oaxaca, or a blend will give you that desirable gooey center. Avoid very low-fat cheeses, as they tend to melt poorly.
- Monitor Heat Constantly: Crepe makers can get very hot. Keep an eye on your quesadilla to prevent burning. Adjust the temperature dial as needed. If you notice it browning too quickly, lower the heat slightly.
- Use a Wide, Thin Spatula: A good spatula is your best friend for carefully sliding under the quesadilla and executing a clean flip. Silicone spatulas are great for non-stick surfaces.
- Get Creative with Fillings: Beyond the classic cheese, experiment with various combinations:
- Breakfast Quesadilla: Scrambled eggs, bacon, cheese.
- Chicken Fajita Quesadilla: Pre-cooked chicken, sautéed peppers and onions, cheese.
- Spinach and Mushroom Quesadilla: Sautéed spinach, mushrooms, feta, and mozzarella.
- Dessert Quesadilla: Nutella and banana (cook on lower heat and watch carefully).
“The beauty of a crepe maker lies in its consistent, controllable heat. For quesadillas, this means you can achieve a perfectly golden, crispy exterior every time, far more easily than wrestling with an unevenly heated pan. Just remember, a light hand with fillings is your secret weapon for success!” – Admin, CrepeMakerDepot.com
Comparing Crepe Makers to Other Quesadilla Tools
While your crepe maker is an excellent choice, it’s helpful to understand how it stacks up against other common kitchen appliances used for quesadillas.
Crepe Maker vs. Skillet/Griddle
Both a crepe maker and a traditional skillet or griddle offer a flat, open cooking surface, meaning the technique for making quesadillas (placing, filling, folding/topping, flipping) is very similar.
- Similarities: Manual flipping is required, and both allow for flexible quesadilla sizes and shapes.
- Differences: Electric crepe makers generally offer superior and more consistent temperature control across the entire surface compared to a stovetop skillet, which can have hot spots. Dedicated griddles come close but are often larger.
Crepe Maker vs. Waffle Maker
Using a waffle maker for quesadillas is a popular “hack,” but it produces a very different result.
- Waffle Maker: Creates distinct pockets and a heavily textured surface. This can lead to very crispy edges and rapid cheese melting due to the top and bottom heating elements pressing together. However, the quesadilla’s internal structure is altered.
- Crepe Maker: Maintains the traditional flat, disc-like shape of a quesadilla, offering a smooth, evenly browned surface without the waffle pattern. It’s ideal for those who prefer the classic quesadilla texture.
Crepe Maker vs. Dedicated Quesadilla Maker
Dedicated quesadilla makers are specifically designed for the task, often featuring hinged tops that press and seal the quesadilla, sometimes even cutting it into wedges.
- Dedicated Quesadilla Maker: Provides a convenient, hands-off approach. It presses the quesadilla from both sides, ensuring even heating and often creating a sealed edge, preventing spillage.
- Crepe Maker: Offers more freedom in terms of quesadilla size and thickness. It requires manual flipping and pressing, giving you more control over the crispness level but also requiring more active involvement. The lack of a top plate means you won’t get the sealed edges or pre-cut wedges, but you gain versatility.
Maintenance and Cleaning: Keeping Your Crepe Maker Ready
Proper care ensures your crepe maker remains in top condition for both crepes and quesadillas for years to come.
- Cool Down First: Always allow your crepe maker to cool completely before cleaning.
- Wipe Down After Use: Once cool, simply wipe the non-stick cooking surface with a damp cloth or sponge. For stubborn food bits, a soft brush or a plastic scraper can be used gently.
- Avoid Abrasive Cleaners: Never use steel wool, abrasive pads, or harsh chemical cleaners, as these can damage the non-stick coating.
- Store Properly: Ensure it’s completely dry before storing in a cool, dry place. Protect the cooking surface from scratches by placing a paper towel or soft cloth over it if stacking other items.
By following these simple cleaning and maintenance tips, your crepe maker will be ready for your next culinary adventure, whether it’s sweet crepes or savory quesadillas.
Conclusion
Your crepe maker is a culinary dark horse, capable of far more than just delicate pancakes. With its consistent heat, non-stick surface, and controllable temperature, it’s an excellent, often overlooked, appliance for making incredibly delicious and perfectly crispy quesadillas. By understanding its capabilities and applying a few simple techniques, you can transform everyday tortillas and fillings into a quick, satisfying meal or snack. So next time that quesadilla craving hits, don’t reach for another gadget; empower your crepe maker and unlock its full potential. What creative quesadilla filling will you try first on your newly discovered versatile appliance?
Frequently Asked Questions
Can I use corn tortillas instead of flour tortillas?
Yes, you absolutely can use corn tortillas on a crepe maker. They will result in a firmer, slightly chewier quesadilla with a distinct corn flavor. Be aware that corn tortillas can sometimes be more prone to cracking if handled too roughly, so be gentle when folding or flipping.
How do I prevent cheese from sticking to the crepe maker?
A well-seasoned non-stick crepe maker combined with a light coating of cooking oil or spray before placing the tortilla should prevent sticking. Also, avoid overfilling your quesadilla, as melted cheese that oozes out can sometimes bake onto the surface.
Can I make large quesadillas on a standard crepe maker?
Most standard electric crepe makers have a cooking surface of 12-13 inches, which is perfect for large flour tortillas. You can easily make generous-sized quesadillas that serve one or two people, offering more surface area than many dedicated quesadilla makers.
Is making quesadillas on a crepe maker faster than using a frying pan?
Often, yes. Crepe Makers typically offer very even and consistent heat across the entire surface, which can lead to faster and more uniform cooking than a standard frying pan on a stovetop, which might have hot spots. Preheat time is comparable, but the cooking itself can be more efficient.
What are the best fillings for a crepe maker quesadilla to ensure even cooking?
For even cooking, always use pre-cooked meats and vegetables. Thinly sliced or finely diced ingredients work best to avoid overfilling and ensure everything heats through quickly. Good melting cheeses are crucial for a gooey texture.