Few things are as frustrating as an unreliable heating or cooling system, especially when the comfort of your home is at stake. Often, the silent culprit behind a malfunctioning HVAC system is a faulty thermostat. This small, yet mighty, device is the brain controlling your home’s climate. When it stops working correctly, your entire system can go haywire, leaving you shivering in winter or sweating through summer.
Understanding How To Troubleshoot A Broken Thermostat can save you time, money, and a lot of discomfort. This comprehensive guide will walk you through the common signs of a problem, provide a step-by-step approach to diagnosing and fixing minor issues yourself, and help you recognize when it’s time to call in a professional. By the end, you’ll be better equipped to keep your home’s climate control running smoothly.
Understanding Your Thermostat: Types and How They Work
Thermostats come in various forms, each with unique features and operational nuances. Knowing which type you have can be crucial for effective troubleshooting.
Manual/Non-Programmable Thermostats
|
Our Picks for the Best Crepe maker in 2026
As an Amazon Associate I earn from qualifying purchases.
|
||
| Num | Product | Action |
|---|---|---|
| 1 | Electric Crepe Maker 12'' & Griddle - Non-Stick Pan With Spreader for Roti, Tortilla, Blintzes, Pancakes - Adjustable Temperature, 1000W |

|
| 2 | Baker's Friend Instant Crepe Maker with Handle, Electric Crepe Maker Machine, Crepera Electrica, 8 Inch Non-stick Cooking Surface, Aqua |
|
| 3 | 16 Inch Commercial Crepe Maker, Dual-Head, Dual Zone Temp Setting, Nonstick Pancake Griddle Machine, 50-300°C(120-570℉), 3400W, S.S. Shell, for Catering, Restaurant, Snack Stand, CE Certified |
|
| 4 | Moss & Stone 12” Electric Griddle Pan & Crepe Machine, Non-Stick Electric Crepe Maker with Adjustable Temperature, Includes Spreader & Spatula – Ideal for Pancakes, Blintzes & Tortillas |
|
| 5 | Moss & Stone Electric Crepe Maker – 8” Portable Crepe Pan Nonstick with Dipping Plate, Auto Shut-Off, On/Off Switch, Even Heating & One Automatic Temperature Control – Compact Crepe Maker |
|
| 6 | Moss & Stone Electric Crepe Maker 8 Inch, Portable Crepe Maker & Hot Plate Cooktop On/Off Switch, Nonstick Coating, Automatic Temperature Control, Easy To Use For Pancakes, Blintz, Chapati |
|
| 7 | Gourmia 8” Electric Crepe Maker – Nonstick Ceramic Surface, One-Touch Operation, Includes Batter Tray, Compact & Easy to Clean, Crepe, Pancake & Tortilla Maker |
|
| 8 | Nutrichef Electric Crepe Maker & Griddle Cooktop - Nonstick 12 Inch Aluminum Hot Plate with LED Indicator Lights & Adjustable Temperature Control - Wooden Spatula & Batter Spreader Included |
|
| 9 | Gourmia 12” Crepe Maker – Nonstick Electric Griddle for Pancakes, Omelets & More, Precise Temp Control with Indicator Lights, Includes Spatula & Batter Spreader, Quick Cleanup, Stainless Steel Trim |
|
| 10 |
|
|
These are the simplest thermostats, often found in older homes or rental properties. They typically feature a dial or a simple slider to set your desired temperature. When the room temperature drops below or rises above your setting, the thermostat signals your HVAC system to turn on until the set temperature is reached. Troubleshooting these often involves checking basic connections and power.
Programmable Thermostats
Programmable thermostats allow you to set different temperatures for various times of the day or week, aligning with your schedule and promoting energy efficiency. They usually feature a digital display and buttons for programming. When troubleshooting, common issues include programmed settings not holding or the schedule not executing as expected.
Smart Thermostats
The most advanced category, smart thermostats, offer features like remote control via a smartphone app, learning capabilities that adapt to your preferences, and detailed energy usage reports. Many connect to Wi-Fi and can integrate with smart home systems. Troubleshooting smart thermostats might involve checking Wi-Fi connectivity, app issues, or software glitches in addition to hardware checks.
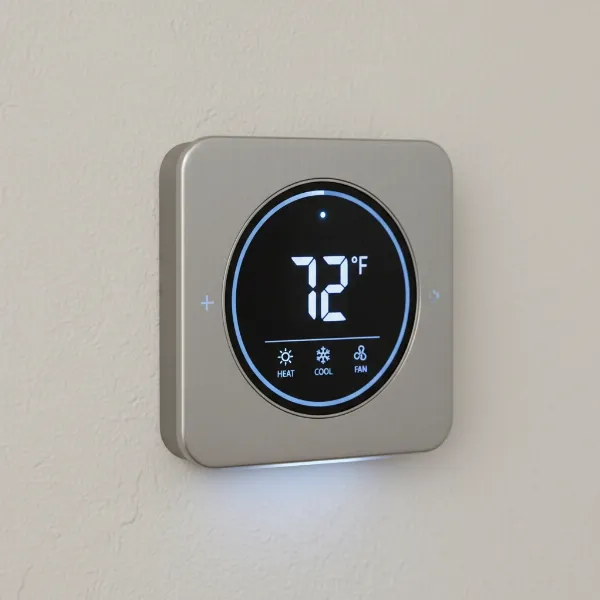 A smart thermostat with a digital display showing temperature and controls.
Signs of a Broken Thermostat
Recognizing the symptoms of a malfunctioning thermostat is the first step toward a solution. Here are the most common indicators that your thermostat might be broken:
- HVAC System Won’t Turn On or Off: Perhaps the most obvious sign, if your furnace or air conditioner refuses to respond to your commands, the thermostat may not be communicating effectively. Conversely, if your system runs continuously without reaching the set temperature, it suggests the thermostat isn’t signaling it to shut off.
- Thermostat Display is Blank or Unresponsive: A blank screen indicates a power issue, while an unresponsive interface means the controls are not registering your inputs. This could be due to dead batteries, a tripped circuit breaker, or internal damage.
- Inconsistent Temperatures or “Hot/Cold Spots”: If some rooms in your home are significantly hotter or colder than others, even with the thermostat set correctly, it might indicate that the thermostat’s sensor is misreading the ambient temperature or it’s improperly located.
- System “Short-Cycling” (Turning On and Off Frequently): Short cycling occurs when your HVAC system turns on for a brief period, then shuts off before reaching the desired temperature. This can be caused by a faulty thermostat, leading to inefficient operation and increased wear on your equipment.
- High Energy Bills: An unexpected spike in your utility costs could signal that your thermostat is instructing your HVAC system to run more often or longer than necessary, leading to wasted energy.
- Programmed Settings Reset or Don’t Hold: For programmable or smart thermostats, if your custom schedules or temperature settings revert to defaults or change unexpectedly, it points to an internal fault or power instability.
- Incorrect Temperature Readings: If your thermostat displays a temperature that doesn’t match the actual room temperature (verified with an independent thermometer), its sensor might be dirty, uncalibrated, or failing.
Step-by-Step Thermostat Troubleshooting Guide
Before calling a professional, many common thermostat issues can be resolved with a few simple troubleshooting steps. Always prioritize safety, especially when dealing with electrical components.
1. Check the Power Supply
A lack of power is a frequent cause of thermostat problems, particularly a blank or unresponsive display.
- For Battery-Powered Thermostats: Most digital thermostats use AA or AAA batteries. If your display is blank or flickering, or if there’s a low battery indicator, replacing the batteries is often the easiest fix. Ensure you use fresh batteries and insert them correctly.
- For Hardwired Thermostats: These thermostats draw power directly from your HVAC system. Check your home’s electrical panel for a tripped circuit breaker associated with your furnace or air conditioner. Flip the breaker completely off, then back on. If the breaker trips again immediately, do not attempt to reset it repeatedly; this indicates a more serious electrical issue.
2. Verify Thermostat Settings
Accidental changes to settings are a common oversight.
- Mode Selection: Ensure your thermostat is set to the correct mode (e.g., “Heat” in winter, “Cool” in summer, or “Off” if you want the system to be inactive). Sometimes, it might be accidentally switched to “Fan Only,” which will circulate air but not heat or cool.
- Temperature Setpoint: Double-check that your desired temperature is set appropriately. If your home is too cold, make sure the heat setting is higher than the current room temperature, and vice versa for cooling.
- Child Lock/Hold Function: Some thermostats have a “hold” function that overrides programmed schedules or a child lock feature that prevents changes. Make sure these are not inadvertently activated.
3. Inspect and Clean the Thermostat
Dust and debris can accumulate inside the thermostat, interfering with its sensitive components and sensors.
- Turn Off Power: Before removing the thermostat cover, switch off the power to your HVAC system at the circuit breaker for safety.
- Remove Cover: Gently remove the thermostat cover. This usually involves prying it off or unscrewing a few fasteners.
- Clean Interior: Using a soft brush (like a clean paintbrush) or compressed air, carefully remove any dust, dirt, or pet hair from the internal components, especially around the sensors and electrical contacts. Never use water or liquid cleaners inside the thermostat.
- Reattach Cover: Once clean, carefully replace the cover.
 A person carefully cleaning the internal components of a thermostat with a soft brush.
4. Examine Wiring Connections (Safety First!)
Loose or corroded wires can disrupt the communication between your thermostat and the HVAC system. This step requires caution.
- Turn Off Power: Crucially, turn off the power to your HVAC system at the circuit breaker before touching any wires.
- Remove Thermostat from Wall: Carefully detach the thermostat from its base plate, exposing the wiring.
- Inspect Wires: Look for any wires that appear loose, disconnected, frayed, or corroded at their terminals. Gently tighten any loose screw terminals. If you notice significant corrosion or damage, it’s best to contact a professional.
- Reassemble: Reattach the thermostat to its base and restore power.
5. Reset Your Thermostat
A reset can often clear minor software glitches or erroneous readings, especially in digital and smart thermostats.
- Soft Reset: Many digital thermostats have a small reset button (sometimes requiring a paperclip to press) or a menu option for a reset. Consult your thermostat’s manual for specific instructions.
- Factory Reset: Some models allow a full factory reset, which will revert all settings to their original defaults. Be aware that you will need to re-program any schedules or Wi-Fi connections afterward.
6. Test Calibration
If your thermostat consistently reads an inaccurate temperature, it might need recalibration. This is more common with older or mechanical thermostats.
- Compare Readings: Place a reliable thermometer near your thermostat and compare its reading with the thermostat’s display after about 15-20 minutes.
- Adjust (if applicable): Some older thermostats have a small calibration screw or lever. Refer to your manual if this is an option. Modern digital thermostats rarely allow manual recalibration and typically require replacement if readings are consistently off.
When to Call an HVAC Professional
While many thermostat issues can be resolved with DIY troubleshooting, some problems require the expertise of a certified HVAC technician.
- DIY Steps Don’t Resolve the Issue: If you’ve gone through all the troubleshooting steps and your thermostat or HVAC system still isn’t working correctly, it’s time to call a pro.
- Complex Wiring Problems: Exposed, frayed, or severely corroded wiring, or if you suspect a short circuit, should be handled by an expert to ensure safety and proper repair.
- Persistent Short-Cycling or System Malfunctions: If your HVAC system continues to short cycle, runs constantly, or fails to heat/cool despite a seemingly functional thermostat, the issue might lie deeper within the HVAC unit itself, requiring professional diagnosis.
- Tripped Circuit Breaker After Resetting: A breaker that trips repeatedly indicates an electrical fault that needs immediate attention from an electrician or HVAC technician to prevent damage or fire hazards.
- Considering an Upgrade: If your thermostat is old and you’re looking to upgrade to a programmable or smart model, a professional can ensure proper installation and compatibility with your existing HVAC system.
“Many thermostat issues appear simple, but if you’ve done the basic checks and it’s still not working, that’s your cue to call in an HVAC professional. They have the tools and knowledge to safely diagnose complex electrical and system communication problems.” – John Doe, Master HVAC Technician at Climate Control Solutions
Conclusion
A well-functioning thermostat is essential for maintaining comfort and energy efficiency in your home. By understanding the different types of thermostats, recognizing the common signs of trouble, and following a methodical troubleshooting process, you can often resolve minor issues yourself. Remember to always prioritize safety, especially when dealing with electrical components. If your efforts don’t restore your system’s functionality, or if you encounter complex problems, don’t hesitate to seek the expertise of a qualified HVAC professional. They can provide a thorough diagnosis and ensure your home’s heating and cooling system operates reliably. What step will you take today to ensure your home’s comfort system is in top shape?
Frequently Asked Questions
How long do thermostats typically last?
The lifespan of a thermostat can vary widely based on its type and quality. Manual and programmable thermostats generally last 10 to 15 years, while more complex smart thermostats might have a slightly shorter lifespan due to evolving technology and software, typically around 8 to 10 years.
Can a dirty thermostat affect its performance?
Yes, absolutely. Dust, dirt, and debris can accumulate inside the thermostat, particularly on sensitive components like temperature sensors and electrical contacts. This buildup can lead to inaccurate temperature readings or hinder the thermostat’s ability to communicate effectively with your HVAC system. Regular, gentle cleaning can prevent these issues.
Is it safe to troubleshoot a thermostat myself?
Basic troubleshooting steps, such as replacing batteries, checking settings, and external cleaning, are generally safe for homeowners. However, any steps involving opening the thermostat to inspect wiring or touching electrical components should only be done after safely turning off the power at the circuit breaker. If you’re uncomfortable or unsure, it’s always safer to consult a professional.
What is “short cycling” and why is it bad?
Short cycling is when your furnace or air conditioner turns on and off too frequently and runs for very short periods, failing to complete a full heating or cooling cycle. This is bad because it wastes energy, places excessive stress on your HVAC system’s components (leading to premature wear and potential breakdowns), and results in uneven temperatures in your home.
How do I know if my thermostat needs batteries?
Many battery-powered digital thermostats will display a low battery icon or message on their screen as the power dwindles. If your screen goes blank or becomes unresponsive, or if your HVAC system stops reacting to thermostat commands, dead batteries are often the first thing to check.