Hello, fellow crepe enthusiasts! It’s your friend from Crepe Maker Depot, here to chat about the one thing that separates a sad, soggy crepe from a golden, glorious masterpiece. We’re going to dive deep into How To Use Temperature Settings Correctly, because trust me, that little dial on your machine is the key to unlocking crepe perfection. I remember my first time; I cranked the heat all the way up, thinking faster was better. What I got was a smoky kitchen and a crepe that was somehow both burnt and raw. It was a disaster! But that failure taught me the most important lesson in the crepe-making world: temperature isn’t just a setting, it’s the soul of the process.
So, What Exactly is a Crepe Maker?
Before we get into the nitty-gritty of heat, let’s talk about the tool itself. A crepe maker is a specialized cooking appliance designed specifically for creating those famously thin, delicate French-style pancakes. Unlike a standard frying pan, its large, flat, and often rimless surface gives you the space and control needed to spread the batter impossibly thin and cook it evenly. It’s the difference between a clunky pancake and an elegant, restaurant-quality crepe. If you’re serious about your crepes, this isn’t a luxury; it’s a necessity.
What Types of Crepe Makers Are Out There?
You’ve got a couple of main contenders in the ring, and choosing the right one for you is the first step. They both get the job done, but the experience is a little different.
| Feature | Electric Crepe Maker | Traditional Crepe Pan (Stovetop) |
|---|---|---|
| Heat Source | Internal electric coil | Gas or electric stovetop |
| Temperature Control | Precise, adjustable thermostat | Relies on stovetop controls; less precise |
| Consistency | Excellent; even heating across the surface | Good, but can have hot spots |
| Portability | Needs an outlet; great for countertops | Very portable; can be used anywhere with a stove |
| Ease of Use | Generally easier for beginners | Requires a bit more skill to manage heat |
For most home chefs, the control and consistency of an electric model are a game-changer. That’s what we’ll be focusing on today, as mastering its settings is a surefire path to success.
Key Features to Consider Before You Buy
Walking into the world of crepe makers can feel overwhelming, but if you focus on a few key things, you’ll find your perfect match.
Why Is Mastering Temperature Control So Important?
This is the big one, the main event. A crepe maker with a reliable, adjustable thermostat is your best friend. Why? Because the cooking process for a crepe is a lightning-fast dance.
“The secret to a perfect crepe lies in the heat. Too low, and the batter steams, becoming tough and rubbery. Too high, and the outside burns before the inside sets. Precise temperature control is not a feature; it is the feature.” – Chef Antoine Dubois, Pastry Innovator.
An accurate temperature dial allows you to find that perfect sweet spot and, more importantly, keep it there. It gives you repeatable, consistent results every single time you cook.
|
Our Picks for the Best Crepe Maker in 2025
As an Amazon Associate, we earn from qualifying purchases.
|
||
| Num | Product | Action |
|---|---|---|
| 1 | Baker\'s Friend Instant Crepe Maker with Handle, Electric Crepe Maker Machine, Crepera Electrica, 8 Inch Non-stick Cooking Surface, Aqua |

|
| 2 | ULTICOR Mini Pancake Maker – 14-Hole Electric Poffertjes Pan – Non-Stick Dutch Mini Pancakes Griddle – Easy to Use, Easy to Clean – Perfect for Breakfast, Desserts, Snacks & More |
|
| 3 | 110V US Commercial 25PCS Mini Pancake Maker,950W Mini Dutch Pancake Maker,Non-stick,Dutch Poffertjes Grill,Stainless Steel,Breakfast,Snacks,Desserts. |
|
| 4 | Proctor Silex Electric Crepe Maker with 13” Nonstick Griddle for Eggs, Pancakes, Omelets and Quesadillas, with Temperature Control, Spatula, Spreader, Batter Cup, Stainless Steel (38400PS) |
|
| 5 | Gourmia 8” Crepe Maker – Nonstick Ceramic Electric Griddle for Crepes, Tortillas & Omelets, Automatic Batter Dipping, Compact & Lightweight, Quick Heat-Up, Includes Batter Plate, Easy Cleanup |
|
| 6 | Moss & Stone Electric Crepe Maker – 8” Portable Crepe Pan Nonstick with Dipping Plate, Auto Shut-Off, On/Off Switch, Even Heating & One Automatic Temperature Control – Compact Crepe Maker |
|
| 7 | Gourmia 12” Crepe Maker – Nonstick Electric Griddle for Pancakes, Omelets & More, Precise Temp Control with Indicator Lights, Includes Spatula & Batter Spreader, Quick Cleanup, Stainless Steel Trim |
|
| 8 | Nutrichef Electric Crepe Maker & Griddle Cooktop - Nonstick 12 Inch Aluminum Hot Plate with LED Indicator Lights & Adjustable Temperature Control - Wooden Spatula & Batter Spreader Included |
|
| 9 | nutrichef Electric Crepe Maker Pan & Griddle, 12 Inch Nonstick Cooktop, LED Indicators & Adjustable Temperature Control, Includes Spatula, Batter Spreader, Cooks Crepes, Roti & Pancakes |
|
| 10 | 24PCS Mini Pancake Maker Machine, Nonstick Electric Dutch Pancakes Griddle, Adjustable Heat Multi-Use Poffertjes Pan, Simple & Easy Baker for Home and Restaurants, Perfect for Breakfast & Desserts |
|
The Nitty-Gritty: How to Use Temperature Settings Correctly
Alright, let’s turn the dial. Most electric crepe makers have a temperature range from around 300°F to 500°F (or 150°C to 260°C). Thinking of it in terms of “low, medium, and high” is a great place to start.
- Low Heat (300°F – 350°F / 150°C – 175°C): This is your “warming zone.” It’s not ideal for cooking the initial crepe, as the batter will take too long to set. However, it’s perfect for gently reheating a pre-made crepe or melting cheese and chocolate for a filling without burning anything.
- Medium Heat (375°F – 400°F / 190°C – 205°C): This is the magic window. For the vast majority of classic sweet crepes (think Nutella and banana or lemon and sugar), this temperature is your golden ticket. It’s hot enough to cook the crepe quickly, creating those desirable lacy, golden-brown spots, but not so hot that you lose control. Your batter should set in about 30-45 seconds on the first side.
- High Heat (425°F+ / 220°C+): Welcome to the pro league. This higher temperature is fantastic for savory buckwheat crepes, known as galettes. The intense heat creates a slightly crispier texture that stands up beautifully to robust fillings like ham, egg, and Gruyère. It requires you to work fast, but the results are undeniably authentic.
Remember, every machine is a little different. Your first couple of crepes are your test subjects. Don’t be afraid to nudge the dial up or down slightly to find what works for your machine and your batter.
What About Sizing and Surface Material?
Beyond temperature, consider these two factors:
- Size: A 12 or 13-inch surface is standard and gives you plenty of room to work. Smaller models are great for tiny kitchens, while larger commercial ones are for feeding a crowd.
- Surface: A high-quality non-stick coating is a must-have for beginners. It makes spreading and flipping a breeze and cleanup is practically non-existent. For the purists, a seasoned cast iron surface offers incredible heat retention, but it requires more maintenance.
Your First Perfect Crepe: A Step-by-Step Guide
Ready to make some magic? Let’s walk through the process together.
- Season the Surface (First Use Only): Before you ever plug it in for the first time, give the cooking surface a gentle wipe with a damp cloth. Then, pour a tiny bit of neutral oil (like canola or vegetable) on a paper towel and rub a thin layer all over the cold surface.
- The All-Important Preheat: Turn your crepe maker to your target temperature—let’s start with 375°F (190°C). Do not skip this step! You must let the surface get fully and evenly heated. Most models have an indicator light that will turn off or change color when it’s ready. This usually takes 5-10 minutes.
- A Touch of Butter: Just before your first crepe, quickly wipe a small amount of melted butter across the hot surface with a paper towel. You’re looking for a sheen, not a puddle. You may only need to do this every few crepes.
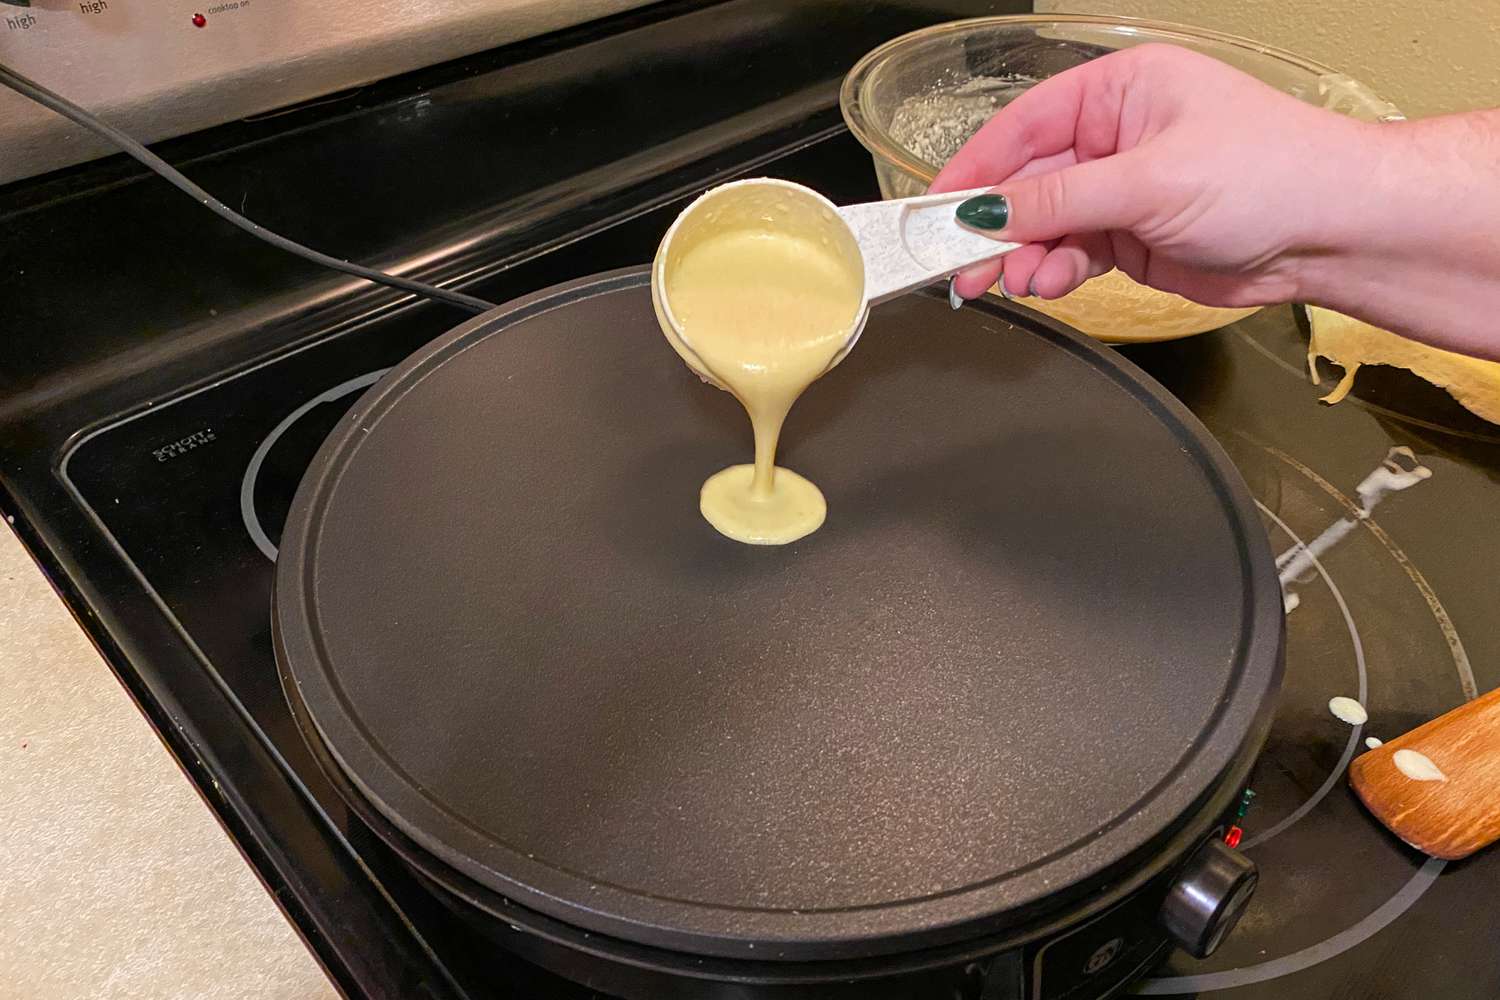
- The Pour and Spread: Ladle about 1/3 cup of batter onto the center of the hot surface. Immediately grab your T-shaped spreader, place it in the center of the puddle, and in one smooth, continuous circular motion, spread the batter out to the edges. Work quickly and confidently!
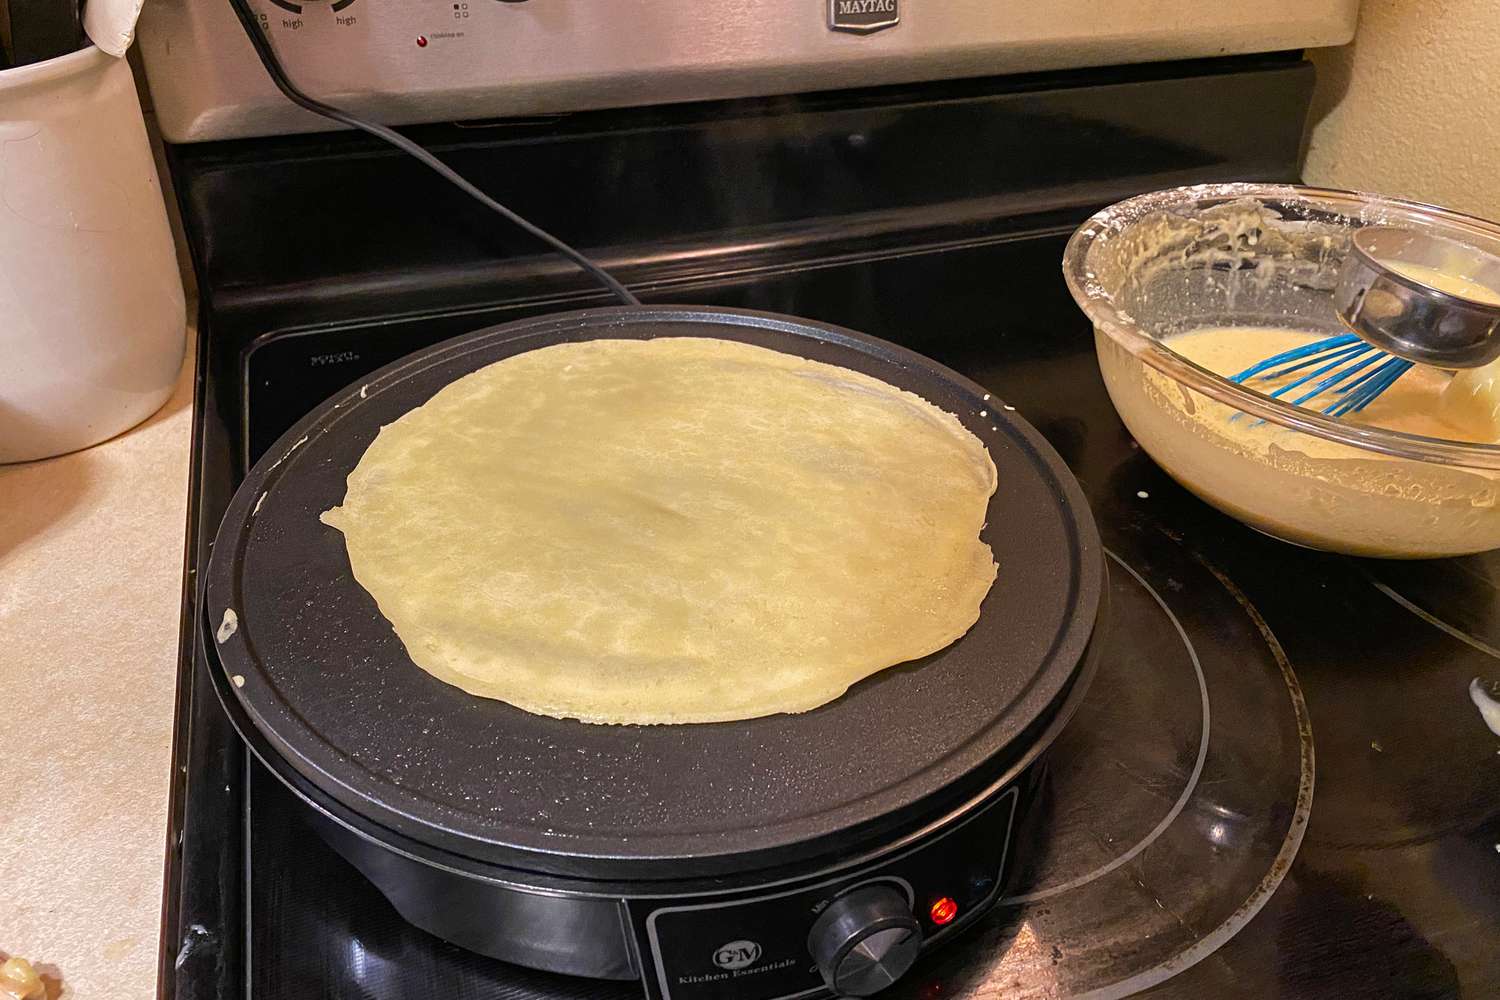
- The Flip: After about 30-45 seconds, the edges will start to look dry and may even lift slightly. The surface will lose its wet shine. This is your cue! Slide a long, thin spatula under the crepe, lift, and swiftly flip it over.
- The Final Touch: The second side needs only about 20-30 seconds. Add your fillings now, fold, and slide your beautiful creation onto a plate. Voila!
Tips and Tricks from the Depot Kitchen
- Batter is Boss: Let your batter rest in the fridge for at least 30 minutes before using it. This allows the gluten to relax, resulting in a more tender crepe.
- Keep it Clean: Keep your spreader clean. After each crepe, dip it in a glass of water and wipe it dry to prevent sticking and clumping.
- The First One is for the Chef: It’s an unwritten rule of crepe making that the first one is always a bit of a dud. It helps season the pan and lets you test your temperature. Consider it a tasty sacrifice.
Keeping Your Crepe Maker Happy: Cleaning and Care
Proper care will ensure your crepe maker lasts for years. It’s surprisingly simple.
Post-Cooking Cleaning Checklist:
- [ ] Unplug and Cool Down: Always, always let the machine cool down completely before cleaning.
- [ ] Wipe It Down: Use a soft, damp cloth or sponge to wipe the surface clean. For any stubborn bits, a little warm, soapy water is fine, but be gentle.
- [ ] No Abrasives: Never use metal scrubbers, steel wool, or harsh abrasive cleaners on a non-stick surface. You’ll scratch and ruin the coating.
- [ ] Dry Thoroughly: Make sure it’s completely dry before storing it to prevent any rust or damage.
Think Outside the Circle: It’s More Than Just Crepes!
Your crepe maker is a versatile kitchen tool. Its large, evenly heated surface is perfect for:
- Making fluffy American-style pancakes (just don’t spread them!)
- Warming tortillas for tacos or quesadillas
- Frying eggs or making omelets
- Cooking delicate blinis or Indian dosa
Frequently Asked Crepe Questions
What is the best temperature to cook crepes?
The ideal temperature for most classic, thin crepes is between 375°F and 400°F (190°C to 205°C). This allows the crepe to cook quickly and develop a golden-brown color without burning before it’s fully set.
Why are my crepes sticking to the crepe maker?
Sticking is usually caused by one of three things: the heat is too low, the surface wasn’t preheated properly, or there isn’t enough fat on the surface. Try turning the heat up slightly and wiping a thin layer of butter or oil on before pouring your batter.
How do I know when my crepe is ready to flip?
Look at the edges! The edges of the crepe will start to dry out and may even begin to curl up slightly from the surface. The top surface of the crepe will also change from a wet sheen to a more matte, cooked appearance.
Can I use pancake batter in my crepe maker?
You can, but it won’t produce a crepe. Pancake batter is much thicker and contains leavening agents. You’ll simply end up with a very large, flat pancake. For true crepes, you need a thin, liquid-like batter.
How often do I need to re-season the cooking surface?
For a non-stick surface, you don’t need to “season” it in the traditional cast-iron sense. Just a quick wipe with a bit of butter or oil every few crepes is usually enough to keep things running smoothly.
Your Journey to Crepe Mastery
There you have it—the inside scoop on your crepe maker’s most powerful feature. It might seem like a small detail, but learning how to use temperature settings correctly is truly the foundation of great crepe making. It’s about developing a feel for the heat and understanding how it transforms a simple batter into something truly special. So go on, plug in your machine, have confidence in that dial, and start your delicious journey. We can’t wait to hear about the incredible creations you whip up.