Hello, fellow food enthusiast! Welcome to Crepe Maker Depot. If you’re here, chances are you’ve dreamt of sliding a paper-thin, golden-brown crepe from a pan with a flick of the wrist. But maybe your reality involves scraped pans and torn, tragic-looking blobs. I’ve been there. That’s why this comprehensive Nonstick Crepe Maker Review is your first step toward crepe nirvana. We’re going to break down everything you need to know to choose, use, and fall in love with the perfect tool for your kitchen.
What is a Crepe Maker, and Why Do You Absolutely Need One?
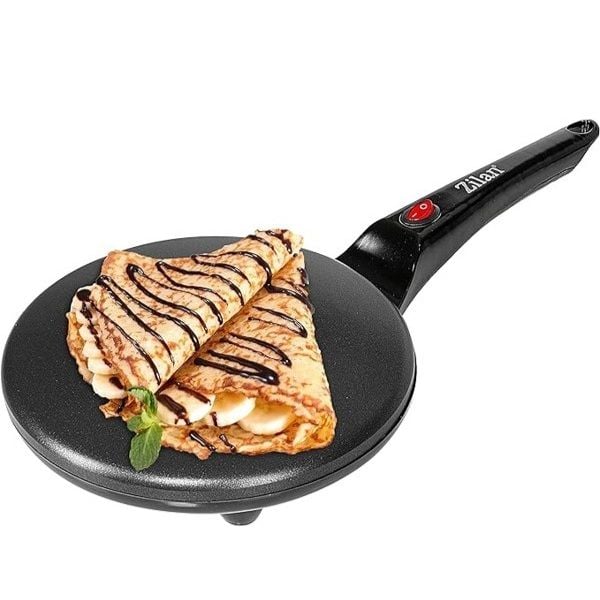
A crepe maker is a specialized cooking appliance designed for one glorious purpose: making perfect crepes. Unlike a standard frying pan, it features a large, flat, and typically nonstick surface with a low edge, which makes spreading batter and flipping crepes a breeze. Think of it as the difference between trying to paint a mural with a toothbrush versus a proper roller—the right tool simply changes the game. A great nonstick crepe maker ensures even heat distribution, preventing the dreaded hot spots that burn one side while leaving the other raw.
What Are the Different Types of Crepe Makers?
When you start shopping, you’ll find two main contenders in the crepe-making arena: electric models and specialized stovetop pans. Each has its own personality, and the right one for you depends on your kitchen style and crepe-making ambitions.
| Feature | Electric Crepe Maker | Nonstick Crepe Pan (Stovetop) |
|---|---|---|
| Heat Source | Self-contained electric heating element | Gas or electric stovetop |
| Heat Control | Precise, often with a dial | Dependant on your stovetop’s control |
| Portability | Can be used anywhere with an outlet | Limited to the kitchen stove |
| Ease of Use | Very beginner-friendly | Requires a bit more practice |
| Best For | Consistency and large batches | Traditional feel and versatility |
Electric Crepe Makers
These are standalone units you plug into the wall. They’re fantastic for beginners because they take the guesswork out of temperature control. Most have a simple dial to set the heat, so you get consistent results every single time. They’re perfect for setting up a “crepe station” at a brunch party.
Nonstick Crepe Pans
These are essentially specialized, shallow pans for your stovetop. They are often made from cast iron, carbon steel, or aluminum with a nonstick coating. They give you a more traditional, hands-on cooking experience. While mastering the heat on your stove can take a minute, these pans are often more versatile for other cooking tasks.
Key Features in Your Nonstick Crepe Maker Review
So, you’re ready to find “the one.” What should you look for? It’s not just about the nonstick surface. Here’s a breakdown of the features that truly matter.
Size and Surface Area
The diameter of the crepe maker determines the size of your crepes.
- 10-12 inches (25-30 cm): This is a great all-around size for classic dinner or dessert crepes. It’s manageable for flipping but large enough to hold a generous amount of filling.
- 13 inches (33 cm) and larger: These are for the serious crepe artist! They produce large, restaurant-style crepes, but they can be trickier for beginners to handle.
If your kitchen space is tight, you might feel limited. However, there are excellent smaller models available. For those looking for something more portable or easier to store, our compact crepe maker review explores some fantastic options that don’t compromise on quality.
Temperature Control
This is, without a doubt, the most critical feature. Inconsistent heat is the number one enemy of a good crepe.
“A great crepe maker is defined by its ability to maintain a precise, even temperature across the entire surface. This is the secret to achieving that uniformly golden, delicate texture without any burnt spots or pale patches.”
– Chef Isabelle Moreau, Pastry Consultant
Look for electric models with an adjustable thermostat and an indicator light that tells you when it’s reached the perfect temperature. For stovetop pans, a heavy base that distributes heat evenly is key.
The Nonstick Surface
The “nonstick” in nonstick crepe maker review is the star of the show. A quality PFOA-free coating allows you to use minimal oil or butter and ensures your delicate crepes release effortlessly. This not only makes flipping a joy but also simplifies cleanup immensely.
Included Accessories
Many crepe makers come with a starter kit, which is a huge bonus for beginners. Look for packages that include:
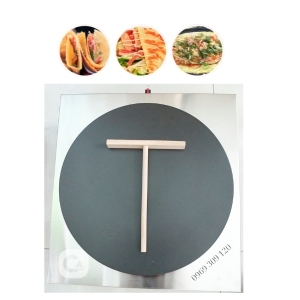
- A Batter Spreader (T-stick): This is essential for getting that signature paper-thin crepe.
- A Spatula: A long, thin spatula (often made of wood or nylon) is designed to get under the crepe without tearing it.
|
Our Picks for the Best Crepe Maker in 2025
As an Amazon Associate, we earn from qualifying purchases.
|
||
| Num | Product | Action |
|---|---|---|
| 1 | 24PCS Mini Pancake Maker Machine, Nonstick Electric Dutch Pancakes Griddle, Adjustable Heat Multi-Use Poffertjes Pan, Simple & Easy Baker for Home and Restaurants, Perfect for Breakfast & Desserts |

|
| 2 | Moss & Stone Electric Crepe Maker – 8” Portable Crepe Pan Nonstick with Dipping Plate, Auto Shut-Off, On/Off Switch, Even Heating & One Automatic Temperature Control – Compact Crepe Maker |
|
| 3 | Baker\'s Friend Instant Crepe Maker with Handle, Electric Crepe Maker Machine, Crepera Electrica, 8 Inch Non-stick Cooking Surface, Aqua |
|
| 4 | Proctor Silex Electric Crepe Maker with 13” Nonstick Griddle for Eggs, Pancakes, Omelets and Quesadillas, with Temperature Control, Spatula, Spreader, Batter Cup, Stainless Steel (38400PS) |
|
| 5 | ULTICOR Mini Pancake Maker – 14-Hole Electric Poffertjes Pan – Non-Stick Dutch Mini Pancakes Griddle – Easy to Use, Easy to Clean – Perfect for Breakfast, Desserts, Snacks & More |
|
| 6 | Gourmia 8” Crepe Maker – Nonstick Ceramic Electric Griddle for Crepes, Tortillas & Omelets, Automatic Batter Dipping, Compact & Lightweight, Quick Heat-Up, Includes Batter Plate, Easy Cleanup |
|
| 7 | nutrichef Electric Crepe Maker Pan & Griddle, 12 Inch Nonstick Cooktop, LED Indicators & Adjustable Temperature Control, Includes Spatula, Batter Spreader, Cooks Crepes, Roti & Pancakes |
|
| 8 | Nutrichef Electric Crepe Maker & Griddle Cooktop - Nonstick 12 Inch Aluminum Hot Plate with LED Indicator Lights & Adjustable Temperature Control - Wooden Spatula & Batter Spreader Included |
|
| 9 | Gourmia 12” Crepe Maker – Nonstick Electric Griddle for Pancakes, Omelets & More, Precise Temp Control with Indicator Lights, Includes Spatula & Batter Spreader, Quick Cleanup, Stainless Steel Trim |
|
| 10 | 110V US Commercial 25PCS Mini Pancake Maker,950W Mini Dutch Pancake Maker,Non-stick,Dutch Poffertjes Grill,Stainless Steel,Breakfast,Snacks,Desserts. |
|
How to Use a Crepe Maker: A Beginner’s Guide
Got your new crepe maker? Fantastic! Let’s turn that box into a stack of deliciousness.
- Prepare the Machine: Before your first use, wipe the surface with a damp cloth and dry it completely. “Season” the surface by lightly wiping it with a paper towel dipped in vegetable oil while it’s warm.
- Heat It Up: Turn on your electric maker or place your pan on the stove over medium heat. Let it preheat for a few minutes until it’s evenly hot. A drop of water should sizzle and evaporate instantly.
- Pour the Batter: Ladle about 1/4 to 1/3 cup of batter onto the center of the surface. The exact amount will depend on the size of your maker.
- Spread It Thin: This is the fun part! Immediately grab your T-shaped spreader. Starting from the center, gently push the batter outwards in a circular motion until you have a thin, even layer. Don’t press too hard! A light touch is all you need.
- Cook and Flip: Let it cook for about 30-60 seconds, or until the edges start to look dry and lift away from the surface. Gently slide your spatula underneath and flip it over with one confident motion.
- Finish Cooking: The second side needs only about 20-30 seconds. Slide it onto a plate and get ready for the next one!
Tips and Tricks for Flawless Crepes
- Let Your Batter Rest: After mixing your batter, let it rest in the fridge for at least 30 minutes. This allows the gluten to relax, resulting in a more tender, less rubbery crepe.
- The First Crepe is a Test: Don’t be discouraged if your first one is a mess. It’s an old kitchen tradition! Use it to test the temperature and the amount of batter.
- Use Clarified Butter: For the best flavor and a non-stick guarantee, brush the surface lightly with clarified butter (ghee) between crepes. Regular butter can burn, but clarified butter has a higher smoke point.
- Stack ‘Em Up: Place a piece of parchment or wax paper between crepes if you’re stacking them to prevent them from sticking together.
How Do I Clean and Care for My Crepe Maker?
Proper care will keep your nonstick surface in prime condition for years.
- Always Let It Cool Down: Never plunge a hot crepe maker into cold water. The thermal shock can warp the surface and damage the nonstick coating.
- Wipe, Don’t Scrub: After it has cooled, simply wipe the surface with a soft, damp cloth or paper towel. For any stubborn bits, use a soft sponge with a tiny drop of dish soap and rinse well.
- Avoid Abrasives: Never use metal utensils, steel wool, or abrasive scouring pads on the nonstick surface. You’ll scratch it, and its nonstick magic will be gone forever.
- Store It Safely: Store your crepe maker flat, and don’t stack other heavy pots and pans on top of it.
Beyond Crepes: What Else Can I Make?
Your crepe maker is more versatile than you think! It’s essentially a perfect little griddle. Use it to make:
- Pancakes and Blinis: The even heat is perfect for fluffy pancakes.
- Tortillas: Warm up store-bought tortillas or cook your own from scratch.
- Quesadillas: The large surface area is ideal for a perfectly melted, crispy quesadilla.
- Eggs: Fry or scramble eggs directly on the surface for an easy breakfast.
- Bacon: Cook bacon strips flat for an even crisp.
Frequently Asked Questions (FAQ)
1. Do I need to season my nonstick crepe maker?
Yes, it’s a good idea to lightly season it before the first use. Just wipe a thin layer of cooking oil onto the warm surface. This helps enhance the nonstick performance from the very beginning.
2. What is the best temperature to cook crepes?
Medium heat is the sweet spot. On an electric maker, this is usually around the middle of the dial (about 375-400°F or 190-200°C). Too hot and they’ll burn before they cook; too cool and they’ll get tough.
3. Can I use metal utensils on my nonstick crepe maker?
No, absolutely not. Metal utensils will scratch and ruin the nonstick coating. Always use the wood, silicone, or nylon tools that often come with the maker or are sold separately.
4. Why are my crepes tearing when I try to flip them?
This usually happens for two reasons: either the heat is too low and the crepe hasn’t set properly, or you’re trying to flip it too soon. Make sure the edges look dry and are starting to curl up slightly before you go in with the spatula.
5. Is an electric crepe maker better than a stovetop pan for a beginner?
For most beginners, an electric crepe maker is easier to use. The built-in temperature control removes a lot of the guesswork, allowing you to focus on mastering your batter-spreading technique.
Your Journey to Crepe Perfection Starts Now
Choosing the right appliance is the foundation of your crepe-making adventure. A quality crepe maker transforms a potentially frustrating task into a creative and rewarding culinary experience. By understanding the key features and how to use them, you’re not just buying a kitchen gadget; you’re unlocking a world of delicious possibilities, from savory buckwheat galettes to sweet, fruit-filled delights. This nonstick crepe maker review should give you the confidence to pick the perfect partner for your kitchen.
Now, go forth and create! And be sure to share your favorite crepe fillings and successes with our community. We can’t wait to see what you whip up.