Hello there, fellow crepe enthusiasts! It’s your friend from Crepe Maker Depot, and today, we’re diving deep into a topic close to my heart. Let’s talk about turning your kitchen into a little slice of Parisian heaven. If you’ve ever dreamt of crafting those delicate, paper-thin, golden-brown crepes but ended up with something more like a lumpy pancake, you’re in the right place. This Professional Crepe Maker Review is more than just a list of features; it’s your roadmap to crepe perfection. I’ve spent years behind these machines, and I’m here to share everything I’ve learned.
So, What Exactly Is a Crepe Maker, and Why Do You Need One?
At its core, a crepe maker is a dedicated appliance with a large, flat, circular cooking surface designed for one thing: making flawless crepes. You might be thinking, “Can’t I just use a skillet?” Sure, you can try. But a dedicated crepe maker offers two things a standard pan just can’t compete with: consistent, evenly distributed heat and a perfectly flat, expansive surface. This means no hot spots, no burnt edges with a raw center, and plenty of room to spread your batter into that signature ultra-thin layer. It’s the difference between “good enough” and magnifique.
For those exploring different types of convenient cooking appliances, you’ll find that specialized tools often deliver the best results. A great example of a user-friendly machine that excels at its specific task is detailed in this Dash crepe maker review, which illustrates the convenience these dedicated models offer.
The Lowdown on Crepe Maker Types![Fluffy Greek Yogurt Pancakes [Video] - Sweet and Savory Meals](https://sweetandsavorymeals.com/wp-content/uploads/2020/02/greek-yogurt-pancakes-SweetAndSavoryMeals-4.jpg)
When you start shopping, you’ll notice two main families of crepe makers. It’s not a one-size-fits-all situation, and the right one for you depends on your kitchen and your crepe-making ambitions.
- Electric Crepe Makers: These are the most common for home use. They’re countertop units that you plug in, set the temperature, and you’re good to go. They offer fantastic heat control and are incredibly user-friendly, making them perfect for beginners and seasoned pros alike.
- Pan-Style Crepe Makers: These are essentially specialized, heavy-bottomed pans, often made of cast iron or carbon steel, that you use on your stovetop (gas or induction). They require a bit more skill to manage the heat but are favored by traditionalists for the authentic “feel” and the beautiful crust they can produce.
Here’s a quick breakdown to help you decide:
| Feature | Electric Crepe Maker | Pan-Style Crepe Maker |
|---|---|---|
| Ease of Use | Very high; “set it and forget it” temperature | Moderate; requires manual heat management |
| Heat Control | Precise, thanks to built-in thermostats | Variable; depends on your stovetop’s power |
| Portability | Limited by outlet access | Highly portable; can be used on different heat sources |
| Best For | Beginners, consistent results, indoor use | Traditionalists, experienced cooks, camping |
Key Features in Our Professional Crepe Maker Review
Alright, let’s get into the nitty-gritty. When I’m evaluating a machine, these are the non-negotiables I look for. This is what separates the toys from the real tools of the trade.
Size and Surface Area: Does Bigger Mean Better?
The standard home crepe maker has a surface around 12-13 inches in diameter. This is a fantastic size for classic dinner-plate crepes, perfect for folding or rolling. Professional and commercial models can go up to 16 inches or more. For most home kitchens, 12-13 inches is the sweet spot—large enough for impressive results without taking over your entire counter.
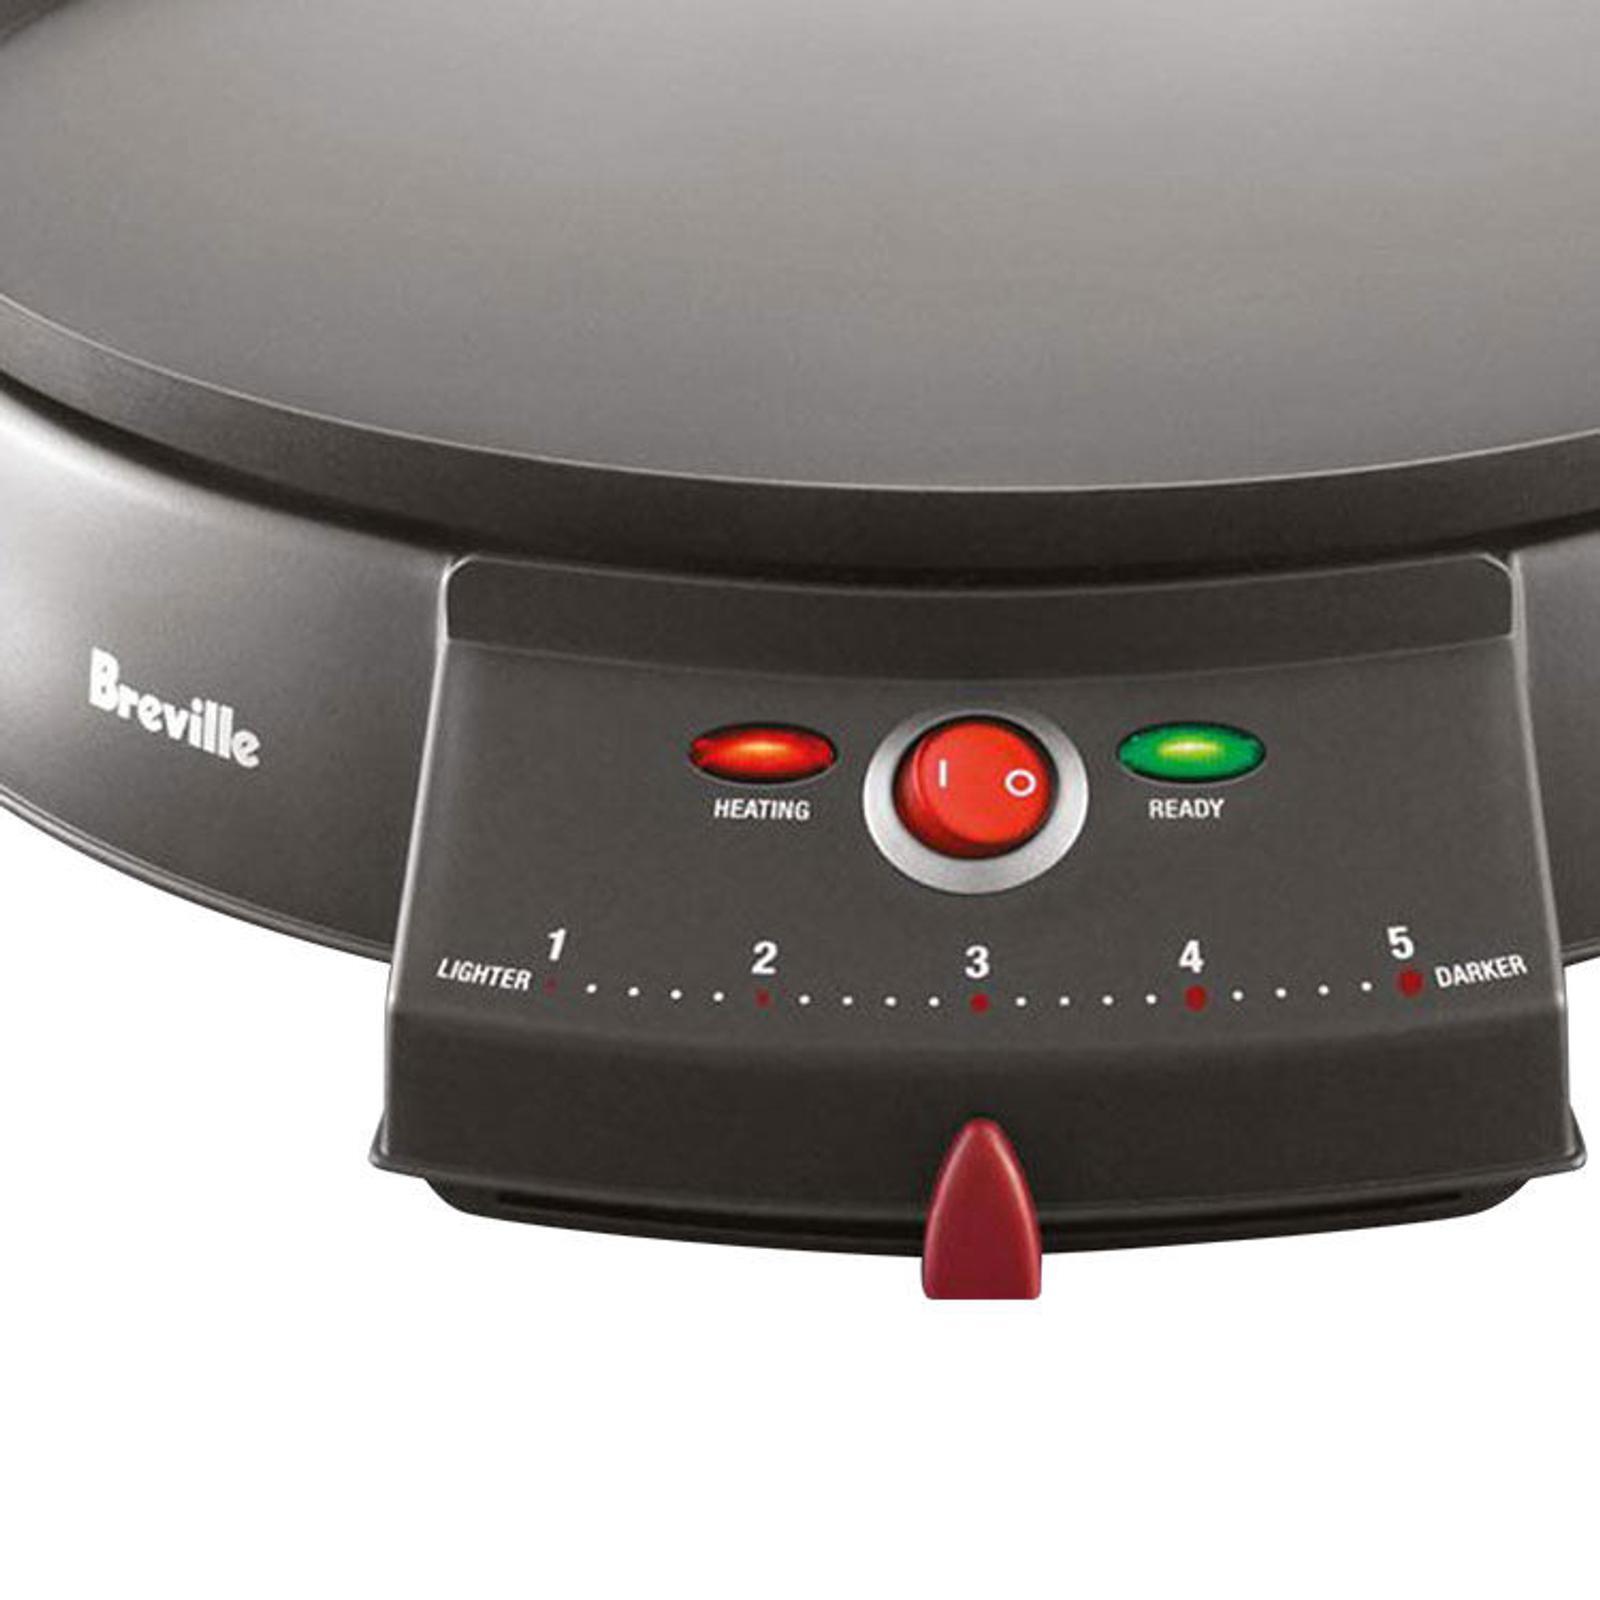
The Magic of Temperature Control
Why is precise temperature so crucial? It all comes down to the Maillard reaction—the chemical process that gives browned food its distinctive flavor and color.
As Pastry Chef Antoine Dubois often says, “A great crepe is a dance between time and temperature. Without precise heat control, you’re just guessing. You need a machine that can hold a steady temperature, allowing the batter to set and brown perfectly without burning.”
Look for a machine with an adjustable thermostat, preferably with a wide range. A good professional crepe maker review will always emphasize this feature. The ideal temperature for crepes is typically around 375-400°F (190-200°C). A machine that can reliably hit and maintain that temperature is worth its weight in gold.
Surface Material: Non-Stick is Non-Negotiable
A delicate crepe sticking to the surface is a culinary tragedy. The best surfaces are either seasoned cast iron (for traditional pans) or a high-quality, PFOA-free non-stick coating for electric models. This ensures your crepes release effortlessly, allowing for that satisfying, easy flip. A non-stick surface also means you’ll use far less butter or oil, leading to a healthier, less greasy final product.
Don’t Forget the Accessories!
A good crepe maker package often comes with the tools of the trade. The two most important are:
- A Batter Spreader: This T-shaped wooden or plastic tool is essential for spreading the batter in a thin, even circle.
- A Long, Thin Spatula: This is used for lifting the edges and flipping the crepe. A wooden one is ideal to avoid scratching the non-stick surface.
|
Our Picks for the Best Crepe Maker in 2025
As an Amazon Associate, we earn from qualifying purchases.
|
||
| Num | Product | Action |
|---|---|---|
| 1 | nutrichef Electric Crepe Maker Pan & Griddle, 12 Inch Nonstick Cooktop, LED Indicators & Adjustable Temperature Control, Includes Spatula, Batter Spreader, Cooks Crepes, Roti & Pancakes |

|
| 2 | Proctor Silex Electric Crepe Maker with 13” Nonstick Griddle for Eggs, Pancakes, Omelets and Quesadillas, with Temperature Control, Spatula, Spreader, Batter Cup, Stainless Steel (38400PS) |
|
| 3 | 110V US Commercial 25PCS Mini Pancake Maker,950W Mini Dutch Pancake Maker,Non-stick,Dutch Poffertjes Grill,Stainless Steel,Breakfast,Snacks,Desserts. |
|
| 4 | Gourmia 12” Crepe Maker – Nonstick Electric Griddle for Pancakes, Omelets & More, Precise Temp Control with Indicator Lights, Includes Spatula & Batter Spreader, Quick Cleanup, Stainless Steel Trim |
|
| 5 | ULTICOR Mini Pancake Maker – 14-Hole Electric Poffertjes Pan – Non-Stick Dutch Mini Pancakes Griddle – Easy to Use, Easy to Clean – Perfect for Breakfast, Desserts, Snacks & More |
|
| 6 | 24PCS Mini Pancake Maker Machine, Nonstick Electric Dutch Pancakes Griddle, Adjustable Heat Multi-Use Poffertjes Pan, Simple & Easy Baker for Home and Restaurants, Perfect for Breakfast & Desserts |
|
| 7 | Nutrichef Electric Crepe Maker & Griddle Cooktop - Nonstick 12 Inch Aluminum Hot Plate with LED Indicator Lights & Adjustable Temperature Control - Wooden Spatula & Batter Spreader Included |
|
| 8 | Gourmia 8” Crepe Maker – Nonstick Ceramic Electric Griddle for Crepes, Tortillas & Omelets, Automatic Batter Dipping, Compact & Lightweight, Quick Heat-Up, Includes Batter Plate, Easy Cleanup |
|
| 9 | Baker\'s Friend Instant Crepe Maker with Handle, Electric Crepe Maker Machine, Crepera Electrica, 8 Inch Non-stick Cooking Surface, Aqua |
|
| 10 | Moss & Stone Electric Crepe Maker – 8” Portable Crepe Pan Nonstick with Dipping Plate, Auto Shut-Off, On/Off Switch, Even Heating & One Automatic Temperature Control – Compact Crepe Maker |
|
Your First Crepe: A Beginner’s Guide to Using Your Machine
Ready to make some magic? Don’t be intimidated. Once you get the hang of it, the process is rhythmic and relaxing.
- Preparation is Key: Lightly grease the cold surface of your crepe maker with a little butter or oil on a paper towel. This is more for flavor and initial seasoning than for non-stick purposes.
- Preheat Properly: Turn your machine on and set it to your desired temperature. Most machines have an indicator light that tells you when it’s ready. Do not skip this step! Pouring batter on a cold surface is a recipe for a sticky mess.
- The Pour and Spread: Ladle about 1/3 cup of batter onto the center of the hot surface. Immediately grab your spreader and, starting from the center, work in a smooth, circular motion to spread the batter out to the edges. Don’t press too hard. Let the tool do the work.
- Patience and Timing: Let the crepe cook for about 45-60 seconds on the first side. You’ll see the edges start to dry and lift slightly. The surface will go from shiny to matte.
- The Flip: Gently slide your spatula under the edge of the crepe and lift. It should release easily. In one confident motion, flip it over. The second side needs only about 20-30 seconds to cook.
- Fill and Fold: Slide the finished crepe onto a plate and get started on the next one!
Pro Tips for Flawless Crepes Every Single Time
Over the years, I’ve picked up a few tricks that make a world of difference.
- Rest Your Batter: After mixing your batter, let it rest in the fridge for at least 30 minutes, or even overnight. This allows the gluten to relax and the flour to fully hydrate, resulting in a more tender, flavorful crepe.
- The First Crepe is a Sacrifice: Don’t get discouraged if your first crepe is a dud. It almost always is! Consider it a test for your temperature and a way to season the surface.
- Consistency is Crucial: Your batter should have the consistency of heavy cream. Too thick, and it won’t spread thin. Too thin, and it will tear easily.
- Work Clean: Keep a damp cloth handy to wipe down your spreader between crepes to prevent batter buildup.
Keeping Your Crepe Maker in Tip-Top Shape
A little love goes a long way in extending the life of your machine. After it has cooled down completely, simply wipe the surface with a soft, damp cloth. Avoid abrasive sponges, harsh detergents, and never submerge an electric crepe maker in water. For stubborn bits, a little oil on a paper towel will usually do the trick. Proper care ensures your machine will be your trusted partner for years of delicious breakfasts and desserts.
Beyond the Crepe: What Else Can You Make?
Think of your crepe maker as a mini electric griddle! Its large, even-heating surface is perfect for a variety of other delicious treats:
- American-style pancakes
- Flour tortillas
- Lacy potato latkes
- Fried or scrambled eggs
- Quesadillas and grilled cheese sandwiches
Frequently Asked Questions
What’s the best temperature to cook crepes?
The sweet spot is generally between 375°F and 400°F (190-200°C). This is hot enough to cook the crepe quickly and achieve a nice golden color without burning it before it’s cooked through.
Why are my crepes sticking to the crepe maker?
The most common culprits are insufficient preheating or a surface that needs a light re-seasoning with oil. Pouring batter on a surface that isn’t hot enough will cause it to stick every time.
Can I use pancake batter in a crepe maker?
While you can, it won’t produce a crepe. Pancake batter is much thicker and contains leavening agents. You’ll end up with a very large, flat pancake, which isn’t necessarily a bad thing!
How do I get my crepes perfectly thin?
The secret is a combination of a thin, well-rested batter and a quick, confident hand with the spreader. Use a light touch and move in one continuous spiral motion from the center outwards.
Is a commercial-grade crepe maker necessary for home use?
For 99% of home cooks, a good quality domestic electric crepe maker is more than sufficient. Commercial models are built for continuous, all-day use and are often overkill (and much more expensive) for a home kitchen.
The Final Word
Owning a quality machine transforms crepe making from a challenging chore into a joyful, creative process. I hope this professional crepe maker review and guide has demystified the process and inspired you to take the plunge. It’s an investment in countless happy breakfasts, delightful desserts, and the simple pleasure of creating something wonderful from scratch. Now, go forth and create! I’d love to hear about your crepe-making adventures and favorite recipes in the comments below.