Hello, fellow crepe enthusiasts! It’s your friend from Crepe Maker Depot, here to talk about something near and dear to my heart. We often get caught up in the magic of the crepe maker itself—the perfect temperature, the non-stick surface—but we sometimes forget the unsung heroes of our craft. I’m talking about your spatula and batter spreader. Proper Spatula And Batter Spreader Maintenance isn’t just a chore; it’s the secret handshake between you and a perfect, paper-thin crepe. Neglect them, and you’re in for a world of torn, clumpy frustration. But care for them, and they’ll reward you with flawless creations time and time again.
Let’s dive into the world of these essential tools. Understanding how to look after them is a foundational step, but it’s just one part of the grand crepe-making journey. For those who are also thinking about the longevity of their main equipment, it’s interesting to consider how long do crepe makers last, as proper care across all your tools is key. Today, we’ll cover everything from maintenance to mastering the machine itself, ensuring you have all the knowledge you need.
Why Your Tools Matter More Than You Think
Ever tried to paint a masterpiece with a frayed brush? It’s the same principle here. A warped wooden spreader will create thick and thin spots in your batter. A spatula with a nicked edge will tear your delicate crepe right when you go for that triumphant flip. These aren’t just pieces of wood or metal; they are extensions of your hands, the instruments that conduct the beautiful symphony of batter on a hot surface.
Think of it this way: your crepe maker is the stage, the batter is the star performer, but your spreader and spatula are the director and choreographer. They ensure the performance is smooth, graceful, and hits all the right notes. Giving them the care they deserve is non-negotiable for anyone serious about their crepe game.
Choosing Your Dynamic Duo: Spatulas and Spreaders
Before we get into the nitty-gritty of maintenance, let’s quickly touch on what you’re working with. The material of your tools dictates their care routine.
- Wooden (Beechwood is common): The traditionalist’s choice. They are gentle on non-stick surfaces and, when properly seasoned, glide beautifully. They require a bit more TLC, like a good cast-iron skillet.
- Stainless Steel: Durable, easy to clean, and often used by professionals. The key here is to have a delicate touch to avoid scratching your crepe maker’s surface. They are fantastic for seasoned cast-iron pans.
- Nylon/Silicone: The modern, low-maintenance option. They are flexible, heat-resistant, and dishwasher-safe. A great choice for beginners, though some purists miss the feel of wood.
The Heart of the Matter: A Guide to Spatula and Batter Spreader Maintenance
Alright, let’s roll up our sleeves. This is where you turn good tools into great, long-lasting partners in crime. Proper spatula and batter spreader maintenance is simpler than you think, but it demands consistency.
For Wooden Tools: The Traditional Choice
Your wooden tools are alive, in a sense. They can absorb water, dry out, and crack. Your job is to keep them seasoned, clean, and happy.
- First-Time Seasoning (The Most Important Step!): Before its maiden voyage, give your new wooden spreader and spatula a spa day. Submerge them in warm water for about 30 minutes. Then, let them air dry completely. Once dry, generously coat them with a food-safe mineral oil or a specialized wood conditioner. Let the oil soak in for several hours, or even overnight, then wipe off any excess with a clean cloth. This process seals the wood, preventing the batter from sticking and the wood from warping.
- The Post-Crepe Cleanup: Never, ever put your wooden tools in the dishwasher. The intense heat and prolonged moisture will destroy them. Instead, wash them by hand with warm water and a little mild soap immediately after use.
- Drying is Crucial: Don’t just toss them in a drawer. Pat them dry with a towel and then let them air dry completely before storing them. Trapped moisture is the enemy.
- Regular Re-oiling: Depending on how often you use them, you’ll want to re-oil your tools every month or so. If they start to look pale or dry, they’re thirsty. A quick coat of mineral oil will bring them right back to life.
For Stainless Steel and Nylon Tools: The Modern Approach
These guys are a bit more low-maintenance, but they still need some love.
- Dishwasher Safe (Usually): Most stainless steel and nylon/silicone tools can go right in the dishwasher. Check the manufacturer’s instructions to be sure.
- Avoid Abrasives: Don’t use steel wool or harsh scouring pads on them. While stainless steel is tough, you can still create micro-scratches that batter can cling to. A simple sponge and dish soap are all you need.
- Check for Wear and Tear: For nylon spatulas, check the edge for any signs of melting or fraying. For steel spatulas, ensure the edge is smooth and free of burrs that could damage your cooking surface.
A Pro’s Two Cents: I once spoke with renowned pastry chef Olivia Rose, and she said, “I treat my wooden spreader like I treat my best knife. I clean it immediately, dry it carefully, and never let anyone else touch it. It has a certain ‘feel’ that you develop over hundreds of crepes, and proper care preserves that.”
Now, About the Main Stage: The Crepe Maker Itself
Great tools are one thing, but they need a worthy stage to perform on. If you’re in the market or looking to upgrade, understanding the different types is key. For a commercial setting, the requirements are even more specific; a deeper dive into choosing a crepe maker for a food truck business reveals just how specialized these machines can get.
Here’s a quick comparison of the most common types for home use:
| Feature | Electric Crepe Maker | Non-Stick Crepe Pan (Stovetop) |
|---|---|---|
| Heat Source | Built-in electric coil | Gas or electric stovetop |
| Heat Control | Precise, adjustable thermostat | Relies on stovetop control; can be uneven |
| Consistency | Excellent; even heating surface | Can have hot spots depending on the stove |
| Portability | Less portable; needs an outlet | Very portable; works on most stovetops |
| Ease of Use | Very beginner-friendly | Requires more practice to manage heat |
|
Our Picks for the Best Crepe Maker in 2025
As an Amazon Associate, we earn from qualifying purchases.
|
||
| Num | Product | Action |
|---|---|---|
| 1 | 24PCS Mini Pancake Maker Machine, Nonstick Electric Dutch Pancakes Griddle, Adjustable Heat Multi-Use Poffertjes Pan, Simple & Easy Baker for Home and Restaurants, Perfect for Breakfast & Desserts |

|
| 2 | Baker\'s Friend Instant Crepe Maker with Handle, Electric Crepe Maker Machine, Crepera Electrica, 8 Inch Non-stick Cooking Surface, Aqua |
|
| 3 | ULTICOR Mini Pancake Maker – 14-Hole Electric Poffertjes Pan – Non-Stick Dutch Mini Pancakes Griddle – Easy to Use, Easy to Clean – Perfect for Breakfast, Desserts, Snacks & More |
|
| 4 | nutrichef Electric Crepe Maker Pan & Griddle, 12 Inch Nonstick Cooktop, LED Indicators & Adjustable Temperature Control, Includes Spatula, Batter Spreader, Cooks Crepes, Roti & Pancakes |
|
| 5 | Nutrichef Electric Crepe Maker & Griddle Cooktop - Nonstick 12 Inch Aluminum Hot Plate with LED Indicator Lights & Adjustable Temperature Control - Wooden Spatula & Batter Spreader Included |
|
| 6 | Gourmia 12” Crepe Maker – Nonstick Electric Griddle for Pancakes, Omelets & More, Precise Temp Control with Indicator Lights, Includes Spatula & Batter Spreader, Quick Cleanup, Stainless Steel Trim |
|
| 7 | Proctor Silex Electric Crepe Maker with 13” Nonstick Griddle for Eggs, Pancakes, Omelets and Quesadillas, with Temperature Control, Spatula, Spreader, Batter Cup, Stainless Steel (38400PS) |
|
| 8 | Gourmia 8” Crepe Maker – Nonstick Ceramic Electric Griddle for Crepes, Tortillas & Omelets, Automatic Batter Dipping, Compact & Lightweight, Quick Heat-Up, Includes Batter Plate, Easy Cleanup |
|
| 9 | 110V US Commercial 25PCS Mini Pancake Maker,950W Mini Dutch Pancake Maker,Non-stick,Dutch Poffertjes Grill,Stainless Steel,Breakfast,Snacks,Desserts. |
|
| 10 | Moss & Stone Electric Crepe Maker – 8” Portable Crepe Pan Nonstick with Dipping Plate, Auto Shut-Off, On/Off Switch, Even Heating & One Automatic Temperature Control – Compact Crepe Maker |
|
When you’re shopping, look for a large cooking surface (12-13 inches is great for versatile crepes), a reliable non-stick coating, and, for electric models, a precise temperature control dial. These features give you the control you need to achieve that perfect golden-brown finish.
From Batter to Bliss: Your First Perfect Crepe
Alright, your tools are pristine and your machine is ready. Let’s make a crepe!
- Preheat Your Machine: Get your electric maker or pan to a medium heat. It should be hot enough that a drop of water sizzles instantly but not so hot that it burns the batter on contact.
- A Touch of Fat: Lightly grease the surface with a bit of butter or oil on a paper towel. You barely need any, just enough for a micro-thin layer.
- The Pour and Spread: Pour a ladleful of batter (about 1/4 to 1/3 cup) into the center. Immediately grab your seasoned wooden spreader. Starting from the center, use a light, confident, circular motion to spread the batter out into a thin, even circle. Don’t press down hard! Let the tool do the work.
- The Cook: Let it cook for about 30-60 seconds, until the edges start to look dry and lift slightly. The surface should look set, not liquidy.
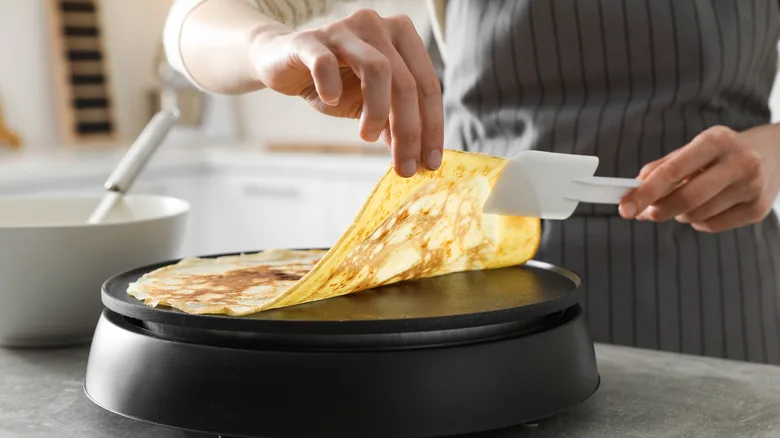
- The Flip: This is the moment of truth. Slide your long spatula completely under the crepe. Take a breath, and with a confident flick of the wrist, lift and flip it over.
- The Finish: The second side needs only about 20-30 seconds. Slide it onto a plate and get ready for the next one!
Keeping Your Crepe Maker in Prime Condition
Just like your tools, your machine needs care to perform its best. After it has cooled down completely, simply wipe the surface with a damp, soft cloth. Avoid abrasive cleaners that could damage the non-stick coating. Proper cleaning is a huge part of the puzzle, and to get the full picture, learning how to store a crepe maker properly will ensure it’s safe and ready for your next culinary adventure.
Frequently Asked Questions
How often should I oil my wooden crepe spreader?
If you use it frequently (weekly), a light re-oiling once a month is ideal. If you use it less often, re-oiling every 2-3 months or whenever it looks dry will keep it in perfect shape.
Can I use a metal spatula on a non-stick crepe maker?
It’s generally not recommended. Even with a careful hand, you risk scratching the non-stick surface over time. Stick with wooden or nylon/silicone spatulas for non-stick pans to be safe.
My batter is sticking to my wooden spreader. What did I do wrong?
This usually means the spreader wasn’t seasoned properly or it needs to be re-oiled. Another common culprit is not soaking it in water for a few minutes before its first use of the day. A quick soak prevents the dry wood from absorbing the moisture from the batter.
What is the T-shaped wooden tool called?
That’s the batter spreader! It’s also commonly known as a “rateau” in French or sometimes simply a T-stick or crepe rake.
Is there a difference between a crepe spatula and a regular spatula?
Yes, absolutely. A crepe spatula (or turner) is typically very long and thin, often with a straight edge. This design allows you to get fully underneath the wide, delicate crepe for a clean, tear-free flip. A standard kitchen spatula is usually too short and thick for the job.
Your Journey to Crepe Mastery
There you have it. The secret to incredible crepes isn’t just a great recipe; it’s a holistic approach that honors every piece of equipment. By investing a little time in spatula and batter spreader maintenance, you’re not just preserving your tools—you’re respecting the craft. You’re ensuring that every time you step up to your crepe maker, you’re set up for success. Now, go forth, spread that batter with confidence, and share your delicious creations with the world! We’d love to hear about your experiences in the comments below.