Hello, fellow food enthusiasts and future crepe artists! It’s your go-to expert from Crepe Maker Depot, here to chat about one of my absolute favorite kitchen tools. If you’ve ever wondered What Is A Cast Iron Crepe Pan and whether it’s the secret ingredient you’ve been missing, you’ve come to the right place. Let’s pull back the curtain on this timeless piece of cookware and discover why it might just become the most cherished pan in your kitchen.
Picture this: a lazy Sunday morning, the scent of vanilla and melted butter filling the air, and the delicate sizzle of batter hitting a hot surface. That’s the magic of crepe-making. And while there are many ways to get there, using a traditional cast iron pan is an experience in itself. It’s about connecting with a cooking method that has been perfected over generations.
First Off, What Exactly Is a Crepe Maker?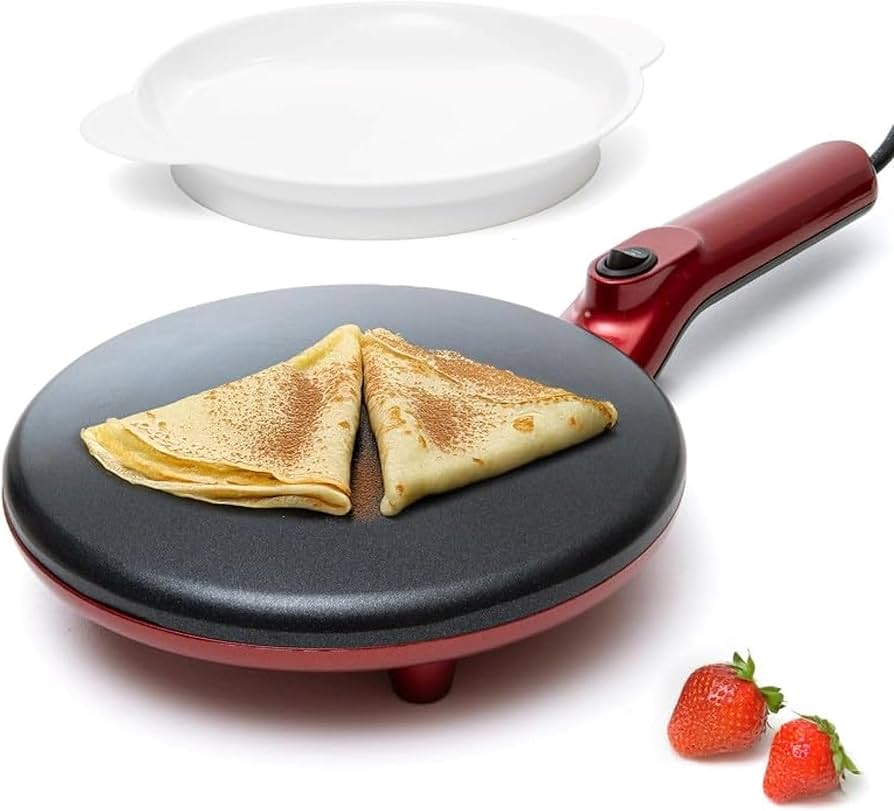
Simply put, a crepe maker is any device designed specifically for cooking thin, delicate crepes. This can range from a modern electric griddle to the classic pan we’re focusing on today. The goal is always the same: to provide a wide, flat, and evenly heated surface that allows you to spread batter incredibly thin and cook it to golden-brown perfection without any hot spots.
Are There Different Types of Crepe Makers?
You bet! The crepe-making world is beautifully diverse. While we’re diving deep into the cast iron variety, it’s helpful to know what else is out there.
- Electric Crepe Makers: These are countertop appliances with a built-in heating element and a non-stick cooking surface. They offer precise temperature control and are fantastic for beginners, ensuring consistent results every single time.
- Non-Stick Crepe Pans: These look similar to a standard frying pan but are much lighter and have very low, flared sides. They are easy to use and clean, making them a popular choice for quick and easy crepe sessions.
- Cast Iron Crepe Pans: The star of our show! These are the traditional, heavyweight champions of the crepe world. They are revered for their incredible heat retention and the unique, subtly crisp texture they impart to crepes.
Here’s a quick breakdown to help you compare:
| Feature | Electric Crepe Maker | Non-Stick Crepe Pan | Cast Iron Crepe Pan |
|---|---|---|---|
| Heat Control | Excellent, built-in thermostat | Good, relies on stovetop | Superb, holds heat steadily |
| Ease of Use | Very easy, beginner-friendly | Easy | Requires some practice (seasoning) |
| Versatility | Primarily for crepes/pancakes | Good for eggs, tortillas | Excellent, can be used for searing |
| Durability | Good | Fair (non-stick can degrade) | Exceptional, lasts for generations |
| Flavor/Texture | Consistent, soft texture | Good, but can lack crispness | Superior, develops a unique flavor |
So, What Is a Cast Iron Crepe Pan, Really?
A what is a cast iron crepe pan query brings us to the heart of traditional French cooking. It’s a heavy, flat-bottomed pan made from a single piece of cast iron. Its defining features are its shallow depth and low, gently sloped sides. This design isn’t just for looks; it’s pure function. The low sides make it incredibly easy to get a spatula under your delicate crepe for that all-important, flawless flip.
But the real magic is in the material itself. Cast iron is a master of heat. It takes a little longer to heat up than, say, aluminum, but once it’s hot, it stays hot. This incredible heat retention means you get a perfectly even cooking surface, eliminating the dreaded hot spots that can burn your crepe in one area while leaving another part undercooked.
“The soul of a perfect crepe lies in the heat. A well-seasoned cast iron pan doesn’t just cook the crepe; it breathes life into it, creating a texture that is impossible to replicate with modern non-stick surfaces.”
— Chef Isabelle Dubois, Parisian Pâtissier
This steady, radiant heat is what gives crepes made in a cast iron pan their signature texture: tender and pliable in the middle with exquisitely crisp, lacy edges.
|
Our Picks for the Best Crepe Maker in 2025
As an Amazon Associate, we earn from qualifying purchases.
|
||
| Num | Product | Action |
|---|---|---|
| 1 | 110V US Commercial 25PCS Mini Pancake Maker,950W Mini Dutch Pancake Maker,Non-stick,Dutch Poffertjes Grill,Stainless Steel,Breakfast,Snacks,Desserts. |

|
| 2 | Gourmia 12” Crepe Maker – Nonstick Electric Griddle for Pancakes, Omelets & More, Precise Temp Control with Indicator Lights, Includes Spatula & Batter Spreader, Quick Cleanup, Stainless Steel Trim |
|
| 3 | Moss & Stone Electric Crepe Maker – 8” Portable Crepe Pan Nonstick with Dipping Plate, Auto Shut-Off, On/Off Switch, Even Heating & One Automatic Temperature Control – Compact Crepe Maker |
|
| 4 | ULTICOR Mini Pancake Maker – 14-Hole Electric Poffertjes Pan – Non-Stick Dutch Mini Pancakes Griddle – Easy to Use, Easy to Clean – Perfect for Breakfast, Desserts, Snacks & More |
|
| 5 | Nutrichef Electric Crepe Maker & Griddle Cooktop - Nonstick 12 Inch Aluminum Hot Plate with LED Indicator Lights & Adjustable Temperature Control - Wooden Spatula & Batter Spreader Included |
|
| 6 | Gourmia 8” Crepe Maker – Nonstick Ceramic Electric Griddle for Crepes, Tortillas & Omelets, Automatic Batter Dipping, Compact & Lightweight, Quick Heat-Up, Includes Batter Plate, Easy Cleanup |
|
| 7 | 24PCS Mini Pancake Maker Machine, Nonstick Electric Dutch Pancakes Griddle, Adjustable Heat Multi-Use Poffertjes Pan, Simple & Easy Baker for Home and Restaurants, Perfect for Breakfast & Desserts |
|
| 8 | nutrichef Electric Crepe Maker Pan & Griddle, 12 Inch Nonstick Cooktop, LED Indicators & Adjustable Temperature Control, Includes Spatula, Batter Spreader, Cooks Crepes, Roti & Pancakes |
|
| 9 | Proctor Silex Electric Crepe Maker with 13” Nonstick Griddle for Eggs, Pancakes, Omelets and Quesadillas, with Temperature Control, Spatula, Spreader, Batter Cup, Stainless Steel (38400PS) |
|
| 10 | Baker\'s Friend Instant Crepe Maker with Handle, Electric Crepe Maker Machine, Crepera Electrica, 8 Inch Non-stick Cooking Surface, Aqua |
|
Key Features to Look For in a Cast Iron Crepe Pan
Thinking of adding one to your collection? Here’s what matters:
- Size: Most cast iron crepe pans range from 10 to 12 inches in diameter. This is a great size for standard dinner-plate crepes, whether you’re folding them into triangles or rolling them up.
- Seasoning: A well-seasoned pan is naturally non-stick. “Seasoning” is just a process of baking oil onto the cast iron, which creates a slick, polymerized surface. Many pans now come pre-seasoned, which is a huge help for beginners.
- Handle: Look for a comfortable handle that offers a good grip. Remember, the pan is heavy, and the handle will get hot, so you’ll always want to use an oven mitt or handle cover.
- Weight: Don’t be shy about the heft! The weight is a sign of quality and is essential for its heat-retaining properties. A good cast iron pan is an investment that will literally last a lifetime.
Your First Crepe on a Cast Iron Pan: A Beginner’s Guide
Feeling intimidated? Don’t be. I remember my first time, and believe me, with a few simple steps, you’ll be flipping like a pro.
- Prepare the Pan: Place your cast iron crepe pan on the stove over medium heat. Let it preheat for a good 5-10 minutes. You want it properly hot before the batter even thinks about touching it. To test if it’s ready, flick a tiny drop of water on it. If it sizzles and evaporates instantly, you’re good to go.
- Grease It Up: Even a seasoned pan needs a little fat. I swear by clarified butter (ghee) because it has a high smoke point and adds incredible flavor. You can also use a neutral oil like grapeseed or canola. Use a paper towel to wipe a very thin layer over the entire surface.
- Pour and Swirl: Ladle about 1/4 to 1/3 cup of your crepe batter into the center of the pan. Immediately pick up the pan by the handle and gently swirl it in a circular motion to spread the batter as thinly and evenly as possible. This is the crucial move!
- Cook and Wait: Let it cook for about 45-60 seconds. You’ll see the edges start to dry out and lift away from the pan. The surface will go from shiny to matte.
- The Flip: This is the moment of truth! Slide a long, thin spatula (an offset spatula works wonders) under the crepe, lift it confidently, and flip it over. The other side only needs about 20-30 seconds.
- Serve and Repeat: Slide the finished crepe onto a plate. Give the pan a quick wipe with your oiled paper towel between each crepe, and keep going!
Pro Tips for Perfect Cast Iron Crepes
- Let Your Batter Rest! This is non-negotiable. After mixing your batter, let it rest in the fridge for at least 30 minutes, or even overnight. This allows the gluten to relax, resulting in a much more tender and delicate crepe.
- The First Crepe is for the Chef. It’s an old saying for a reason. The first crepe is almost always a sacrifice. Use it to test the heat of your pan and the amount of batter you need. Don’t worry if it’s a mess—it’s a delicious mess.
- Control Your Heat. You want steady, medium heat. If your crepes are cooking too fast or burning, turn the heat down slightly. If they’re taking too long and turning out rubbery, nudge it up a bit.
How Do I Care for My Cast Iron Crepe Pan?
Proper care is what turns a good pan into a great one that you can pass down to your grandkids. It’s simpler than you think.
- Cleaning: After cooking, let the pan cool down slightly. Use a paper towel to wipe out any excess oil or crumbs. For anything stuck on, use a stiff brush or a plastic scraper and hot water. Avoid using soap if you can, as it can strip the seasoning you’ve worked so hard to build.
- Drying: This is the most important step! Never let your cast iron air dry, as it will rust. Dry it thoroughly with a towel, then place it back on the stove over low heat for a few minutes to evaporate any remaining moisture.
- Re-seasoning: Once it’s bone-dry, pour a tiny bit of cooking oil into the pan and use a paper towel to rub a very thin coat over the entire cooking surface. This protects it from rust and builds up your non-stick layer.
Beyond Crepes: What Else Can You Make?
Your cast iron crepe pan is more versatile than you think! Its flat surface and even heating make it perfect for:
- Pancakes and Galettes: The obvious cousins of the crepe.
- Tortillas: Both flour and corn tortillas cook up beautifully.
- Pita Bread and Naan: Get a wonderful puff and lovely char marks.
- Quesadillas: Achieve a perfectly crisp exterior and gooey, melted cheese inside.
- Searing Fish or Scallops: The high, even heat provides an incredible sear.
Frequently Asked Questions
Q: Can I use a regular cast iron skillet instead of a crepe pan?
A: You certainly can! The main difference is the high, steep sides of a skillet make flipping a delicate crepe a bit trickier. A dedicated crepe pan’s low, sloped sides are designed to make that process effortless.
Q: My crepes are sticking to my new cast iron crepe pan! What did I do wrong?
A: Don’t panic! This usually comes down to one of three things: the pan wasn’t hot enough before you added the batter, you didn’t use enough butter or oil, or the pan’s seasoning needs to be built up a bit more. Keep using it, and it will get better with every cook.
Q: Is a heavier cast iron pan better?
A: Generally, yes. The weight and thickness are what give cast iron its superior heat retention. A flimsy, lightweight pan won’t hold heat as evenly, which can lead to hot spots and inconsistent cooking.
Q: Can I use metal utensils on my cast iron crepe pan?
A: Absolutely! Unlike chemical non-stick coatings, the seasoned surface of a cast iron pan is incredibly durable. A metal spatula is often the best tool for getting cleanly under a crepe.
Q: How do I fix a rusty cast iron pan?
A: It’s easier than you think. Just scrub the rust off with steel wool, wash the pan thoroughly with soap and water (this is one of the few times soap is okay!), dry it completely, and then re-season it by applying a thin layer of oil and baking it in the oven for an hour.
So, what is a cast iron crepe pan? It’s more than just cookware; it’s a connection to tradition, a tool for creating culinary magic, and a durable kitchen partner that only gets better with age. It invites you to slow down, to perfect a technique, and to enjoy the simple, profound pleasure of making something delicious from scratch. Now, who’s ready to start flipping?