Hello fellow crepe enthusiasts, and welcome to the heart of Crepe Maker Depot! It’s your resident crepe guru, here to chat about something we often overlook in our quest for the perfect, paper-thin delicacy: aftercare. You’ve just finished a glorious session, the kitchen smells divine, and you’re left with a slightly messy but faithful crepe maker. You wash it gently, but then comes the crucial question: What Is The Best Way To Dry A Crepe Maker to ensure it lives a long, happy life?
It might sound like a simple question, but trust me, getting this step right is the secret to protecting your investment and guaranteeing countless future batches of flawless crepes. It’s the difference between a non-stick surface that lasts for years and one that starts to give you trouble way too soon. So, grab a coffee, and let’s dive into the art of crepe maker care, from the final wipe-down to getting it ready for its next performance.
Why Proper Drying Is Your Crepe Maker’s Best Friend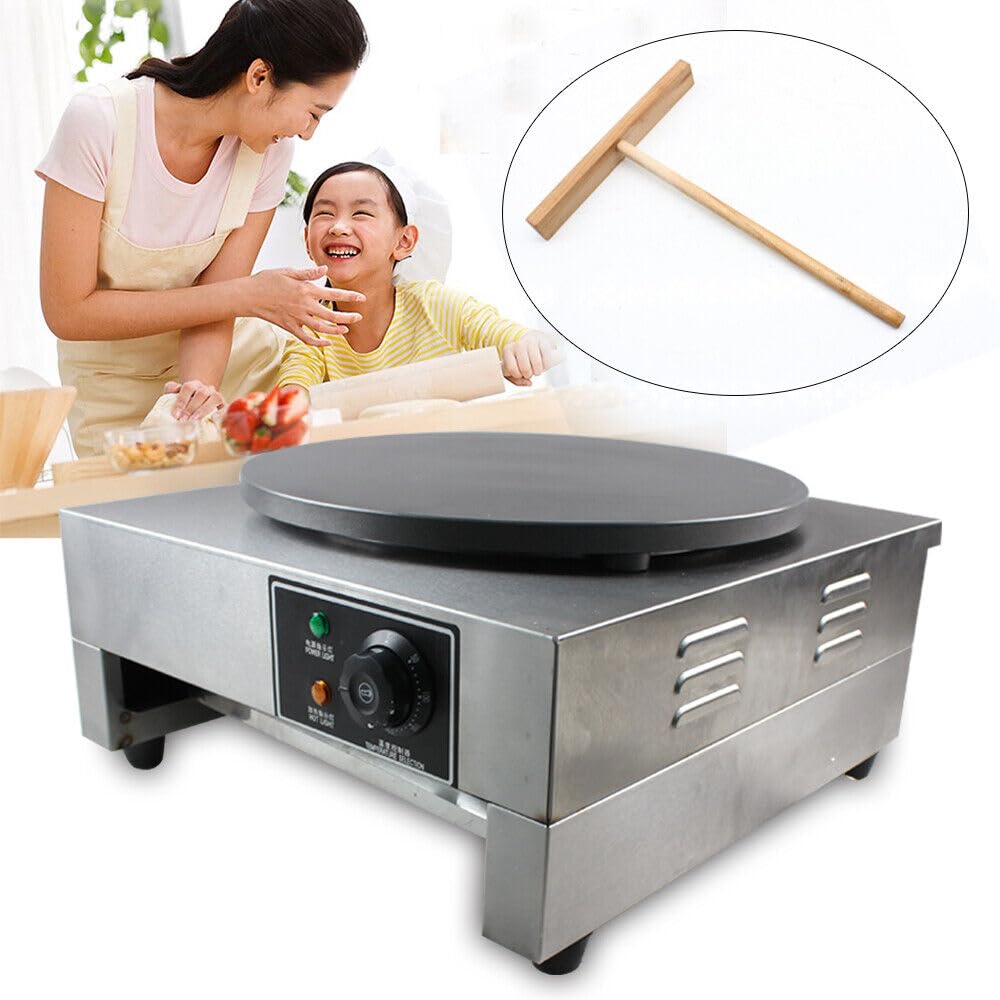
Let’s be real for a moment. Most of us just want to get the cleanup over with. But treating your crepe maker with a little TLC, especially when it comes to drying, pays off big time. Think of its non-stick surface like a delicate ecosystem.
- It Prevents Rust: This is especially critical for cast iron models or any parts with exposed metal. Lingering moisture is the number one enemy and the fast track to rust spots.
- It Protects the Non-Stick Coating: Many non-stick coatings can be compromised by mineral deposits left behind from evaporated tap water. Over time, this can lead to a less effective surface, meaning your crepes might start sticking.
- It Ensures a Clean Start: A perfectly dry crepe maker is a perfectly clean one. You won’t have to worry about any residual moisture sizzling or interfering with your batter the next time you heat it up.
So, how do we achieve this state of perfect, moisture-free bliss?
The Definitive Answer: What Is the Best Way to Dry a Crepe Maker?
After countless hours spent in my kitchen lab (and a few rookie mistakes years ago!), I’ve perfected a three-step method that is foolproof. It combines gentleness with efficiency, ensuring not a single drop of moisture remains.
- The Initial Gentle Pat-Down: Once you’ve cleaned the surface with a soft sponge and a tiny bit of mild soap (and rinsed it thoroughly!), don’t just leave it in the dish rack. Grab a soft, clean, lint-free cloth—a microfiber towel is absolutely perfect for this—and gently pat the entire surface dry. Don’t scrub or rub aggressively. The goal here is just to remove the bulk of the water.
- Air-Drying Is Good, But We Can Do Better: Letting it air dry is a common step, but it’s not the final one. Air drying can still leave behind invisible trace amounts of moisture, especially in the tiny pores of the cooking surface or around the edges and crevices of the machine.
- The Pro-Move: A Kiss of Low Heat: Here is the game-changer. After patting it dry, plug your electric crepe maker in and turn it on to its lowest heat setting for just 2-3 minutes. For a stovetop pan, place it on the burner on very low heat. This gentle warmth will evaporate every last bit of sneaky, residual moisture. You’ll know it’s perfectly dry when the surface looks uniform and feels slightly warm to the touch (be careful!). Turn it off, let it cool completely, and then store it.
A Word of Caution: We’re talking low heat. You are not trying to preheat it for another batch of crepes. The goal is gentle evaporation, not searing heat, which could be stressful for a cold, clean non-stick surface.
This method ensures your crepe maker is bone-dry and ready for storage, protecting it from moisture-related damage and preserving that precious non-stick surface.
First Things First: How to Clean Your Crepe Maker Properly
You can’t have a perfectly dry crepe maker without a perfectly clean one. Cleaning is an art of subtraction—removing what you don’t want (grease, batter bits) without damaging what you do (the cooking surface).
Do’s of Crepe Maker Cleaning
- Wait for it to cool down: Never, ever pour cold water onto a hot crepe maker. This thermal shock can warp the plate or damage the non-stick coating. Let it cool until it’s just warm to the touch.
- Use soft materials: A soft sponge, a dishcloth, or a paper towel is all you need.
- Use a drop of mild dish soap: For stubborn residue, a tiny amount of gentle soap in warm water works wonders.
- Wipe, don’t scrub: Use gentle, circular motions.
Don’ts of Crepe Maker Cleaning
- Never use metal utensils: Don’t scrape off burnt bits with a knife or metal spatula. Use a silicone or wooden spatula if needed while it’s still warm.
- Avoid abrasive cleaners: Say no to steel wool, scouring pads, and harsh chemical cleaners. They will scratch and destroy your non-stick surface.
- Don’t submerge electric models: This is a huge safety hazard and will ruin the electrical components. Only the removable plates on some models are submersible—always check your manual!
Choosing Your Crepe-Making Partner
If you’re new here, you might be wondering which type of crepe maker is right for you. It really comes down to your kitchen style and how often you plan on making these French delights.
| Feature | Electric Crepe Maker | Crepe Pan (Stovetop) |
|---|---|---|
| Heat Control | Precise, consistent temperature settings | Dependent on your stovetop; requires more practice |
| Ease of Use | Very beginner-friendly; large, flat surface | Steeper learning curve; swirling is a key skill |
| Portability | Less portable; needs an outlet | Very portable; works on gas, electric, induction |
| Even Cooking | Excellent; heating element covers the whole plate | Good, but can have hot spots depending on the burner |
| Best For | Families, beginners, and perfectionists | Those with limited space, experienced cooks |
|
Our Picks for the Best Crepe Maker in 2025
As an Amazon Associate, we earn from qualifying purchases.
|
||
| Num | Product | Action |
|---|---|---|
| 1 | 110V US Commercial 25PCS Mini Pancake Maker,950W Mini Dutch Pancake Maker,Non-stick,Dutch Poffertjes Grill,Stainless Steel,Breakfast,Snacks,Desserts. |

|
| 2 | Proctor Silex Electric Crepe Maker with 13” Nonstick Griddle for Eggs, Pancakes, Omelets and Quesadillas, with Temperature Control, Spatula, Spreader, Batter Cup, Stainless Steel (38400PS) |
|
| 3 | Baker\'s Friend Instant Crepe Maker with Handle, Electric Crepe Maker Machine, Crepera Electrica, 8 Inch Non-stick Cooking Surface, Aqua |
|
| 4 | Nutrichef Electric Crepe Maker & Griddle Cooktop - Nonstick 12 Inch Aluminum Hot Plate with LED Indicator Lights & Adjustable Temperature Control - Wooden Spatula & Batter Spreader Included |
|
| 5 | nutrichef Electric Crepe Maker Pan & Griddle, 12 Inch Nonstick Cooktop, LED Indicators & Adjustable Temperature Control, Includes Spatula, Batter Spreader, Cooks Crepes, Roti & Pancakes |
|
| 6 | ULTICOR Mini Pancake Maker – 14-Hole Electric Poffertjes Pan – Non-Stick Dutch Mini Pancakes Griddle – Easy to Use, Easy to Clean – Perfect for Breakfast, Desserts, Snacks & More |
|
| 7 | Moss & Stone Electric Crepe Maker – 8” Portable Crepe Pan Nonstick with Dipping Plate, Auto Shut-Off, On/Off Switch, Even Heating & One Automatic Temperature Control – Compact Crepe Maker |
|
| 8 | 24PCS Mini Pancake Maker Machine, Nonstick Electric Dutch Pancakes Griddle, Adjustable Heat Multi-Use Poffertjes Pan, Simple & Easy Baker for Home and Restaurants, Perfect for Breakfast & Desserts |
|
| 9 | Gourmia 8” Crepe Maker – Nonstick Ceramic Electric Griddle for Crepes, Tortillas & Omelets, Automatic Batter Dipping, Compact & Lightweight, Quick Heat-Up, Includes Batter Plate, Easy Cleanup |
|
| 10 | Gourmia 12” Crepe Maker – Nonstick Electric Griddle for Pancakes, Omelets & More, Precise Temp Control with Indicator Lights, Includes Spatula & Batter Spreader, Quick Cleanup, Stainless Steel Trim |
|
Key Features to Look For
- Size: A 12 or 13-inch surface is a great all-purpose size for classic crepes.
- Temperature Control: For electric models, variable temperature control is a must-have for getting that perfect golden-brown finish.
- Surface: A high-quality PFOA-free non-stick surface is the standard for easy flipping and cleaning. Cast iron is a fantastic, durable option but requires seasoning and more care.
Your First Perfect Crepe: A Beginner’s Guide
Ready to make some magic? Using your crepe maker for the first time is exciting. Here’s a quick-start guide.
- Season (If Necessary): If you have a new cast iron pan, you’ll need to season it. For most non-stick models, a quick wipe with a lightly oiled paper towel on the warm surface before the very first use is all you need.
- Preheat Perfectly: This is non-negotiable. Set your electric maker to a medium heat (around 400°F / 200°C is a good starting point) and give it a full 5-10 minutes to heat up evenly.
- The Batter: Your batter should have the consistency of heavy cream. Too thick, and it won’t spread. Too thin, and it’ll be fragile.
- The Pour and Swirl: Pour about 1/4 to 1/3 cup of batter into the center of the hot surface. Immediately use the T-shaped spreader in a circular motion, starting from the center and working your way out, to create a thin, even circle. Work quickly!
- The Flip: After about 30-60 seconds, the edges will start to look dry and may lift slightly. The surface will look set, not wet. Slide a long, thin spatula under the crepe and flip it with a confident flick of the wrist. Cook the other side for another 20-30 seconds.
- Serve and Repeat: Slide that beauty onto a plate and get ready for the next one!
Beyond Crepes: Other Delicious Uses for Your Maker
Don’t let your crepe maker be a one-trick pony! That large, flat, evenly-heated surface is perfect for a whole host of other treats.
- Pancakes and Flapjacks: Perfect for making large, diner-style pancakes.
- Tortillas: Gently warm up store-bought tortillas or even cook homemade ones from scratch.
- Quesadillas: The large surface area is ideal for a perfectly melted, crispy quesadilla.
- Eggs: Fry or scramble eggs directly on the surface.
- Bacon or Sausages: The consistent heat cooks breakfast meats beautifully.
Frequently Asked Questions
What’s the best way to store my crepe maker?
After it’s perfectly dry and cool, store it in a dry cupboard. If you can, place a paper towel or a soft cloth on the cooking surface to protect it from scratches if you plan on stacking other pans on top of it.
Why are my crepes sticking to my non-stick surface?
This usually happens for one of two reasons: the surface wasn’t preheated enough, or there’s a buildup of microscopic food/oil residue. Give it a thorough but gentle clean, and make sure you’re preheating it properly before pouring the batter.
Can I use cooking spray on my crepe maker?
It’s generally not recommended. Cooking sprays contain propellants and emulsifiers that can build up on non-stick surfaces over time, creating a gummy residue that’s hard to remove and actually causes food to stick. A light wipe with a paper towel dipped in butter or oil is much better.
How do I know when the crepe is ready to flip?
Look at the surface. It should change from glossy and wet to matte and set. The edges will also begin to look dry and may even curl up just a tiny bit. That’s your signal!
Can my crepe maker pan go in the dishwasher?
I would strongly advise against it, even if the manufacturer says it’s “dishwasher safe.” The harsh detergents and high heat in a dishwasher can degrade the non-stick coating over time. A gentle hand wash takes less than a minute and will preserve its life for years.
Your Partner in Crepe Perfection
At the end of the day, your crepe maker is a tool for creating joy, connection, and delicious memories. And like any good tool, it performs best when it’s well-cared for. Now that you know that the secret to longevity isn’t just how you cook but also understanding what is the best way to dry a crepe maker, you’re equipped to keep your machine in peak condition. It’s a simple, quick step that makes all the difference.
Happy crepe making, and don’t forget to share your own tips or favorite fillings in the comments below! We’re all part of this delicious community.
One thought on “What Is the Best Way to Dry a Crepe Maker? A Pro Guide”