Crepes, with their delicate texture and versatile nature, are a culinary delight. However, achieving that perfect, intact flip can often feel like a high-wire act, turning a simple breakfast into a kitchen challenge. If you’ve ever watched your beautiful, thin crepe tear apart mid-flip, you know the frustration. The good news is that mastering the art of flipping a crepe without breaking it is entirely achievable with the right techniques, tools, and a bit of practice.
Whether you’re aiming for a casual breakfast at home or looking to impress guests, understanding the nuances of crepe readiness and employing effective flipping methods will elevate your crepe-making game. Forget the days of crepe casualties; it’s time to learn how to confidently turn your crepes like a seasoned pro.
Understanding Crepe Readiness: When to Make Your Move
The secret to a successful flip begins long before you even consider touching the crepe. Knowing precisely when your crepe is ready to be turned is paramount. Flipping too early will inevitably lead to tears, while waiting too long can result in a brittle, overcooked texture.
Look for these key indicators that signal your crepe is ready for its flip:
- Edges Curling: As the crepe cooks, the edges will naturally start to crisp up and pull away from the sides of the pan. This is a clear sign that the bottom has cooked through and released.
- Dry Surface: The liquid batter on top of the crepe should visibly dry out and set. When you gently jiggle the pan, the top surface should no longer appear wet or liquid, though it may still be soft.
- Bubbles Forming: Small bubbles appearing on the surface of the crepe are another good indication of cooking progress.
- Crepe Moves Freely: This is perhaps the most crucial sign. Gently shake your pan. If the crepe slides easily and freely across the bottom without sticking, it has fully released and is ready to be flipped. If it doesn’t move easily, use a thin spatula to carefully loosen the edges all around before attempting to flip.
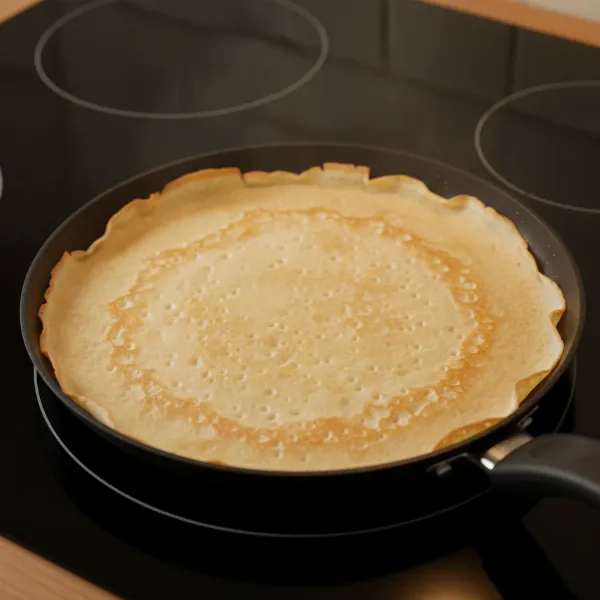 Close-up of a crepe in a pan showing readiness for flipping with curled edges and dry surface.
Essential Tools for Perfect Flipping
While some experienced crepe makers can seemingly flip with anything, having the right tools can make a significant difference, especially for beginners.
Crepe Maker Types
Crepe makers come in a few forms, each with its own advantages for flipping:
- Handheld Crepe Makers: These allow you to dip the cooking surface into the batter. While great for achieving thin crepes, flipping usually involves removing the crepe and using another tool or your hands.
- Pros: Extremely thin crepes, portable.
- Cons: Can be tricky to master for evenness, less control over heat during the flip.
- Tabletop Crepe Makers: These electric griddles offer consistent, even heat. They provide a flat, stable surface ideal for various flipping techniques.
- Pros: Precise temperature control, large cooking surface, excellent for consistent results.
- Cons: Less portable than handheld, requires countertop space.
- Professional Crepe Makers: Designed for high volume, these robust units are found in restaurants and cafes. They offer superior durability and power, often featuring large cooking surfaces perfect for rapid production.
- Pros: High durability, powerful, often with advanced features.
- Cons: Very expensive, requires significant space.
|
Our Picks for the Best Crepe maker in 2026
As an Amazon Associate I earn from qualifying purchases.
|
||
| Num | Product | Action |
|---|---|---|
| 1 | 16 Inch Commercial Crepe Maker, Dual-Head, Dual Zone Temp Setting, Nonstick Pancake Griddle Machine, 50-300°C(120-570℉), 3400W, S.S. Shell, for Catering, Restaurant, Snack Stand, CE Certified |

|
| 2 | Nutrichef Electric Crepe Maker - 8-inch Nonstick Cooktop with On/Off Switch - Cooks Roti, Tortillas & Pancakes - Automatic Temperature Control & Cool Touch Handle - Includes Food Bowl, Whisk & Spatula |
|
| 3 | Moss & Stone Electric Crepe Maker – 8” Portable Crepe Pan Nonstick with Dipping Plate, Auto Shut-Off, On/Off Switch, Even Heating & One Automatic Temperature Control – Compact Crepe Maker |
|
| 4 | Moss & Stone Electric Crepe Maker 8 Inch, Portable Crepe Maker & Hot Plate Cooktop On/Off Switch, Nonstick Coating, Automatic Temperature Control, Easy To Use For Pancakes, Blintz, Chapati |
|
| 5 | Baker's Friend Instant Crepe Maker with Handle, Electric Crepe Maker Machine, Crepera Electrica, 8 Inch Non-stick Cooking Surface, Aqua |
|
| 6 | Nutrichef Electric Crepe Maker & Griddle Cooktop - Nonstick 12 Inch Aluminum Hot Plate with LED Indicator Lights & Adjustable Temperature Control - Wooden Spatula & Batter Spreader Included |
|
| 7 | Gourmia 8” Electric Crepe Maker – Nonstick Ceramic Surface, One-Touch Operation, Includes Batter Tray, Compact & Easy to Clean, Crepe, Pancake & Tortilla Maker |
|
| 8 | Moss & Stone 12” Electric Griddle Pan & Crepe Machine, Non-Stick Electric Crepe Maker with Adjustable Temperature, Includes Spreader & Spatula – Ideal for Pancakes, Blintzes & Tortillas |
|
| 9 | Gourmia 12” Crepe Maker – Nonstick Electric Griddle for Pancakes, Omelets & More, Precise Temp Control with Indicator Lights, Includes Spatula & Batter Spreader, Quick Cleanup, Stainless Steel Trim |
|
| 10 | Electric Crepe Maker 12'' & Griddle - Non-Stick Pan With Spreader for Roti, Tortilla, Blintzes, Pancakes - Adjustable Temperature, 1000W |
|
Spatulas and Spreaders
Beyond the crepe maker itself, your choice of spatula is critical.
- Thin, Wide Spatula: A thin, flexible, and wide spatula (often called a fish slice or turner) is your best friend for flipping crepes. Its thin edge allows it to slide easily under the delicate crepe without tearing, while its width provides ample support.
- Crepe Spreader (T-stick): While not for flipping, a crepe spreader helps you achieve a perfectly thin, even layer of batter. Keeping it clean is vital, as clumps of batter on the spreader can lead to holes or rips in your crepe.
Mastering the Spatula Flip
The spatula flip is the most common and often recommended technique for beginners, offering control and minimizing the risk of breakage.
Step-by-Step Spatula Technique
- Assess Readiness: Wait until the crepe shows all the signs of readiness: curled edges, dry surface, and free movement in the pan.
- Loosen Edges: If the crepe isn’t moving freely, gently run your thin spatula around the edges to ensure it’s completely detached from the pan.
- Slide Under: Slide the spatula under approximately two-thirds of the crepe, starting from the edge furthest from your dominant hand. Be deliberate but gentle, ensuring the spatula is level with the pan.
- Lift and Rotate: Lift the crepe slightly, bringing it up from the pan. Then, in a smooth, fluid motion, rotate your wrist to turn the crepe over, allowing it to land gently back in the pan on its uncooked side. Avoid a forceful or jerky movement.
- Cook Second Side: Cook the second side for a shorter duration, typically 30 seconds to 1 minute, or until lightly golden brown.
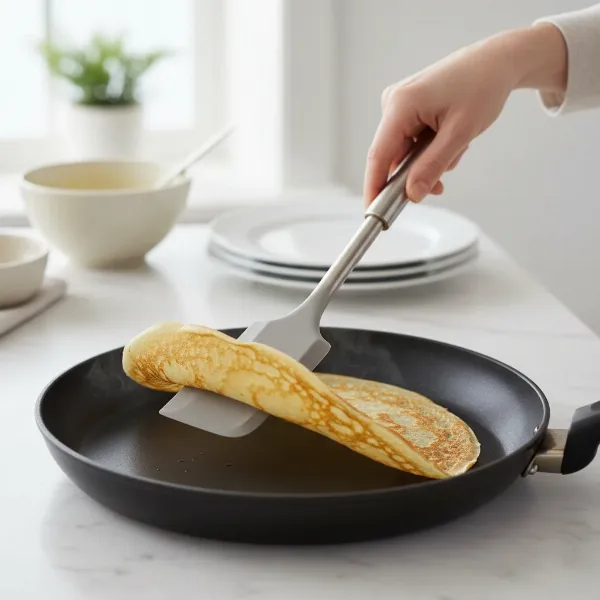 A thin, wide spatula gently flipping a crepe in a non-stick pan, showing the technique.
“Flipping is the second hardest part of making a crepe. You’ll want to make sure that your spatula is level with the pan, and just slide that under, lift and flip, and you’ll notice I kind of rotated my spatula. This kind of makes it a little bit easier.” – CrepePro, Expert Crepe Maker
The Confident Hand Flip
For those seeking a more traditional or tactile approach, the hand flip can be incredibly effective once mastered. This method requires a bit more confidence and a tolerance for heat.
How to Execute a Hand Flip
- Ensure Readiness: Again, the crepe must be fully released and cooked enough to be pliable, not brittle.
- Lift an Edge: Use your fingertips to gently lift a small section of the crepe’s edge.
- Grasp and Lift: Carefully slide your fingers further under the crepe, or gently grab the lifted edge. Be swift but gentle, supporting as much of the crepe as possible.
- Flip: In one quick, confident motion, lift the crepe entirely out of the pan and flip it over, laying it back down on its uncooked side. Be careful not to burn your fingers on the hot pan or crepe.
- Cook: Continue cooking until lightly browned.
This technique might seem intimidating, but with practice, it offers unparalleled control and a truly authentic feel.
The Pan Toss Technique
The pan toss is the most dramatic and impressive method, often seen in professional kitchens. It requires practice and a good understanding of timing and physics.
Steps for the Airborne Flip
- Confirm Readiness: The crepe must be completely detached from the pan and cooked on the first side.
- Shake to Free: Give the pan a strong but controlled shake to ensure the crepe slides freely.
- The Flick: Using your wrist, gently but firmly flick the pan upwards and away from you. The goal is to propel the crepe into the air, allowing it to rotate mid-air before landing back in the pan.
- Catch and Cook: Catch the crepe gently on its uncooked side and continue cooking. “The higher you throw it, the more time you have to catch it, so shoot for the stars!”
Tip: Practice with a cold pan and a non-stick surface first to get the motion down without the pressure of a hot crepe.
Common Mistakes and How to Avoid Them
Even with the best techniques, mishaps can occur. Here are common pitfalls and how to steer clear of them:
- Flipping Too Early: This is the most frequent cause of tears. Always wait for the visual cues of readiness: curled edges, dry surface, and free movement.
- Incorrect Batter Consistency: Batter that is too thin will be fragile and difficult to flip. Batter that is too thick will yield a more pancake-like result. Aim for a consistency similar to thin cream.
- Pan Not Hot Enough or Too Hot: A pan that’s not hot enough will cause the crepe to stick and cook unevenly. A pan that’s too hot will burn the crepe before it’s ready to release. Preheat your pan over medium-high heat.
- Not Using a Non-Stick Surface: A good quality non-stick pan is crucial. If your pan is scratched or has a buildup of carbon, crepes are more likely to stick and tear.
- Lack of Confidence: Hesitation can lead to clumsy movements. Be decisive in your flip.
- The “First Crepe” Syndrome: Don’t be discouraged by the first crepe! “Even the French say, ‘The first crêpe is for the dog!'” It often serves to season the pan and help you adjust the heat.
Tips for Consistent Success
Beyond technique, a few foundational tips will ensure your crepe-flipping journey is smooth and enjoyable.
- Batter Rest Time: Allow your crepe batter to rest in the refrigerator for at least 30 minutes, or even an hour, after mixing. This allows the gluten to relax, making the crepes more flexible and less prone to tearing.
- Proper Pan Seasoning: Even with a non-stick pan, a light brush of butter or neutral oil before each crepe can prevent sticking.
- Patience is Key: Crepe making is an art that benefits from a calm approach. Don’t rush the process, especially when waiting for the crepe to cook through before flipping.
- Clean Your Tools: Regularly clean your crepe spreader and spatula to prevent batter buildup, which can cause imperfections in your crepes.
- Practice, Practice, Practice: Like any skill, crepe flipping improves with repetition. Don’t be afraid to experiment with different techniques to find what works best for you.
Conclusion
Flipping a crepe without breaking it might seem daunting at first, but with a blend of patience, proper technique, and the right tools, it’s a skill you can absolutely master. Remember to pay close attention to the signs of a perfectly cooked first side, choose the flipping method that suits your comfort level—whether it’s a careful spatula maneuver, a confident hand flip, or an adventurous pan toss—and avoid common mistakes like premature flipping or incorrect batter consistency. By focusing on these core principles, you’ll soon be turning out beautifully intact crepes with ease. What’s your go-to crepe filling once you’ve perfected that flawless flip?
Frequently Asked Questions
How do I prevent my crepes from sticking to the pan?
To prevent crepes from sticking, ensure you use a good quality non-stick pan and that it is adequately preheated to medium-high heat. A light brush of butter or oil before pouring each ladle of batter also helps create a non-stick barrier. Additionally, check your batter consistency; if it’s too thin, it might be more prone to sticking.
Can I make crepes thicker to make them easier to flip?
While making crepes slightly thicker can indeed make them less fragile and easier to handle, be aware that this will change their traditional delicate texture. True French crepes are known for their paper-thin quality. If you’re a beginner, starting with a slightly thicker batter can be a good practice step, and you can gradually reduce the thickness as your confidence grows.
What kind of spatula is best for flipping crepes?
A thin, wide, and flexible spatula (often called a fish slice or turner) is ideal for flipping crepes. Its thin edge allows it to slide easily under the delicate crepe without tearing, and its width provides ample support across the crepe’s surface, minimizing the chance of it breaking during the flip. Silicone or nylon spatulas are often preferred for non-stick pans to prevent damage.