For those who navigate the delicious world of crepes without gluten, an electric crepe maker isn’t just a convenience—it’s a game-changer. As a technician with over a decade of experience in crepe maker technology, from home units to commercial powerhouses, I’ve seen firsthand how the right tools and techniques can transform your kitchen creations. Crafting perfect gluten-free crepes can feel like a delicate art, but with the consistent heat and user-friendly design of an electric maker, you’re well on your way to thin, tender, and incredibly satisfying results every time. This guide will walk you through the nuances of gluten-free batter, best practices for your electric maker, and expert tips to ensure your crepes are nothing short of perfection.
Why Choose an Electric Crepe Maker for Gluten-Free Crepes?
The journey to perfect crepes often begins with the right equipment, and for gluten-free varieties, an electric crepe maker offers distinct advantages. Unlike traditional skillets that can have hot spots, electric makers provide consistent, evenly distributed heat across the entire cooking surface. This uniform temperature is crucial for gluten-free batters, which can be more sensitive to temperature fluctuations and prone to uneven cooking or tearing.
Electric crepe makers also simplify the process, making them less intimidating for both novices and seasoned chefs. With intuitive temperature controls, you can precisely adjust the heat to achieve that ideal golden-brown hue and tender texture without constant adjustments. Their typically non-stick surfaces also help in easily lifting delicate gluten-free crepes, reducing the chances of sticking or breaking. This combination of control, consistency, and ease makes an electric crepe maker an invaluable tool in your gluten-free kitchen.
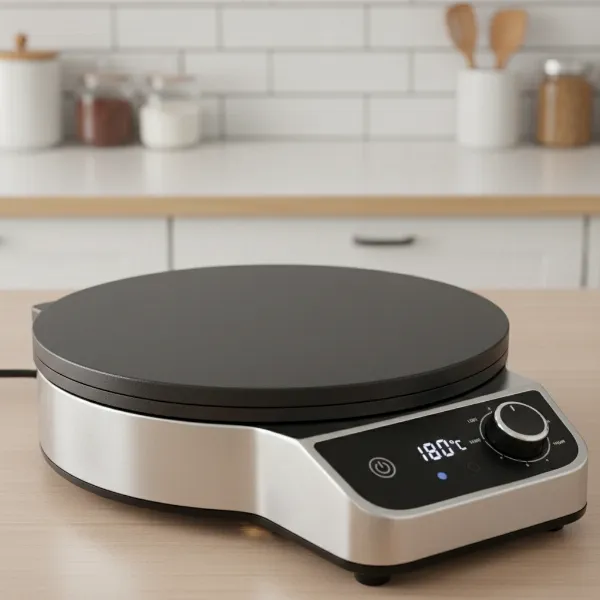 Electric crepe maker with consistent heat, ideal for gluten-free crepes.
Understanding Gluten-Free Crepe Batter
Gluten-free baking demands a different understanding of dough and batter, and crepes are no exception. The absence of gluten, the protein network that gives traditional crepes their elasticity and structure, means we need to approach the batter differently.
The Science of Gluten-Free Flours
|
Our Picks for the Best Crepe maker in 2026
As an Amazon Associate I earn from qualifying purchases.
|
||
| Num | Product | Action |
|---|---|---|
| 1 | Gourmia 12” Crepe Maker – Nonstick Electric Griddle for Pancakes, Omelets & More, Precise Temp Control with Indicator Lights, Includes Spatula & Batter Spreader, Quick Cleanup, Stainless Steel Trim |

|
| 2 | Nutrichef Electric Crepe Maker - 8-inch Nonstick Cooktop with On/Off Switch - Cooks Roti, Tortillas & Pancakes - Automatic Temperature Control & Cool Touch Handle - Includes Food Bowl, Whisk & Spatula |
|
| 3 | Moss & Stone Electric Crepe Maker – 8” Portable Crepe Pan Nonstick with Dipping Plate, Auto Shut-Off, On/Off Switch, Even Heating & One Automatic Temperature Control – Compact Crepe Maker |
|
| 4 | Electric Crepe Maker 12'' & Griddle - Non-Stick Pan With Spreader for Roti, Tortilla, Blintzes, Pancakes - Adjustable Temperature, 1000W |
|
| 5 | Moss & Stone 12” Electric Griddle Pan & Crepe Machine, Non-Stick Electric Crepe Maker with Adjustable Temperature, Includes Spreader & Spatula – Ideal for Pancakes, Blintzes & Tortillas |
|
| 6 | Gourmia 8” Electric Crepe Maker – Nonstick Ceramic Surface, One-Touch Operation, Includes Batter Tray, Compact & Easy to Clean, Crepe, Pancake & Tortilla Maker |
|
| 7 | Baker's Friend Instant Crepe Maker with Handle, Electric Crepe Maker Machine, Crepera Electrica, 8 Inch Non-stick Cooking Surface, Aqua |
|
| 8 | Moss & Stone Electric Crepe Maker 8 Inch, Portable Crepe Maker & Hot Plate Cooktop On/Off Switch, Nonstick Coating, Automatic Temperature Control, Easy To Use For Pancakes, Blintz, Chapati |
|
| 9 | 16 Inch Commercial Crepe Maker, Dual-Head, Dual Zone Temp Setting, Nonstick Pancake Griddle Machine, 50-300°C(120-570℉), 3400W, S.S. Shell, for Catering, Restaurant, Snack Stand, CE Certified |
|
| 10 | Nutrichef Electric Crepe Maker & Griddle Cooktop - Nonstick 12 Inch Aluminum Hot Plate with LED Indicator Lights & Adjustable Temperature Control - Wooden Spatula & Batter Spreader Included |
|
Gluten-free flours behave uniquely compared to wheat flour. Instead of developing gluten, we rely on a blend of flours to mimic the desired texture. Common choices include rice flour (white or brown), tapioca starch, potato starch, and sometimes a touch of buckwheat flour for a distinct flavor. The key often lies in using a high-quality gluten-free all-purpose blend, which typically combines several of these flours.
Crucially, xanthan gum plays a vital role. In gluten-free recipes, xanthan gum acts as a binder, providing the necessary elasticity and preventing the crepes from becoming crumbly or tearing easily. Most 1:1 gluten-free baking blends already contain xanthan gum, but if yours doesn’t, you’ll need to add about ¼ teaspoon per cup of flour to achieve the desired texture. Without it, your crepes may lack the flexibility that makes them so delightful.
Achieving the Perfect Consistency
The ideal gluten-free crepe batter should have a consistency akin to “half and half” – thicker than whole milk but thinner than heavy cream. This balance is critical: too thick, and your crepes will be heavy and rubbery; too thin, and they’ll be hard to spread and tear easily. You may need to adjust the liquid slightly, adding a tablespoon of milk or water at a time until you reach the desired pourable, yet substantial, consistency.
The Importance of Resting
This step is non-negotiable for gluten-free crepes. Resting the batter, ideally for at least 30 minutes to an hour (or even overnight in the refrigerator), allows the gluten-free flours ample time to fully absorb the liquid. This hydration process is vital for creating a more stable, pliable batter that spreads smoothly and cooks evenly, resulting in tender crepes that resist tearing during cooking and flipping. Skipping the resting period can lead to brittle, uneven crepes.
Essential Ingredients for Delicious Gluten-Free Crepes
Crafting exquisite gluten-free crepes begins with selecting the right ingredients. Each component plays a specific role in achieving that coveted thin, delicate texture.
- Gluten-Free Flour Blend: As discussed, a good 1:1 all-purpose gluten-free flour blend with xanthan gum is your best friend. If your blend doesn’t include it, add about ¼ teaspoon of xanthan gum per cup of flour. Buckwheat flour also makes naturally gluten-free crepes with a distinct earthy flavor.
- Liquid Components: Whole milk is traditional, but you can easily substitute with non-dairy alternatives like almond milk or oat milk for a dairy-free option. Many recipes also include a small amount of water to achieve the perfect thinness.
- Binders & Flavor Enhancers:
- Eggs: Provide structure and richness, binding the batter together.
- Melted Butter or Oil: Adds tenderness, flavor, and helps prevent sticking.
- Granulated Sugar: A small amount for sweet crepes enhances flavor and aids in browning. For savory crepes, you might omit or reduce it.
- Salt: Balances the flavors.
- Vanilla Extract: For sweet crepes, vanilla adds a beautiful aromatic touch.
Cross-Contamination Prevention
For those with celiac disease or severe gluten sensitivity, preventing cross-contamination is paramount. When making gluten-free crepes, ensure you use:
- Dedicated Equipment: If possible, use a separate electric crepe maker, bowls, whisks, and spatulas that have not come into contact with gluten-containing flours.
- Thorough Cleaning: If dedicated equipment isn’t feasible, meticulously clean all surfaces and tools that will touch your gluten-free ingredients. Even residual flour dust can be problematic.
Step-by-Step Guide to Making Gluten-Free Crepes on an Electric Maker
With your well-rested batter and clean equipment, it’s time to bring your gluten-free crepes to life. An electric crepe maker simplifies the process, but a few techniques will ensure perfection.
Preparing Your Electric Crepe Maker
First, place your electric crepe maker on a stable, heat-resistant surface. Preheat the maker to the recommended temperature, usually medium to medium-high. Many electric makers have indicator lights that signal when the desired temperature is reached. It’s crucial to allow the machine to fully preheat; starting on a cold surface can lead to crepes that stick or cook unevenly. Lightly brush the cooking surface with melted butter or a neutral oil, wiping away any excess. A very thin layer of fat is all you need for effective non-stick performance and a crisp edge.
Mixing and Resting Your Batter
For the smoothest batter, a blender is highly recommended, especially for gluten-free flours that can be prone to lumps. Simply add all your liquid ingredients first, then the dry ingredients (including xanthan gum if adding separately), and blend until smooth. If blending by hand, use a fine whisk and ensure all ingredients are well incorporated.
Once mixed, transfer the batter to a bowl or a shallow dish if you have an inverted-style crepe maker. Cover it tightly and refrigerate for at least 30 minutes, and preferably for 1-2 hours or even overnight. This resting period allows the gluten-free flours to properly hydrate, preventing tearing and yielding more pliable, tender crepes. After resting, give the batter a gentle stir; you may need to add a touch more milk or water if it has thickened too much.
Cooking Your Gluten-Free Crepes
The method for cooking depends on your electric crepe maker style:
- For Inverted Dip-Style Makers: Once preheated and lightly greased, gently invert the hot, domed cooking surface directly into your rested batter, dipping it about ¼ inch deep. Hold it there for 3-5 seconds, allowing a thin layer of batter to adhere evenly to the surface. Lift the maker, turn it right-side up onto its base, and let the crepe cook.
- For Flat Griddle-Style Makers: Pour a small ladle (typically ¼ cup) of batter onto the center of the preheated, lightly greased surface. Immediately use a T-shaped crepe spreader or the back of the ladle to quickly and gently spread the batter outwards in a circular motion, creating a thin, even circle. Work quickly to ensure the batter spreads before it sets.
Regardless of the style, cook until the crepe’s edges begin to look dry and slightly golden, and you can easily lift the edge with a thin spatula—usually 1 to 2 minutes. For a traditional crepe, you might only cook one side on the maker for a pale, delicate finish. If you prefer a slightly crispier, more cooked crepe, gently slide your spatula under the crepe and confidently flip it. Cook the second side for another 30-60 seconds until lightly golden. Transfer the cooked crepe to a plate and cover it with foil or a clean towel to keep it warm and pliable while you cook the rest.
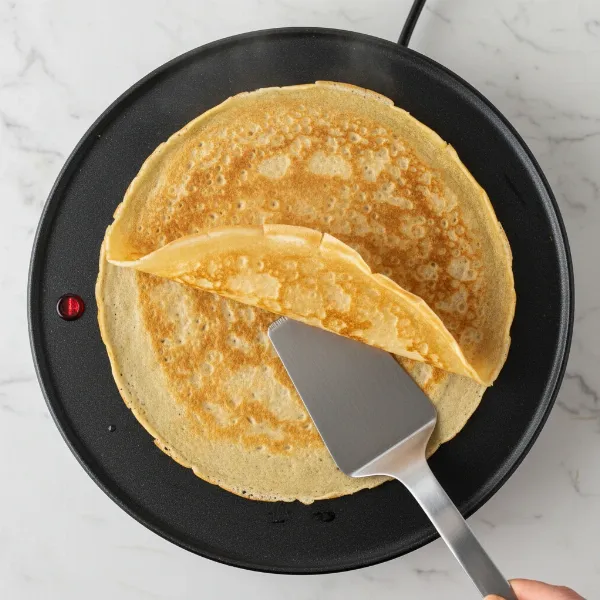 Hand using a spatula to flip a delicate gluten-free crepe on an electric maker.
Troubleshooting Common Gluten-Free Crepe Problems
Even with the best electric maker and recipe, gluten-free crepes can present unique challenges. Here’s how to tackle common issues:
- Crepes are Sticking: This is often due to insufficient oiling or a surface that isn’t hot enough. Make sure your electric maker is fully preheated and that you’ve applied a very thin, even layer of butter or oil, potentially before each crepe. If your maker has a cast iron surface, ensure it’s well-seasoned.
- Crepes are Rubbery or Thick: This usually indicates too much flour in your batter, not enough liquid, or overcooking. Check your flour-to-liquid ratio, thin the batter slightly with a tablespoon of milk or water, and ensure you’re spreading the batter as thinly as possible. Cook just until set; overcooking will make them tough. Using a gluten-free flour blend with too much xanthan gum can also contribute to rubberiness.
- Crepes have Holes or are Uneven: An under-rested batter can be too airy or inconsistent, leading to holes. Ensure your batter rests adequately. Uneven spreading is another culprit; practice using your crepe spreader or dipping technique for an even, thin coating. Over-whisking the batter can introduce too much air, so mix until just combined.
- Lumpy Batter: This typically means your ingredients weren’t mixed thoroughly. Use a blender for the smoothest batter, or whisk vigorously by hand. Ensure any butter is fully melted and that all ingredients are at room temperature to prevent clumping. If lumps persist, you can strain the batter through a fine-mesh sieve.
- Crepes are Tearing When Flipping: This is often a sign of insufficient binding (not enough xanthan gum or eggs), an under-rested batter, or premature flipping. Make sure the first side is almost entirely cooked through and set before attempting to flip. A thin, flexible non-stick spatula can also make flipping easier.
Tips for Perfect Gluten-Free Crepes Every Time
Elevating your gluten-free crepe game is all about refinement and understanding the unique properties of your batter. Here are a few final tips from the pro’s playbook:
- Master the Spatula/Spreader: For flat griddle-style makers, a T-shaped crepe spreader is invaluable for achieving consistently thin, even crepes. Practice makes perfect with the swirling motion. For lifting and flipping, a thin, flexible, heat-resistant spatula is your best friend.
- Keep Cooked Crepes Warm: As you cook a stack of crepes, transfer them to a plate and cover loosely with aluminum foil or a clean kitchen towel. This traps steam, keeping them warm and pliable until you’re ready to serve. You can also place the plate in a very low oven (around 175°F / 80°C) to maintain warmth.
- Don’t Fear the First Crepe: The first crepe is almost always a “tester.” It helps you gauge the perfect temperature, batter consistency, and spreading technique. Don’t be discouraged if it’s not perfect; it’s a delicious learning opportunity!
- Storage and Reheating: Cooked gluten-free crepes store beautifully. Stack them with parchment paper in between (optional, but prevents sticking) and wrap tightly in plastic wrap or place in an airtight container. They’ll keep in the refrigerator for 3-5 days or can be frozen for up to two months. Reheat individual crepes in a dry, warm skillet or microwave for a few seconds until pliable again.
- Experiment with Fillings: The beauty of crepes lies in their versatility. Go sweet with fresh berries, whipped cream, Nutella, or fruit compotes. Or explore savory options like ham and cheese, sautéed mushrooms, spinach, or a creamy chicken filling. The possibilities are endless!
Conclusion
Making gluten-free crepes on an electric maker is not just achievable; it can be an incredibly rewarding culinary experience. By understanding the unique needs of gluten-free flours, paying attention to batter consistency and resting times, and leveraging the consistent heat of your electric maker, you can create crepes that are as thin, tender, and delightful as their traditional counterparts. Don’t be afraid to experiment with different gluten-free flour blends or fillings—every crepe you make builds your expertise. So, fire up your crepe maker, mix that batter, and prepare to impress your taste buds and guests. What delicious filling will you try first with your perfectly crafted gluten-free crepes?
Frequently Asked Questions
Do I need xanthan gum for gluten-free crepes?
Yes, xanthan gum is highly recommended for gluten-free crepes as it provides the necessary elasticity and binding power that gluten typically offers. It helps prevent crepes from becoming brittle or tearing easily, resulting in a more pliable and tender texture. If your 1:1 gluten-free flour blend doesn’t include it, add about ¼ teaspoon per cup of flour.
Can I make gluten-free crepes dairy-free?
Absolutely! To make gluten-free crepes dairy-free, simply substitute regular milk with an unsweetened dairy-free milk alternative like almond milk, oat milk, or soy milk. You should also replace melted butter with a neutral oil (like vegetable or canola oil) or a dairy-free butter substitute.
How long can I store gluten-free crepe batter?
Gluten-free crepe batter benefits greatly from resting, and it can be stored in the refrigerator for up to 24-48 hours. Ensure it’s covered tightly with plastic wrap to prevent a skin from forming. Give it a quick whisk before cooking, and you may need to add a touch more liquid if it has thickened too much.
What’s the best temperature for an electric crepe maker?
The ideal temperature for an electric Crepe Maker typically ranges from medium to medium-high heat. Most makers will have an indicator light that signals when the optimal temperature is reached. It’s crucial to preheat thoroughly to ensure even cooking and prevent sticking, usually around 350-375°F (175-190°C), but follow your specific model’s instructions.
Why are my gluten-free crepes tearing when I flip them?
Tearing often occurs if the batter is under-rested, too thin, or if you’re attempting to flip too soon. Ensure your batter has rested long enough for the flours to hydrate, check its consistency (should be like “half and half”), and wait until the crepe is mostly set and its edges are slightly dry and lifting before confidently attempting to flip with a thin spatula.