The aroma of freshly made roti or chapati wafting through your home is truly one of life’s simple pleasures. These staple flatbreads are a cornerstone of many cuisines, but perfecting their soft texture and characteristic puff can feel like an art form, especially when transitioning to modern kitchen appliances. If you’ve been wondering how to achieve authentic, delicious roti and chapati using an electric griddle, you’re in the right place. This comprehensive guide will equip you with all the knowledge and techniques needed to transform your electric griddle into a flatbread-making powerhouse, helping you craft perfectly soft and puffy results every time.
Understanding Your Electric Griddle for Roti & Chapati
Making excellent roti and chapati hinges on consistent heat and a suitable cooking surface. Electric griddles offer a convenient and often more controlled environment compared to traditional stovetop methods, but understanding their specific advantages for flatbreads is key to success.
What Makes a Good Electric Griddle for Flatbreads?
|
Our Picks for the Best Crepe maker in 2026
As an Amazon Associate I earn from qualifying purchases.
|
||
| Num | Product | Action |
|---|---|---|
| 1 | Nutrichef Electric Crepe Maker - 8-inch Nonstick Cooktop with On/Off Switch - Cooks Roti, Tortillas & Pancakes - Automatic Temperature Control & Cool Touch Handle - Includes Food Bowl, Whisk & Spatula |

|
| 2 | Moss & Stone Electric Crepe Maker 8 Inch, Portable Crepe Maker & Hot Plate Cooktop On/Off Switch, Nonstick Coating, Automatic Temperature Control, Easy To Use For Pancakes, Blintz, Chapati |
|
| 3 | 16 Inch Commercial Crepe Maker, Dual-Head, Dual Zone Temp Setting, Nonstick Pancake Griddle Machine, 50-300°C(120-570℉), 3400W, S.S. Shell, for Catering, Restaurant, Snack Stand, CE Certified |
|
| 4 | Gourmia 12” Crepe Maker – Nonstick Electric Griddle for Pancakes, Omelets & More, Precise Temp Control with Indicator Lights, Includes Spatula & Batter Spreader, Quick Cleanup, Stainless Steel Trim |
|
| 5 | Moss & Stone Electric Crepe Maker – 8” Portable Crepe Pan Nonstick with Dipping Plate, Auto Shut-Off, On/Off Switch, Even Heating & One Automatic Temperature Control – Compact Crepe Maker |
|
| 6 | Electric Crepe Maker 12'' & Griddle - Non-Stick Pan With Spreader for Roti, Tortilla, Blintzes, Pancakes - Adjustable Temperature, 1000W |
|
| 7 | Moss & Stone 12” Electric Griddle Pan & Crepe Machine, Non-Stick Electric Crepe Maker with Adjustable Temperature, Includes Spreader & Spatula – Ideal for Pancakes, Blintzes & Tortillas |
|
| 8 | Nutrichef Electric Crepe Maker & Griddle Cooktop - Nonstick 12 Inch Aluminum Hot Plate with LED Indicator Lights & Adjustable Temperature Control - Wooden Spatula & Batter Spreader Included |
|
| 9 | Gourmia 8” Electric Crepe Maker – Nonstick Ceramic Surface, One-Touch Operation, Includes Batter Tray, Compact & Easy to Clean, Crepe, Pancake & Tortilla Maker |
|
| 10 | Baker's Friend Instant Crepe Maker with Handle, Electric Crepe Maker Machine, Crepera Electrica, 8 Inch Non-stick Cooking Surface, Aqua |
|
When choosing or using an electric griddle for roti and chapati, several features contribute significantly to performance. The ability to maintain a consistent, even heat across the entire cooking surface is paramount. Hot spots can lead to unevenly cooked or burnt patches, while cold spots prevent proper puffing. A non-stick coating is also highly desirable, allowing the dough to cook without sticking and requiring minimal oil, which contributes to lighter, healthier flatbreads. Look for durable coatings that can withstand regular use. Furthermore, precise temperature control is crucial, as different stages of cooking roti benefit from specific heat levels.
Electric Griddle vs. Dedicated Roti Maker
While a standard electric griddle can certainly handle roti and chapati, it’s worth noting the distinction between it and a dedicated electric roti maker (also known as a chapati press).
- General Electric Griddle: These versatile appliances offer a large, flat cooking surface ideal for multiple rotis at once. They are excellent for those who want a multi-purpose kitchen tool capable of cooking pancakes, eggs, and various other foods alongside flatbreads. The challenge with a general griddle might be achieving the signature “puff” without an open flame, which often requires a specific technique of pressing the roti.
- Dedicated Roti Maker/Chapati Press: These specialized units are designed with two heated plates that press and cook the roti simultaneously, often creating an enclosed environment that helps the roti puff beautifully without external intervention. They are less versatile for other dishes but excel at their primary function, offering consistent results for perfectly round, soft, and puffed flatbreads with minimal effort.
Both types of electric appliances offer a controlled cooking environment, eliminating the guesswork often associated with stovetop cooking. The choice depends on your specific needs: versatility or specialized, foolproof flatbread production.
Preparing the Perfect Dough for Electric Griddle Success
The foundation of any great roti or chapati is the dough. Even the best electric griddle can’t salvage poorly prepared dough. Focusing on the right ingredients and technique ensures your flatbreads are soft, pliable, and ready to puff.
Choosing the Right Flour
For authentic roti and chapati, whole wheat flour, known as atta, is essential. Atta is finely milled whole wheat flour, which gives the flatbreads their characteristic texture and nutritional value. While all-purpose flour can be used, it won’t yield the traditional taste or texture. When selecting atta, look for varieties that are fresh and finely ground.
The Art of Kneading
Kneading is where the magic happens. The goal is to develop the gluten in the flour, making the dough smooth and elastic.
- Combine Ingredients: Start with whole wheat flour, warm water, and a pinch of salt (optional, but recommended for flavor). Some recipes also include a teaspoon of oil to add softness.
- Initial Mix: Mix the flour and water gradually until a shaggy dough forms.
- Kneading Process: Transfer the dough to a clean surface and knead vigorously for 5-10 minutes. Push, fold, and stretch the dough until it becomes smooth, soft, and elastic. It should feel pliable but not sticky. If it’s too sticky, add a tiny bit of dry flour; if too stiff, add a few drops of water.
- Thumb Press Test: A well-kneaded dough should retain a gentle thumbprint when pressed.
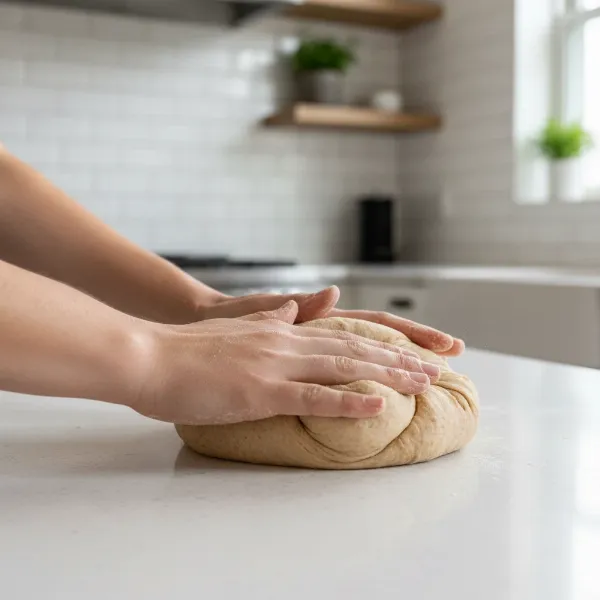 Hands kneading whole wheat flour dough for roti or chapati on a clean surface.
Resting the Dough
After kneading, it’s crucial to let the dough rest. Cover the dough with a damp cloth or plastic wrap and let it sit at room temperature for at least 30 minutes, or up to a few hours. This resting period allows the gluten to relax, making the dough much easier to roll out evenly and contributing to the final softness and ability to puff. Skipping this step can result in tough, hard-to-roll rotis.
Rolling Techniques
Once rested, divide the dough into small, equal-sized balls, typically the size of a golf ball.
- Dusting: Lightly dust each dough ball with dry flour to prevent sticking.
- Flattening: Gently flatten the ball with your palm.
- Rolling: Use a rolling pin to roll the dough into a thin, even circle, about 6-8 inches in diameter. The key is to apply even pressure and rotate the dough frequently to maintain a circular shape and consistent thickness. Unevenly rolled dough will cook inconsistently and may not puff properly. Dust with more dry flour as needed, but try not to use excessive amounts, as it can make the roti dry.
Step-by-Step Guide: Cooking Roti & Chapati on an Electric Griddle
With your perfect dough ready, it’s time to bring your flatbreads to life on the electric griddle. Follow these steps for best results:
Preheating Your Griddle
Proper preheating is the first and most critical step. Turn on your electric griddle and set it to medium-high heat, typically around 375-400°F (190-205°C). Allow it to heat thoroughly for 5-7 minutes. A griddle that isn’t hot enough will result in rotis that are hard and dry, while one that’s too hot can burn the outside before the inside cooks. You can test the heat by sprinkling a few drops of water; they should sizzle and evaporate quickly.
Initial Cook & First Flip
Once the griddle is adequately preheated:
- Place the Roti: Gently place a rolled-out roti onto the hot, dry griddle. Do not add oil at this stage unless specified by your griddle type or recipe.
- First Side Cook: Let it cook for approximately 15-30 seconds. You will begin to see small bubbles forming on the surface, and the dough might appear slightly translucent or change color from white to a lighter pinkish hue. This indicates the first side is starting to cook.
- First Flip: As soon as you see these bubbles, use a spatula to quickly and carefully flip the roti over to the other side. Avoid overcooking the first side, as this can prevent the roti from puffing later.
Achieving the Perfect Puff
This is often the most satisfying part! After the first flip:
- Second Side Cook: Allow the second side to cook for about 30 seconds to 1 minute. You should see more bubbles forming, and some brown spots might appear.
- Gentle Pressing for Puff: Now, with a clean kitchen cloth or the back of a spatula, gently and consistently press down on the edges of the roti. Move the cloth or spatula around the perimeter, pushing trapped steam towards the center. This gentle pressure helps the roti puff up like a balloon.
- Third Flip (if needed): If the roti doesn’t puff evenly or if you prefer more color, you can flip it one last time and continue gently pressing until it puffs. This process effectively cooks the roti from the inside out. For dedicated roti makers, simply closing the lid after the initial placement usually achieves the puff automatically due to dual heating.
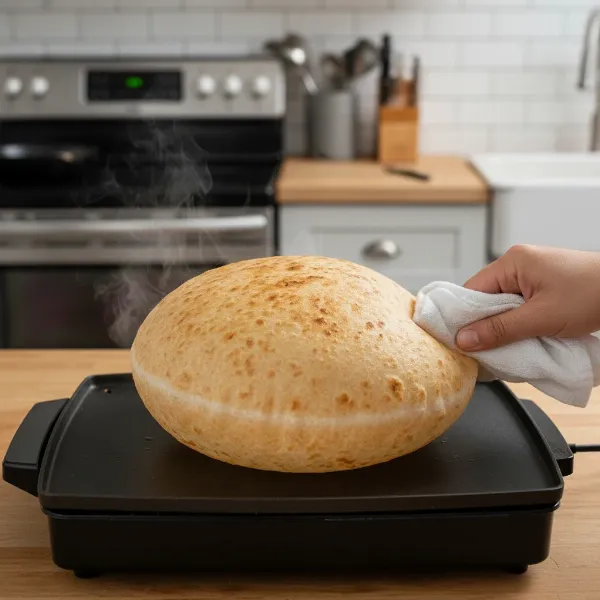 A round roti puffing up like a balloon on a hot electric griddle surface.
Signs of Doneness
A perfectly cooked roti or chapati will have:
- Light to medium brown spots on both sides.
- A soft, pliable texture when gently squeezed.
- A visibly puffed-up appearance (for those that puff).
- No raw or doughy areas.
Post-Cooking Care
As soon as a roti is cooked, transfer it to a plate and immediately brush it with a little ghee (clarified butter) or butter. This not only adds a delicious flavor but also helps keep the roti soft and moist. Stack the cooked rotis on top of each other and cover them with a clean kitchen towel. The residual heat and steam will keep them warm and prevent them from drying out, ensuring they remain wonderfully soft until serving.
Troubleshooting Common Roti & Chapati Challenges
Even with the right tools and techniques, you might encounter a few hurdles. Here’s how to address them:
Roti Not Puffing
This is a common concern. Several factors can prevent your roti from puffing:
- Dough Consistency: If the dough is too stiff or too wet, it won’t trap steam effectively. Ensure it’s soft and elastic.
- Griddle Temperature: An insufficiently hot or excessively hot griddle can prevent puffing. Maintain medium-high heat.
- Rolling Thickness: If the roti is rolled too thick, it may not puff; if too thin, it might tear, allowing steam to escape. Aim for even, medium thickness.
- Overcooking First Side: Cooking the first side for too long can seal the surface prematurely. Flip as soon as small bubbles appear.
- Lack of Pressure: When using a standard griddle, gentle, even pressure with a cloth or spatula is vital to encourage puffing.
Stiff or Dry Roti
If your rotis turn out hard or brittle:
- Overcooking: This is the most common culprit. Reduce cooking time and avoid excessive browning.
- Dry Dough: Ensure your dough has enough moisture and is properly kneaded and rested.
- Insufficient Ghee/Butter: Applying ghee or butter immediately after cooking helps retain moisture and softness.
- Not Stacking/Covering: Stack and cover rotis promptly to keep them warm and soft from trapped steam.
Unevenly Cooked Roti
Uneven cooking is usually due to:
- Inconsistent Griddle Heat: Your electric griddle might have hot or cold spots. If possible, adjust the heat or rotate the roti during cooking. Investing in a griddle known for even heat distribution can help.
- Uneven Rolling: Ensure your dough is rolled to a consistent thickness across the entire circle.
Sticking to the Griddle
While electric griddles typically have non-stick surfaces, sticking can still occur if:
- Griddle Isn’t Hot Enough: The dough might absorb oil and sit rather than searing.
- Surface is Damaged: Scratches or wear can compromise the non-stick coating.
- Excess Flour on Dough: Too much dry flour can turn pasty and stick. Dust off excess flour before placing it on the griddle.
Choosing the Best Electric Griddle for Your Flatbread Needs
Selecting the right electric griddle can significantly enhance your roti-making experience. Consider these factors when making your choice:
Key Features to Consider
- Temperature Control: Look for models with precise, adjustable temperature settings. A range that includes medium-high heat (375-400°F or 190-205°C) is ideal for flatbreads. Digital controls often offer more accuracy than simple dials.
- Non-Stick Surface: A high-quality, durable non-stick coating is a must for easy cooking and cleanup. Ceramic or titanium-infused coatings are often praised for their longevity and performance.
- Size and Capacity: Consider how many rotis you want to cook at once. Larger griddles (19×12.5 inches or more) are great for families, while smaller ones might suffice for single servings or limited counter space.
- Power (Wattage): Higher wattage (e.g., 1200W or more) generally means faster heat-up times and better heat recovery, crucial for cooking multiple flatbreads efficiently.
- Ease of Cleaning & Maintenance: Griddles with removable plates or components that are dishwasher-safe are a huge convenience. A good drip tray for any excess oil (though minimal for roti) is also beneficial.
- Durability: Materials like stainless steel for the body and heat-resistant handles contribute to the longevity and safety of the appliance. A sturdy build ensures even pressure if you’re using it to press dough.
Care and Maintenance for Your Electric Griddle
Proper care ensures your electric griddle remains a reliable tool for years to come.
- Cleaning After Use: Always wait for the griddle to cool down completely before cleaning. Most non-stick surfaces can be wiped clean with a damp cloth or sponge. Avoid abrasive scrubbers or harsh detergents that can damage the coating. For models with removable plates, follow the manufacturer’s instructions for washing.
- Storage: Store your griddle in a dry, well-ventilated area. If it has removable handles or can be folded, this will save storage space.
- Regular Checks: Periodically inspect the power cord, plug, and the non-stick surface for any signs of wear or damage. Replace or repair components if necessary to ensure safe operation.
Conclusion
Making delicious, soft, and perfectly puffed roti and chapati on an electric griddle is entirely achievable with the right approach. From mastering the dough preparation to understanding your griddle’s optimal temperature and applying gentle pressure for that satisfying puff, each step contributes to the authentic taste and texture you crave. An electric griddle or a dedicated roti maker offers unparalleled convenience and consistency, bringing the joy of homemade flatbreads to your kitchen with ease. Don’t be discouraged by initial attempts; like any culinary skill, practice makes perfect. Embrace the process, experiment with the techniques, and soon you’ll be effortlessly turning out stacks of warm, inviting roti and chapati.
What culinary creation will you pair with your freshly made flatbreads tonight?
Frequently Asked Questions
Can I use a regular electric griddle for roti?
Yes, you absolutely can use a regular electric griddle to make delicious roti and chapati. The key is to ensure it has consistent heat distribution and good temperature control. You’ll use a spatula or cloth to gently press the roti to encourage puffing.
What temperature should an electric griddle be for chapati?
For chapati, preheat your electric griddle to a medium-high setting, typically around 375-400°F (190-205°C). This temperature range allows the dough to cook evenly and quickly without burning, which is crucial for achieving that desirable soft texture and puff.
How do you make roti puff without an open flame?
To make roti puff on an electric griddle without an open flame, the most effective method involves gentle pressing. After flipping the roti and allowing the second side to cook slightly, use a clean kitchen cloth or the back of a spatula to softly press the edges of the roti, moving around to encourage the steam to inflate it.
Why are my rotis stiff or dry on the electric griddle?
Stiff or dry rotis are usually a result of overcooking, dough that is too dry or dense, or not applying ghee/butter immediately after cooking. Ensure your dough is soft and elastic, cook each side briefly, and always brush with ghee and stack them under a towel to lock in moisture.
Is an electric roti maker worth it?
An electric roti maker can be highly worth it if you frequently make roti or chapati and desire consistent, perfectly puffed results with minimal effort. While less versatile than a general electric griddle, its specialized design often makes the flatbread-making process quicker and more foolproof.