Imagine effortlessly flipping perfect, golden crepes every single time. No sticking, no tearing, just culinary perfection gliding off the surface. This isn’t just a dream; it’s the reality when your crepe maker plate is properly seasoned. As an experienced technician who’s seen countless machines, from simple home models to robust professional units, I can tell you that understanding the art of seasoning is the single most important step to unlocking your crepe maker’s true potential. It’s about protecting your investment, enhancing performance, and transforming your crepe-making experience from frustrating to fantastic.
Why Seasoning Your Crepe Maker Plate is Essential for Perfection
Seasoning isn’t just a recommendation; it’s a fundamental process that safeguards your crepe maker and elevates your cooking. When done correctly, it creates a naturally non-stick surface, ensuring your crepes release effortlessly and beautifully.
Understanding the Non-Stick Science
|
Our Picks for the Best Crepe maker in 2026
As an Amazon Associate I earn from qualifying purchases.
|
||
| Num | Product | Action |
|---|---|---|
| 1 | Moss & Stone Electric Crepe Maker – 8” Portable Crepe Pan Nonstick with Dipping Plate, Auto Shut-Off, On/Off Switch, Even Heating & One Automatic Temperature Control – Compact Crepe Maker |

|
| 2 | Baker's Friend Instant Crepe Maker with Handle, Electric Crepe Maker Machine, Crepera Electrica, 8 Inch Non-stick Cooking Surface, Aqua |
|
| 3 | Nutrichef Electric Crepe Maker & Griddle Cooktop - Nonstick 12 Inch Aluminum Hot Plate with LED Indicator Lights & Adjustable Temperature Control - Wooden Spatula & Batter Spreader Included |
|
| 4 | 16 Inch Commercial Crepe Maker, Dual-Head, Dual Zone Temp Setting, Nonstick Pancake Griddle Machine, 50-300°C(120-570℉), 3400W, S.S. Shell, for Catering, Restaurant, Snack Stand, CE Certified |
|
| 5 | Gourmia 8” Electric Crepe Maker – Nonstick Ceramic Surface, One-Touch Operation, Includes Batter Tray, Compact & Easy to Clean, Crepe, Pancake & Tortilla Maker |
|
| 6 | Moss & Stone Electric Crepe Maker 8 Inch, Portable Crepe Maker & Hot Plate Cooktop On/Off Switch, Nonstick Coating, Automatic Temperature Control, Easy To Use For Pancakes, Blintz, Chapati |
|
| 7 | Nutrichef Electric Crepe Maker - 8-inch Nonstick Cooktop with On/Off Switch - Cooks Roti, Tortillas & Pancakes - Automatic Temperature Control & Cool Touch Handle - Includes Food Bowl, Whisk & Spatula |
|
| 8 | Moss & Stone 12” Electric Griddle Pan & Crepe Machine, Non-Stick Electric Crepe Maker with Adjustable Temperature, Includes Spreader & Spatula – Ideal for Pancakes, Blintzes & Tortillas |
|
| 9 | Electric Crepe Maker 12'' & Griddle - Non-Stick Pan With Spreader for Roti, Tortilla, Blintzes, Pancakes - Adjustable Temperature, 1000W |
|
| 10 | Gourmia 12” Crepe Maker – Nonstick Electric Griddle for Pancakes, Omelets & More, Precise Temp Control with Indicator Lights, Includes Spatula & Batter Spreader, Quick Cleanup, Stainless Steel Trim |
|
The griddle of many crepe makers, especially professional models, is crafted from machined cast iron. While robust and excellent at retaining heat, untreated cast iron possesses microscopic cavities and is prone to rust. Seasoning addresses these two primary challenges. It involves repeatedly applying thin layers of vegetable oil and heating them to a high temperature, causing the oil to polymerize and bond with the metal. This process fills those tiny imperfections, creating a smooth, slick, and non-porous surface that prevents batter from adhering. The result is a natural, durable non-stick coating that gets better with every use, eliminating the need for excessive greasing.
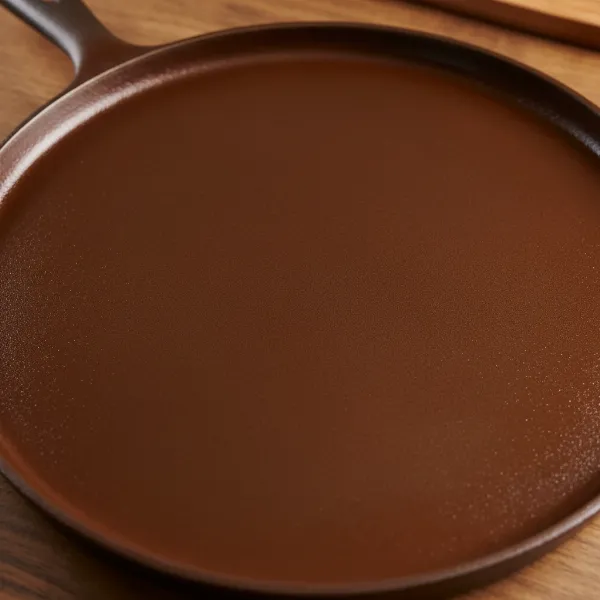 Close-up of a perfectly seasoned cast iron crepe maker surface, smooth and dark brown.
Protecting Your Investment
Beyond its non-stick benefits, seasoning provides a vital protective barrier for your crepe maker’s plate. The polymerized oil acts as a shield, preventing moisture and air from coming into direct contact with the cast iron. This significantly reduces the risk of rust formation, which can otherwise compromise the integrity and longevity of your appliance. A well-seasoned plate not only performs better but also lasts longer, making it a wise investment for any crepe enthusiast or professional.
Preparing Your Crepe Maker for Its First Seasoning
Before you begin the exciting journey of seasoning, a few preparatory steps are crucial to ensure the process is successful and the non-stick coating develops flawlessly.
The Initial Clean: A Crucial First Step
Whether your crepe maker is brand new or you’re re-seasoning an older plate, a thorough initial clean is paramount. For new machines, wipe the plate down with a damp cloth to remove any manufacturing residues, dust, or protective coatings. For used machines, ensure all old food debris and rust (if any) are carefully removed. You can use a mild soap and water, but make sure to rinse thoroughly and dry the plate completely. Any moisture left on the plate can hinder the seasoning process and lead to uneven results or even rust.
Gathering Your Tools: What You’ll Need
Having the right tools on hand will make the seasoning process smooth and efficient. You will need:
- Vegetable Oil: Choose a high smoke point oil like sunflower, grapeseed, or canola oil. Avoid oils with low smoke points or those with strong flavors.
- Greasing Pad or Cotton Cloth: A dedicated crepe greasing pad is ideal for even application. Alternatively, a tightly rolled-up, lint-free cotton cloth or paper towels can work. Avoid synthetic materials, as they can melt when exposed to high heat.
- Heat-Resistant Gloves: To protect your hands from the hot surface.
- Tongs: For safely handling the cloth or pad.
Step-by-Step Guide to Perfectly Season Your Crepe Maker Plate
Seasoning a cast-iron crepe maker plate is a methodical process that typically takes 1 to 1.5 hours. Patience and consistency are your best allies here.
Step 1: Preheat Your Crepe Maker to the Ideal Temperature
Plug in your crepe maker and turn it on. For most models, set the temperature to approximately 250-270°C (around 500°F). Allow the machine to fully preheat until it reaches the set temperature. The indicator light will usually turn off once it’s ready. Maintaining a consistent temperature throughout the seasoning is key for proper polymerization.
Step 2: Apply a Thin Layer of Oil Evenly
Once the plate is hot, carefully pour about 1 teaspoon to 1 tablespoon of your chosen vegetable oil onto the center of the plate. Using your greasing pad or a rolled cotton cloth held with tongs, spread the oil evenly across the entire cooking surface. The key is to apply a very thin layer. Any excess oil can lead to a sticky, uneven finish rather than a smooth, non-stick one. You want just enough to lightly coat the surface without pooling.
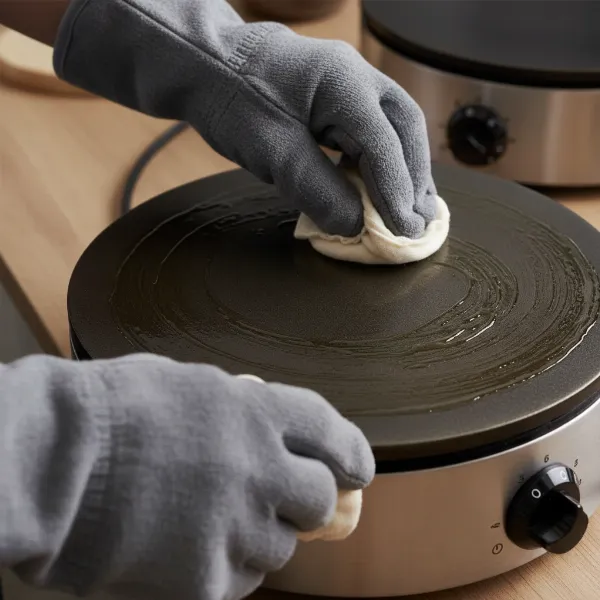 Hand applying a thin layer of vegetable oil on a hot crepe maker plate with a greasing pad.
Step 3: Heat and Cure Until No More Smoke
Allow the oil to cook on the hot plate. You will notice it begin to smoke. This is the polymerization process in action, creating that durable non-stick layer. Continue heating for 5 to 10 minutes, or until the smoke completely subsides. It’s crucial that the plate stops smoking before proceeding, as this indicates the oil has fully cured and bonded with the cast iron.
Step 4: Repeat for Optimal Results
After the first layer has cured and stopped smoking, repeat the entire process (applying a thin layer of oil, spreading evenly, and heating until smoke subsides). For the initial seasoning, you’ll need to apply multiple coats. Many experts recommend 8 to 9 layers in total. For the first few layers (e.g., layers 1-4), you might use a full teaspoon of oil. For subsequent layers (e.g., layers 5-9), reduce the amount of oil to about half a teaspoon. Each layer should be spread thinly and allowed to cure completely. The final seasoned plate should have a light chestnut-brown, varnish-like appearance.
The Best Oils for Achieving a Superior Non-Stick Surface
Choosing the right oil is crucial for successful seasoning. Not all oils are created equal when it comes to forming that durable, non-stick polymer layer.
High Smoke Point Oils: Your Go-To Choices
The ideal oils for seasoning are those with a high smoke point and a neutral flavor. These oils can withstand the high temperatures required for polymerization without breaking down or imparting unwanted tastes to your crepes. Excellent options include:
- Sunflower Oil: A popular choice due to its high smoke point and neutral flavor.
- Grapeseed Oil: Very high smoke point, light, and neutral.
- Canola Oil: Widely available, affordable, and has a good smoke point.
- Flaxseed Oil: While having a lower smoke point, some enthusiasts prefer it for creating a very hard, durable seasoning, though it requires more careful temperature control.
Oils to Avoid and Why
While tempting, certain oils should be avoided for seasoning your crepe maker:
- Olive Oil: Has a relatively low smoke point and can leave a sticky residue or burn, creating an unpleasant flavor.
- Butter or Margarine: These contain milk solids and water, which will burn and gunk up your plate rather than forming a clean, polymerized layer.
- Flavored Oils: Any oil with a distinct flavor (like extra virgin olive oil or sesame oil) will transfer that flavor to your crepes.
Common Mistakes to Steer Clear Of During Seasoning
Even with the best intentions, it’s easy to make mistakes that can hinder your seasoning efforts. Knowing these pitfalls can save you time and frustration.
Over-Oiling: The Enemy of Evenness
One of the most common errors is applying too much oil. A thick layer of oil won’t polymerize properly; instead, it will turn sticky, gummy, or even flaky. Remember, the goal is a microscopically thin layer that bakes onto the surface. If you see any pooling or excess oil, wipe it off thoroughly before continuing to heat the plate. A properly seasoned surface is dry to the touch, not oily.
Not Enough Heat: The Incomplete Cure
Insufficient heat is another pitfall. If your crepe maker isn’t hot enough, the oil won’t reach its smoke point and won’t polymerize effectively. This results in a weak, poorly bonded layer that won’t provide the desired non-stick properties and may quickly wear off. Always ensure your crepe maker is fully preheated to the recommended temperature and maintains that heat throughout each seasoning cycle.
Impatience: Rushing the Process
Seasoning is a process that demands patience. Each layer needs adequate time to polymerize and cure completely, which means waiting for the smoke to subside before applying the next coat. Rushing through the steps or cutting short the heating time will result in an inferior seasoning that won’t perform as expected. Dedicate sufficient time (at least 1 to 1.5 hours) to do it right, and your reward will be perfectly non-stick crepes.
Maintaining Your Crepe Maker’s Seasoning: Tips for Longevity
Once your crepe maker is beautifully seasoned, proper maintenance is key to preserving its non-stick qualities and extending its lifespan.
Gentle Cleaning for Sustained Non-Stick
After each use, clean your crepe maker gently while it’s still warm. Avoid harsh soaps, abrasive scrubbers, or metal utensils, as these can strip away the delicate seasoning layer. Instead, use a soft cloth or sponge and warm water to wipe away any food residue. For stubborn spots, a plastic scraper can be used carefully. Dry the plate thoroughly after cleaning, and if desired, apply a minuscule amount of oil (less than a quarter teaspoon) and wipe it dry before storing to offer an extra layer of protection.
When and How to Re-Season Your Plate
Even with the best care, the seasoning on your crepe maker plate will gradually wear down over time, especially with frequent use. Signs that your plate needs re-seasoning include crepes starting to stick, a dulling of the plate’s color, or the appearance of small, flaky patches where the seasoning has come off. When this happens, a full re-seasoning may not be necessary. You can often restore the non-stick surface by performing 2-3 coats of seasoning as outlined above, focusing on the affected areas. For severe degradation or rust, a deeper clean or even “stripping” with an abrasive stone may be needed before a full re-seasoning.
Troubleshooting Common Non-Stick Issues
If you’re finding your crepes still stick after seasoning, consider these troubleshooting tips. First, ensure your batter recipe is balanced; too much sugar can lead to sticking. Second, check your cooking temperature; too low and the crepe won’t crisp and release; too high and it might burn. Third, verify that you’re using a minimal amount of fat (a quick wipe with an oiled pad) between crepes for the first few uses, as the seasoning builds up over time. If issues persist, a thorough re-evaluation of your seasoning process might be in order, focusing on thin oil layers and complete curing.
Properly seasoning your crepe maker plate is more than just a task; it’s an investment in countless delicious crepes and a testament to your culinary care. By understanding the science, following the steps diligently, and maintaining your machine, you ensure that every crepe slides off with ease, perfectly cooked and ready to be enjoyed. Your crepe maker isn’t just an appliance; it’s a gateway to culinary creativity and perfectly crafted treats.
Frequently Asked Questions
What kind of oil is best for seasoning a crepe maker?
High smoke point, neutral-flavored vegetable oils are best, such as sunflower, grapeseed, or canola oil. These oils polymerize effectively at high temperatures, creating a durable, non-stick surface without imparting unwanted flavors to your crepes.
How often should I season my crepe maker plate?
Initial seasoning is crucial before first use. After that, the frequency depends on usage. With regular gentle cleaning, you might only need to re-season partially every few months, or fully if crepes start sticking or seasoning visibly degrades.
Can I use olive oil to season my crepe maker?
It is generally not recommended to use olive oil for seasoning. Olive oil has a lower smoke point and can break down at the high temperatures required for proper seasoning, potentially leaving a sticky residue or a burnt flavor on your plate.
How do I know if my crepe maker plate is properly seasoned?
A properly seasoned crepe maker plate will have a uniform, light chestnut-brown, varnish-like appearance. It should feel smooth and dry to the touch, and crepes should release easily from the surface without sticking.
What temperature should I use to season my crepe maker?
Most cast-iron Crepe Makers should be seasoned at a temperature between 250-270°C (around 500°F). Maintaining this high, consistent heat is essential for the oil to polymerize effectively and create a durable non-stick layer.